Linking Google Analytics
Analytics can be used to enrich the records you extract from a website. By boosting search results based on their popularity (or another metric tracked by Google Analytics), you can improve the relevance of your website’s search.
With a little bit of configuration, your crawler can fetch Google Analytics metrics automatically and regularly.
Here’s a brief overview of the required steps:
- Generate a service account on Google Cloud Platform.
- Have the administrator of your Google Analytics account provides read access to the email address of that service account.
- Edit your crawler’s configuration, so that it contains:
- the credentials of the service account
- the identifier of the Google Analytics view you want to fetch metrics from
- Verify that your crawler is able to connect to your Google Analytics view.
- Edit your crawler’s
recordExtractorso that it integrates the metrics retrieved from Google Analytics into the output records (make sure this works as expected).
Create a Service Account
First, create a service account on Google Cloud Platform.
- Create (or select an existing) project from console.developers.google.com.
- Activate the Analytics Reporting API in that project.
- In the Credentials section, create a new Service account. You can skip the optional steps.
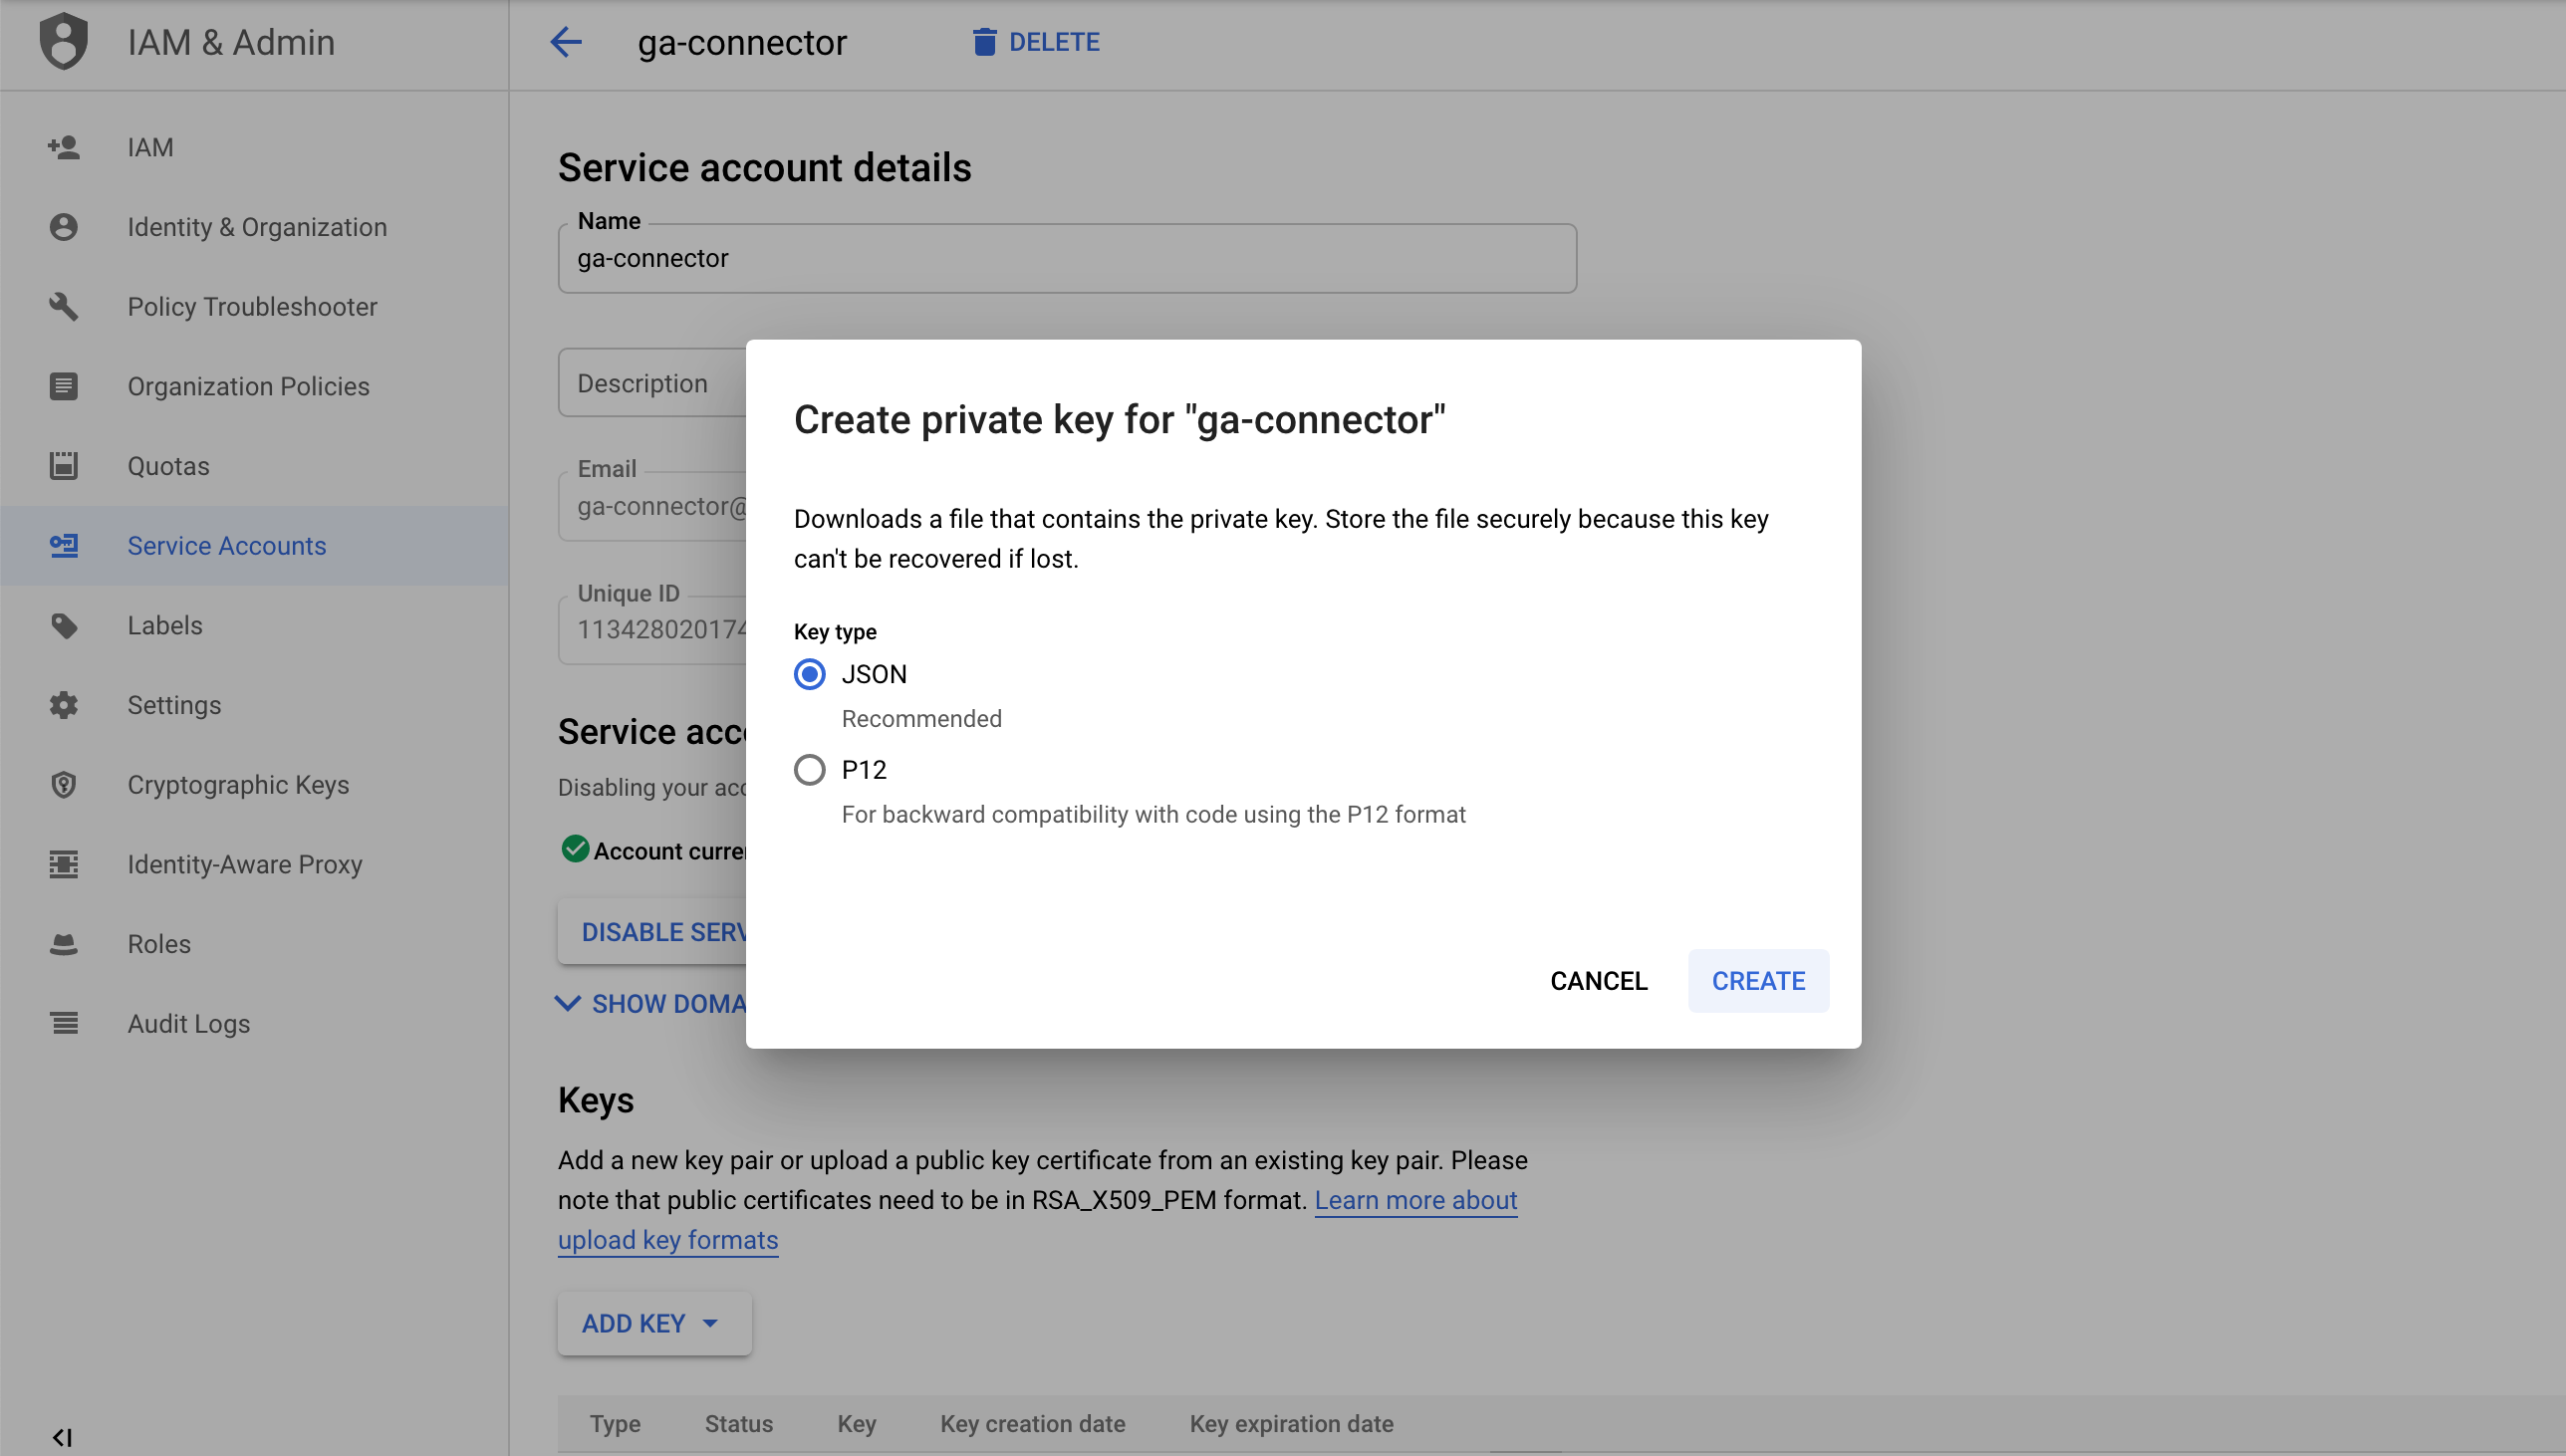
- Open the Service account and click on Add key -> Create new key. Select JSON, and download the resulting JSON file (you will need this file in step 3).

We recommend that you include the following information in the name of your service account:
- the name of the crawled website
- the word “google-analytics” or “GA”
- the word “crawler”
Grant access to Google Analytics data
In this step, we see how an administrator of your Google Analytics account can provide read access to the service account created in the previous step.
Steps to be followed by an administrator:
- Log in to Google Analytics.
- Select Account, Property, and then the View that contains the analytics for the website you are crawling.
- Go to the Admin tab.
- In the View panel (on the right side of the screen), click on View User Management.
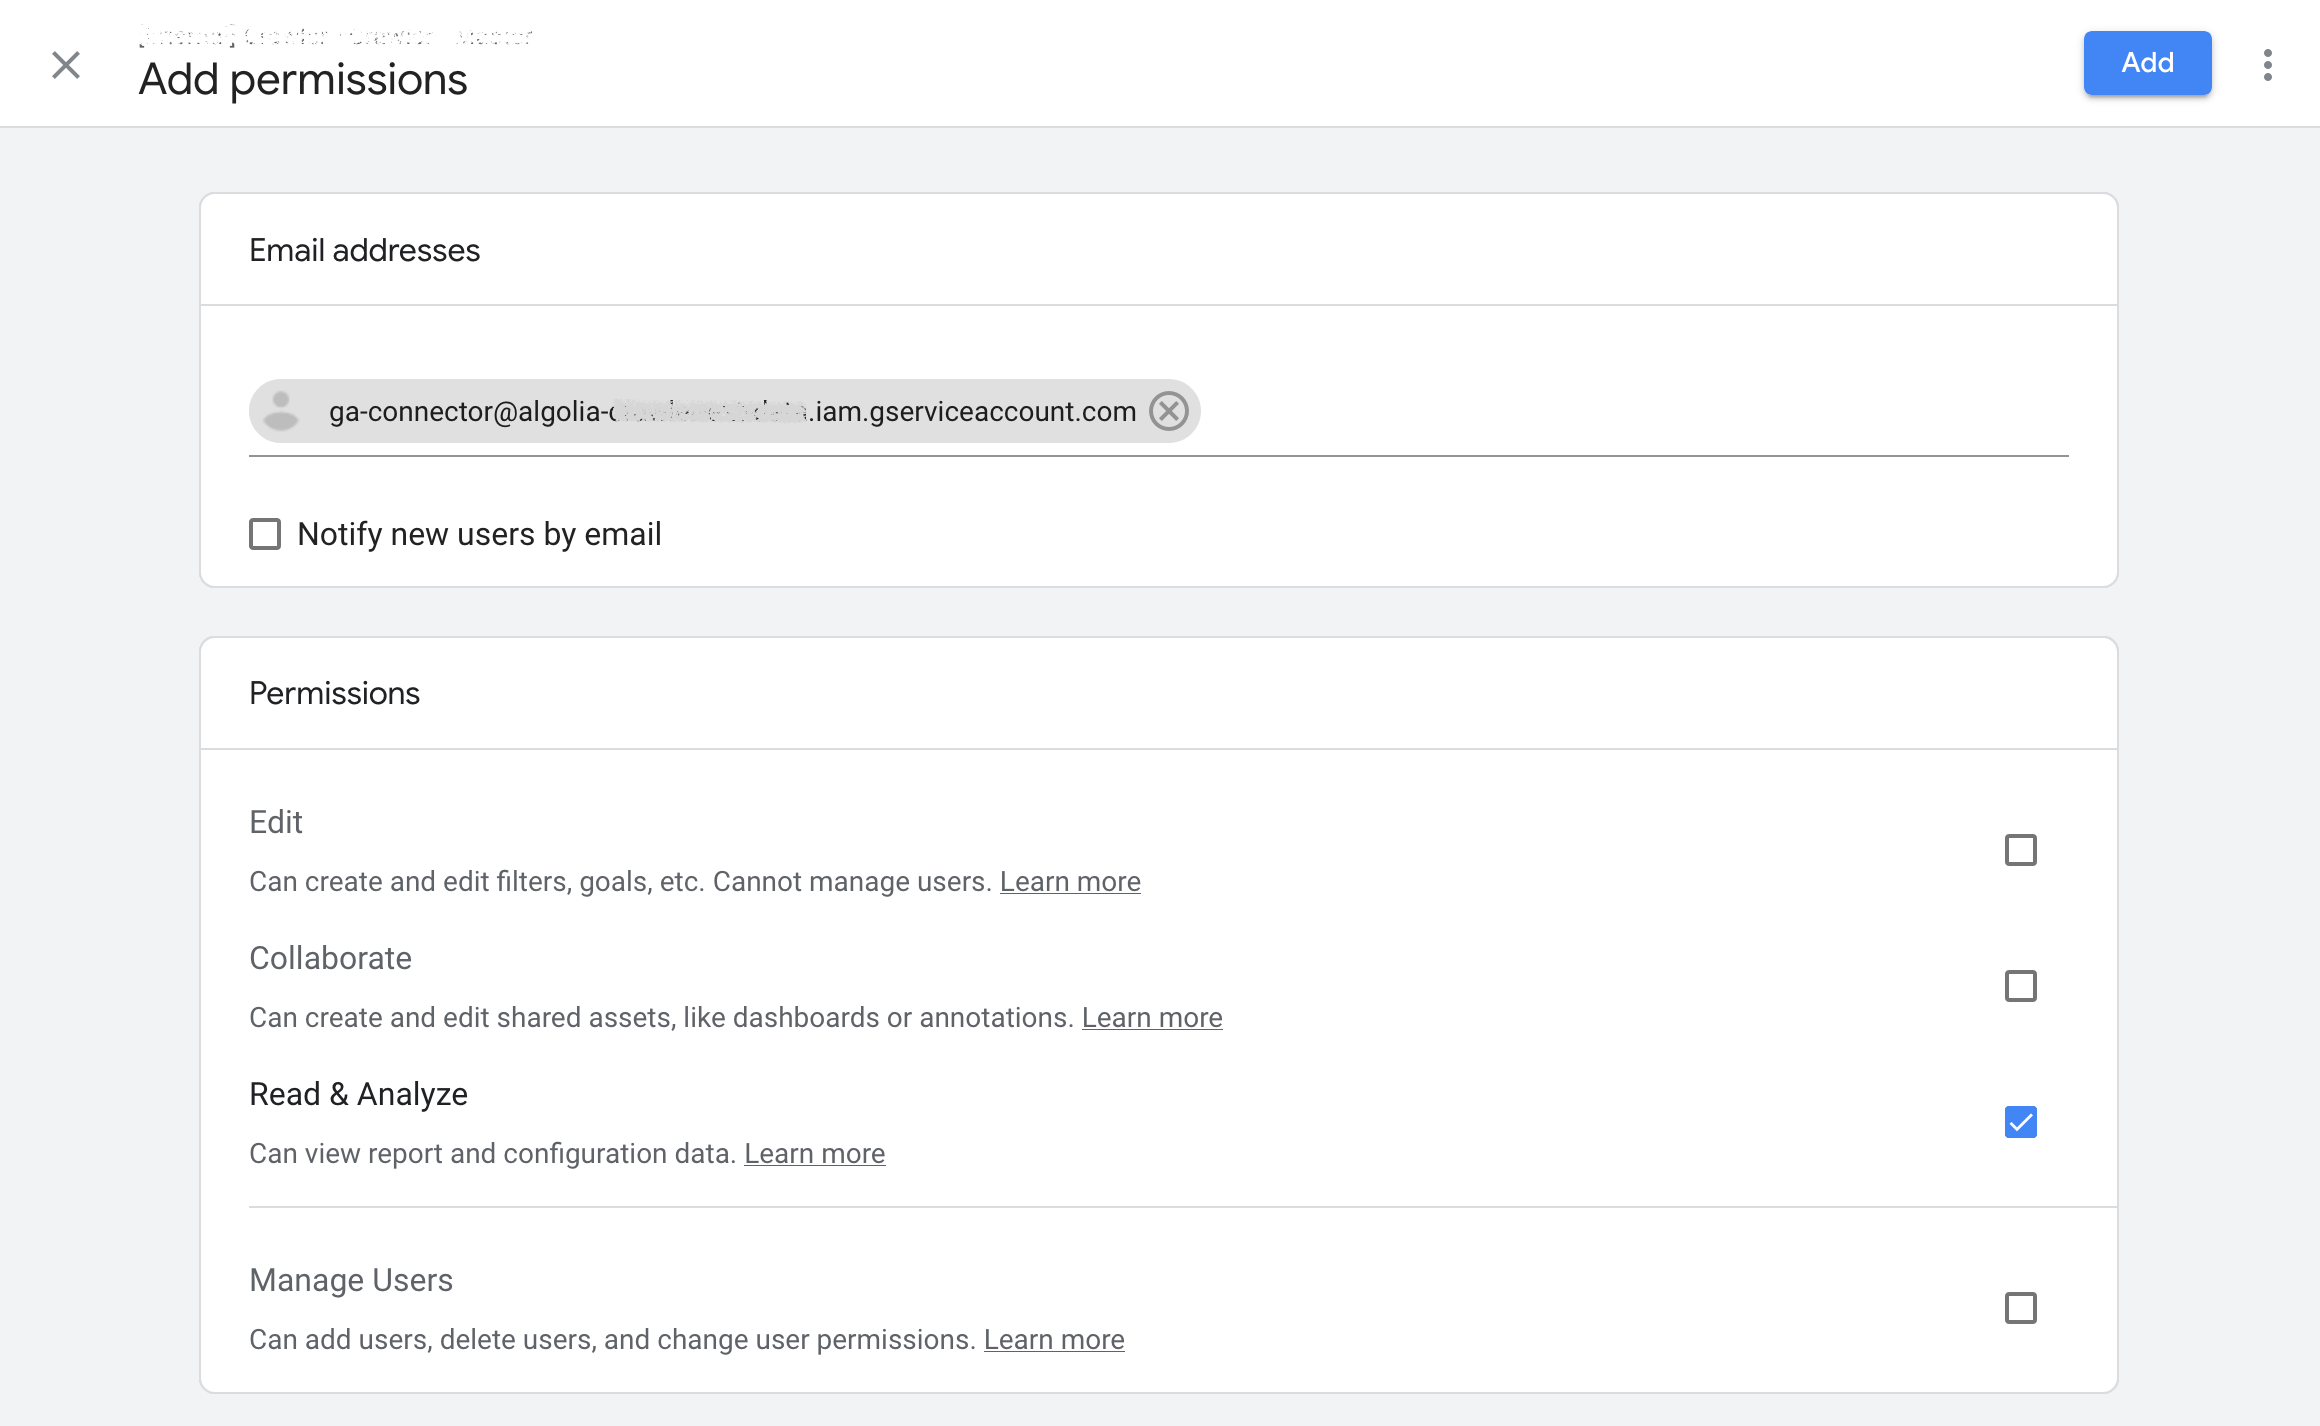
- Click the + button, then click “Add users”.
- Paste the email address of the service account that was generated in the previous step.
- In the Permissions panel, make sure that only the “Read & Analyze” permission is enabled.
- Click the “Add” button to confirm.

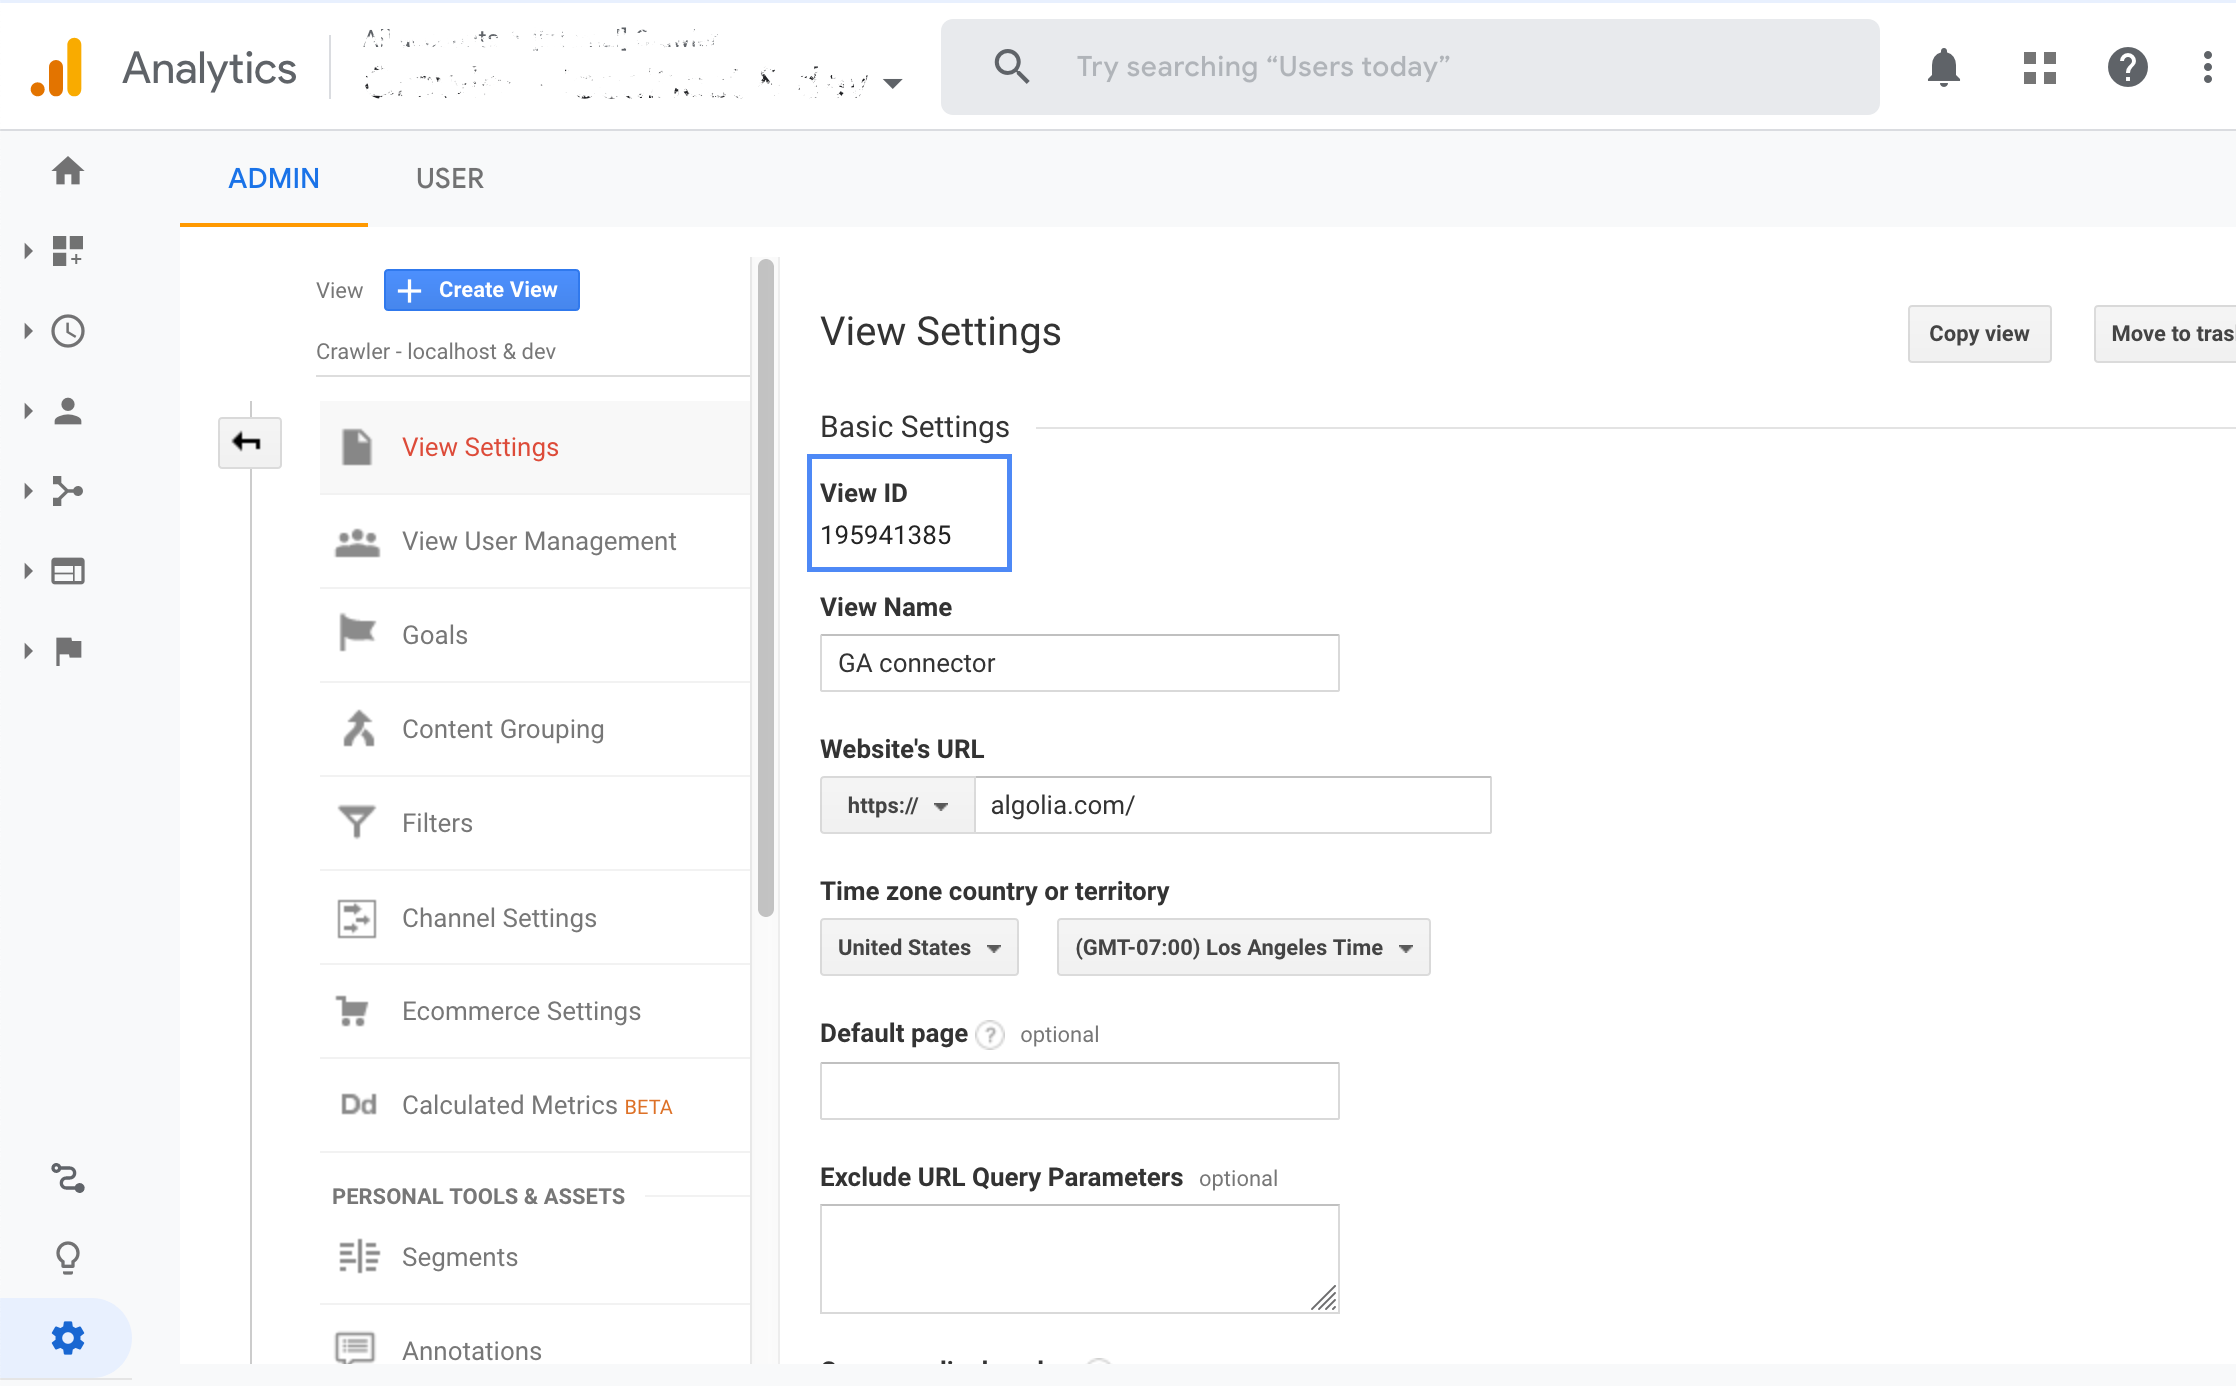
- Return to the Admin tab of your Google Analytics View and click on View Settings.
- Copy the “View ID” number and send it to the owner of your crawler account.

Update your crawler’s configuration
In this step, edit the configuration of your crawler to integrate the credentials of your service account, and the “View ID” you received in the previous step.
- Go to your Crawler dashboard, select your crawler, and click on the Editor tab.
- Specify the following properties in your crawler’s
externalDataSourcesproperty:
client_email: the email address of the service account you created in step 1.private_key: the private key that is included in the JSON file you downloaded in step 1.viewIds: the “View ID” provided by the administrator of the Google Analytics account in step 2
- Save your changes.
After saving your crawler’s configuration, your Google Analytics metrics will be fetched whenever you crawl your website. If an error occurs while fetching your analytics, it should be reported in less than one minute after the crawling process starts.
Test that your Crawler can connect to the Google Analytics view
In this step, you will check that the Crawler is able to connect to your Google Analytics view.
Before editing your crawler’s recordExtractor to leverage the metrics from the linked Google Analytics view, make sure:
- the credentials you specified in the previous step are correct,
- and that they give your crawler access to the view’s metrics.
These checks can be performed by crawling, which makes your crawler fetch your linked metrics from Google Analytics. To perform a crawl:
- Open the Overview tab for your crawler.
- Click on the Restart crawling button.
If you see an “Unable to fetch External Data” error message within 30 seconds, your crawler was not able to connect to your Google Analytics view with the credentials you provided. In this case, cancel the crawl operation and make sure you’ve entered everything correctly.
If an error message hasn’t popped up in the first 30 seconds, the connection to Google Analytics was successful. Feel free to pause or cancel the crawling.
Integrate analytics into records
In this step, you’ll edit your recordExtractor so that it integrates metrics from Google Analytics into the records it produces.
- Go to your Crawler Admin, select your crawler, and go to the Editor tab.
- Add the
externalDataSourcesparameter to your crawler. You can insert it right above the actions parameter.Copy1 2 3 4 5 6 7 8 9 10 11 12 13 14 15 16
externalDataSources: [ { dataSourceId: 'myAnalytics', type: 'googleanalytics', metrics: ['ga:uniquePageViews'], startDate: '90daysAgo', endDate: 'today', credentials: { type: 'service_account', client_email: 'dummy@my-project.iam.gserviceaccount.com', private_key: 'YOUR_PRIVATE_KEY', viewIds: [YOUR_VIEW_ID], }, }, ],
- Read metric values from the external data source you just defined, and store them as attributes for your resulting record(s). If you want an example of how this looks, go to our sample configurations Github repository and checkout the
recordExtractorof our sample Google Analytics crawler configuration. - In the Test URL field of the configuration editor (which you can find in the Settings tab of the Admin), type the URL of one of your pages that has analytics attached to it.
- Click on Run test.
- When the test is done running, click the External data tab. You should see the analytics data extracted from Google Analytics for that page.
If this doesn’t work as expected, please try adding a trailing / to your URL, or test with another URL.
