Voice Search
On this page
This guide explains how to build step by step a voice search experience using the libraries provided by Algolia. You’ll build an iOS application with a classic search bar and a button that triggers the voice input. To create this app, you’ll use the InstantSearch and VoiceOverlay libraries.
Prepare your project
To use InstantSearch iOS, you need an Algolia account. You can create a new account, or use the following credentials:
- Application ID:
latency - Search API Key:
1f6fd3a6fb973cb08419fe7d288fa4db - Index name:
bestbuy
These credentials give access to a preloaded dataset of products appropriate for this guide.
Create a new Xcode project
Start by creating a new Xcode project.
Open Xcode, and select File -> New -> Project in the menu bar.
Select iOS -> App template and click Next.
Give your application a name and click Next.
Build and run your application (CMD + R). You should see the device simulator with a blank screen.
Add project dependencies
This tutorial uses Swift Package Manager to integrate the Algolia libraries.
If you prefer to use another dependency manager (Cocoapods, Carthage) please checkout the corresponding installation guides for InstantSearch and VoiceOverlay.
In the menu bar select File -> Swift Packages -> Add Package Dependency.
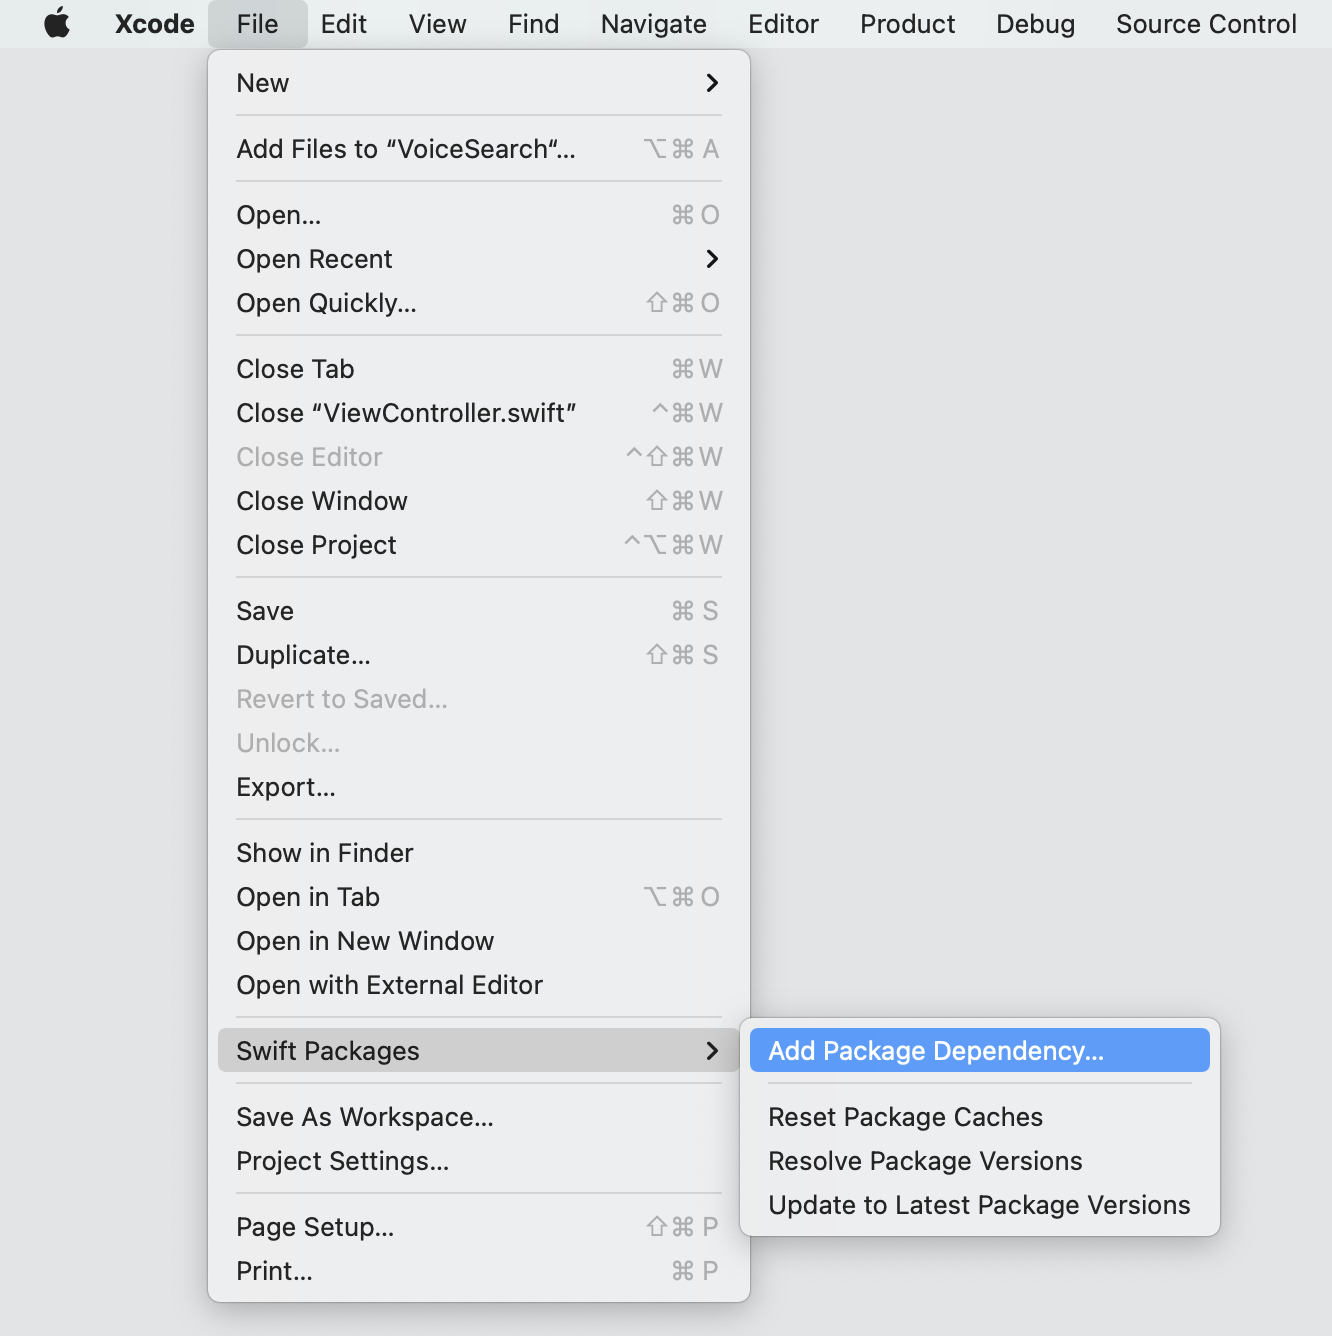
Paste the GitHub link for the InstantSearch library: https://github.com/algolia/instantsearch-ios

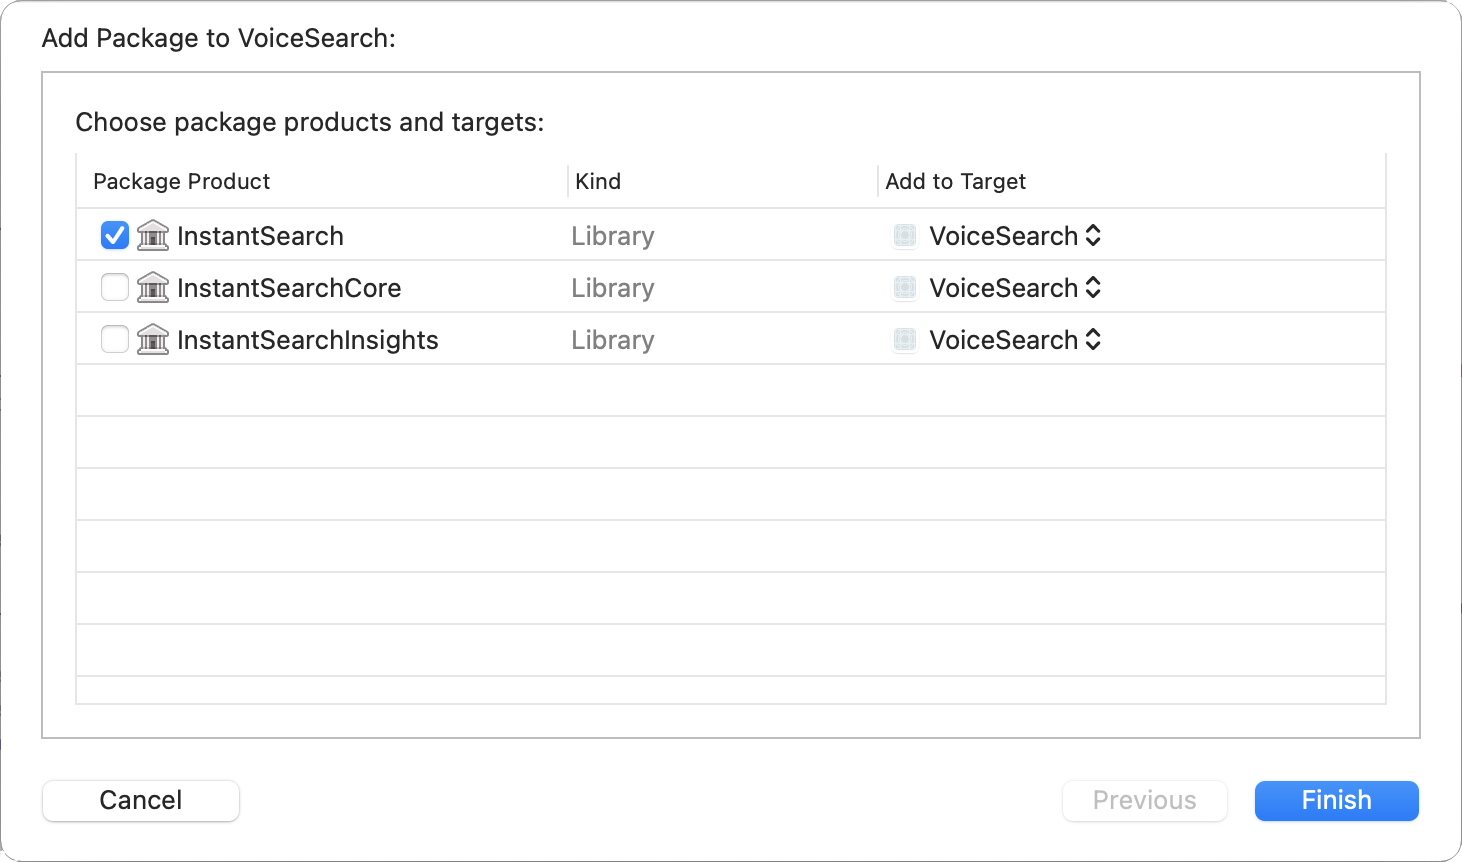
Pick the latest library version on the next screen, and select the InstantSearch product from the following list:
Do the same for the VoiceOverlay package with the following repository link: https://github.com/algolia/voice-overlay-ios
Your dependencies are installed and you’re all set to work on your application.
Create a basic search experience
Start by creating a classic search interface with search bar and results list. In your Xcode project, open the ViewController.swift file and import the InstantSearch library.
1
import InstantSearch
Then, add the hits model and UI components for the BestBuy index items before the declaration of the ViewController class. These components are borrowed from the Getting Started Guide where you can read more about them.
1
2
3
4
5
6
7
8
9
10
11
12
13
14
15
16
17
18
19
20
21
22
struct BestBuyItem: Codable {
  let name: String
}

struct BestBuyTableViewCellConfigurator: TableViewCellConfigurable {

  let model: BestBuyItem

  init(model: BestBuyItem, indexPath: IndexPath) {
    self.model = model
  }

  func configure(_ cell: UITableViewCell) {
    cell.textLabel?.text = model.name
  }

}

typealias BestBuyHitsViewController = HitsTableViewController<BestBuyTableViewCellConfigurator>

class ViewController: UIViewController {
}
Then, fill your ViewController class with a minimal set of InstantSearch components for a basic search experience.
SearchBar- UIKit component for textual query input.TextFieldController- controller that binds theSearchBarwith other InstantSearch components.BestBuyHitsViewController- controller that presents the list of search results.SingleIndexSearchConnector- connector that encapsulates the search business logic and connects all components together.
Your ViewController class should look as follows:
1
2
3
4
5
6
7
8
9
10
11
12
13
14
15
16
17
class ViewController: UIViewController {

  let searchBar: UISearchBar = .init()
  lazy var textFieldController: TextFieldController = .init(searchBar: searchBar)
  lazy var searchConnector: SingleIndexSearchConnector<BestBuyItem> = .init(appID: "latency",
                                                                            apiKey: "1f6fd3a6fb973cb08419fe7d288fa4db",
                                                                            indexName: "bestbuy",
                                                                            queryInputController: textFieldController,
                                                                            hitsController: hitsTableViewController)
  let hitsTableViewController: BestBuyHitsViewController = .init()

  override func viewDidLoad() {
    super.viewDidLoad()
    searchConnector.connect()
    searchConnector.hitsConnector.searcher.search()
  }
}
With the search logic ready, it’s time to work on the presentation. Add a setupUI function and call it from the viewDidLoad method:
1
2
3
4
5
6
7
8
9
10
11
12
13
14
15
16
17
18
19
20
21
22
23
24
25
26
27
28
29
30
31
32
33
34
35
36
37
38
39
40
41
class ViewController: UIViewController {

  let searchBar: UISearchBar = .init()
  lazy var textFieldController: TextFieldController = .init(searchBar: searchBar)
  lazy var searchConnector: SingleIndexSearchConnector<BestBuyItem> = .init(appID: "latency",
                                                                            apiKey: "1f6fd3a6fb973cb08419fe7d288fa4db",
                                                                            indexName: "bestbuy",
                                                                            queryInputController: textFieldController,
                                                                            hitsController: hitsTableViewController)
  let hitsTableViewController: BestBuyHitsViewController = .init()

  override func viewDidLoad() {
    super.viewDidLoad()
    searchConnector.connect()
    searchConnector.hitsConnector.searcher.search()
  }

  func setupUI() {
    // Setup search bar
    searchBar.translatesAutoresizingMaskIntoConstraints = false
    searchBar.searchBarStyle = .minimal

    // Setup layout
    let headerStackView = UIStackView()
    headerStackView.translatesAutoresizingMaskIntoConstraints = false
    headerStackView.addArrangedSubview(searchBar)

    let stackView = UIStackView()
    stackView.translatesAutoresizingMaskIntoConstraints = false
    stackView.axis = .vertical
    view.addSubview(stackView)
    NSLayoutConstraint.activate([
      stackView.topAnchor.constraint(equalTo: view.safeAreaLayoutGuide.topAnchor),
      stackView.leadingAnchor.constraint(equalTo: view.safeAreaLayoutGuide.leadingAnchor),
      stackView.trailingAnchor.constraint(equalTo: view.safeAreaLayoutGuide.trailingAnchor),
      stackView.bottomAnchor.constraint(equalTo: view.bottomAnchor),
    ])
    stackView.addArrangedSubview(headerStackView)
    stackView.addArrangedSubview(hitsTableViewController.view)
  }
}
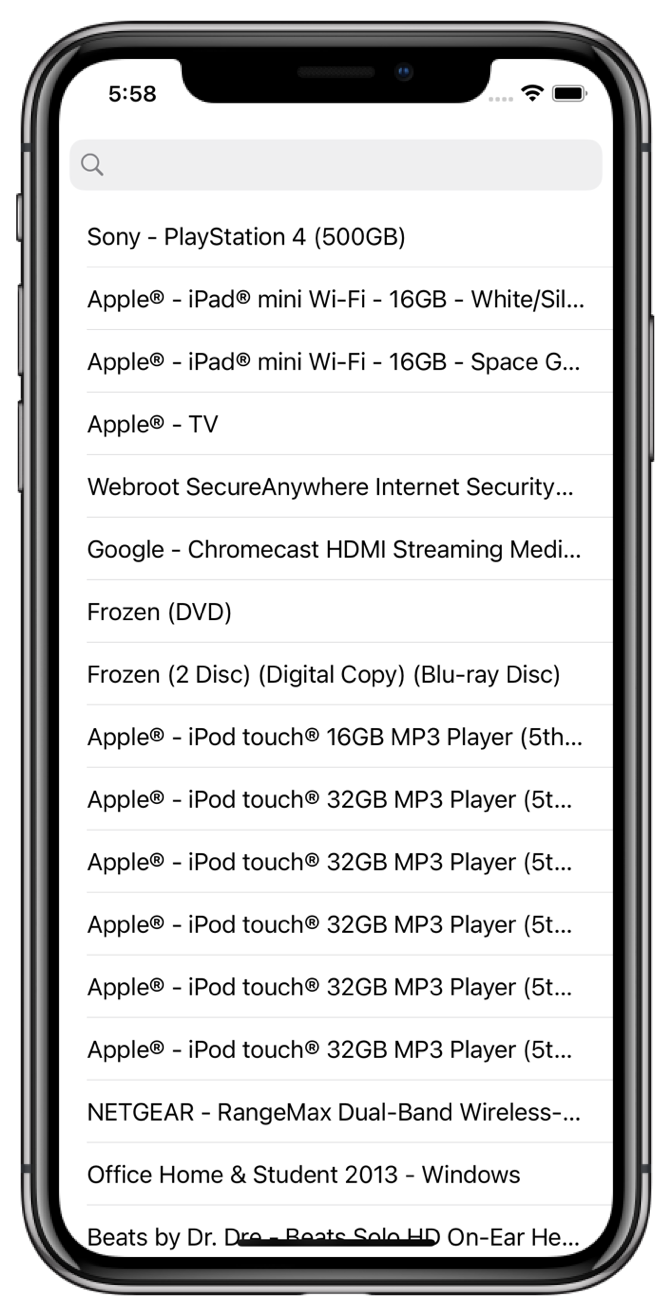
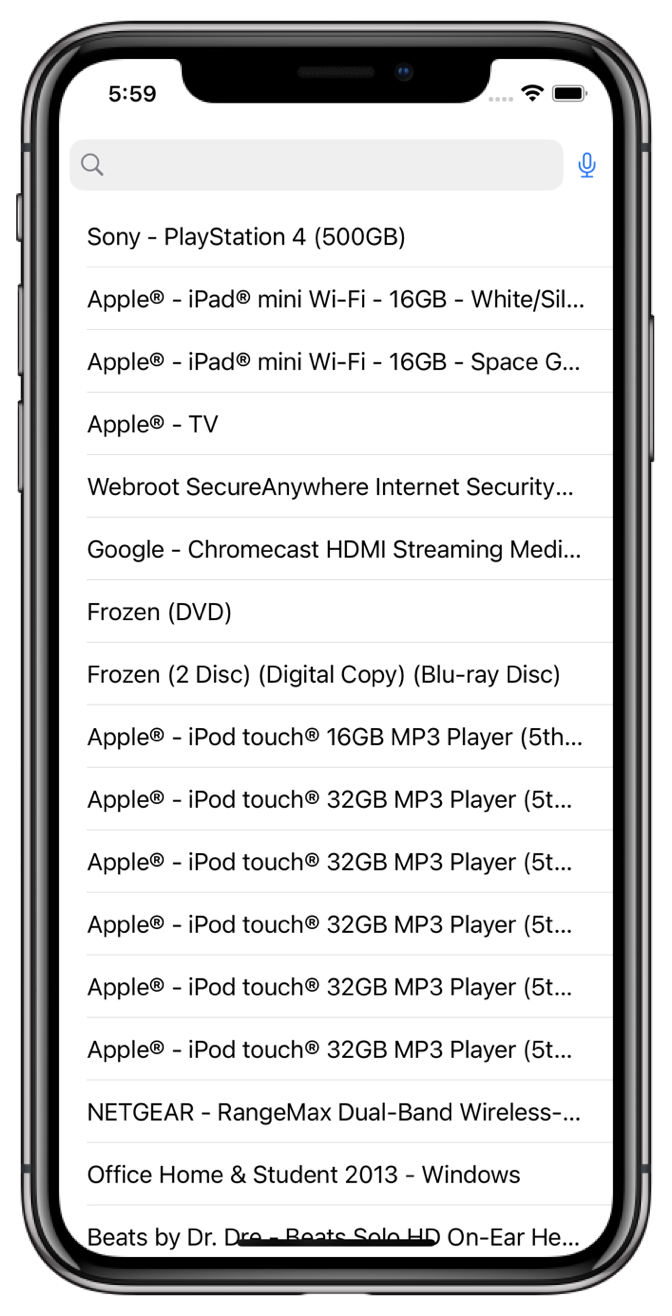
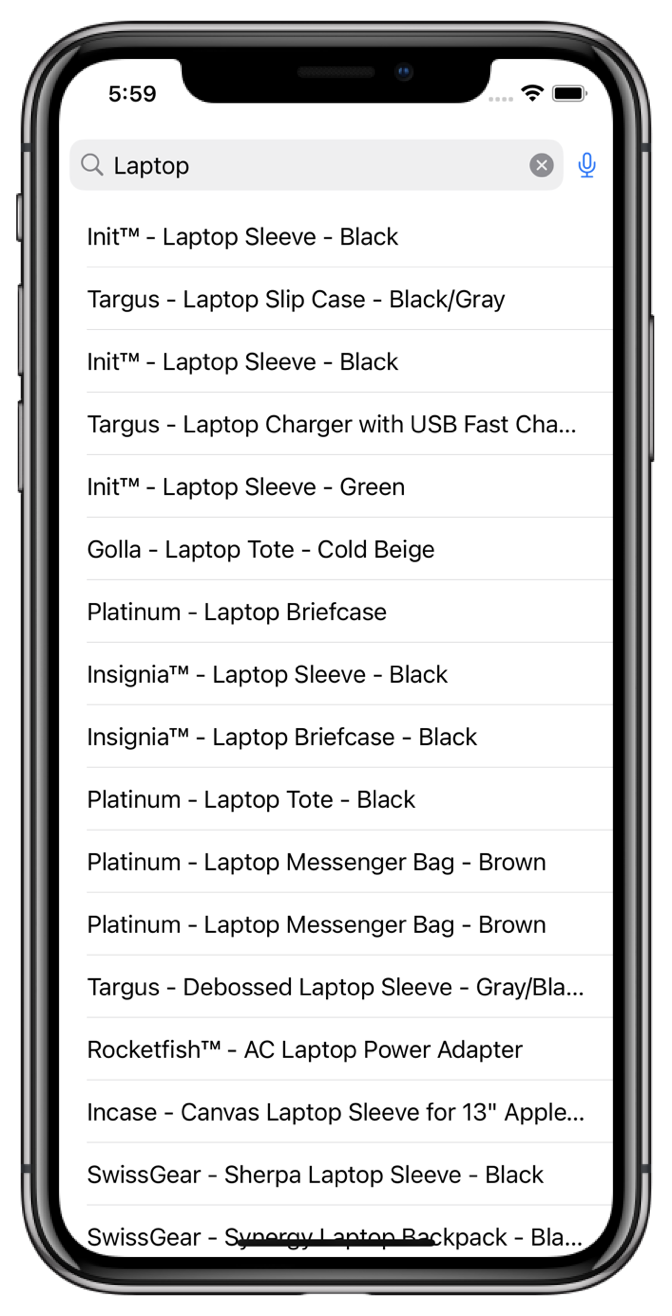
Build and run your application. The basic search experience is ready: you can type your search query and get instant results.
Create a voice search experience
This is a two-step process:
- Prepare the project for voice input and speech recognition.
- Add a button on the right of the search bar that triggers the voice input.
Setup permission request
By default, the VoiceOverlay library uses the AVFoundation framework for voice capturing and the Speech framework for speech to text transformation. Both libraries come with the iOS SDK.
These frameworks require the microphone and speech recognition permissions, respectively, from the operating system.
The VoiceOverlay library takes care of the permission request logic and appearance, all you have to do is to provide the reason you need these permissions in the info.plist file .
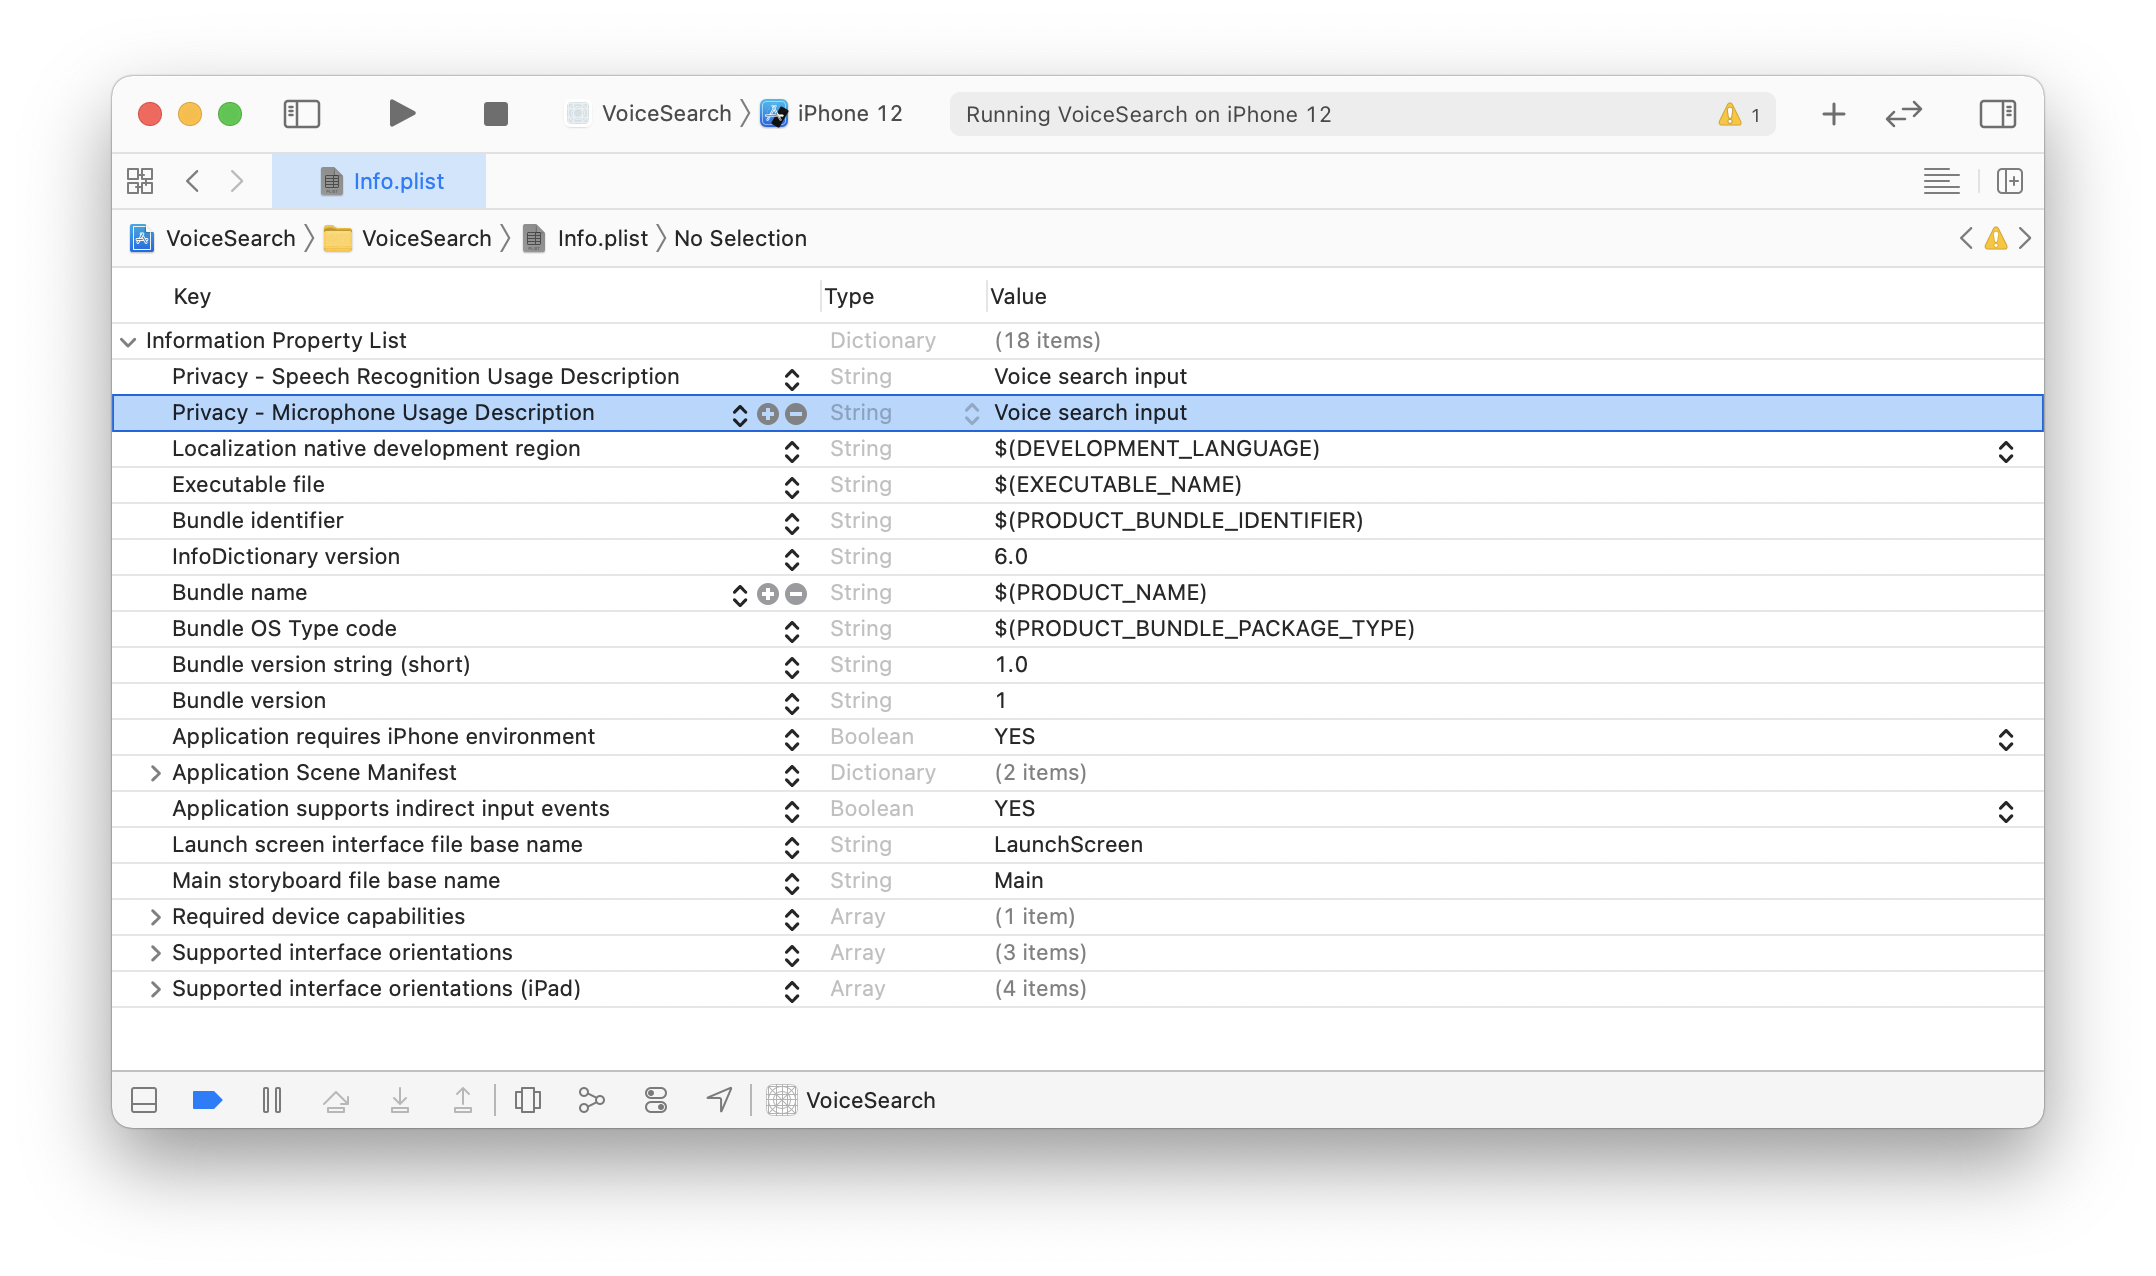
Open the info.plist file of your VoiceSearch target in the Xcode editor, and add the following keys:
Privacy - Microphone Usage DescriptionPrivacy - Speech Recognition Usage Descriptionwith values :Voice input.
In the end your info.plist should look as follows:
Add voice input logic
First, add import InstantSearchVoiceOverlay at the top of your ViewController.swift file.
1
2
3
import UIKit
import InstantSearch
import InstantSearchVoiceOverlay
Declare VoiceOverlayController, voiceInputButton in the ViewController:
1
2
3
4
5
6
7
8
9
10
11
12
13
14
15
16
class ViewController: UIViewController {

  let searchBar: UISearchBar = .init()
  lazy var textFieldController: TextFieldController = .init(searchBar: searchBar)
  lazy var searchConnector: SingleIndexSearchConnector<BestBuyItem> = .init(appID: "latency",
                                                                            apiKey: "1f6fd3a6fb973cb08419fe7d288fa4db",
                                                                            indexName: "bestbuy",
                                                                            queryInputController: textFieldController,
                                                                            hitsController: hitsTableViewController)
  let hitsTableViewController: BestBuyHitsViewController = .init()

  let voiceOverlayController: VoiceOverlayController = .init()
  let voiceInputButton: UIButton = .init()

  //...
}
Add the didTapVoiceInputButton function triggered by the voice input button. This function binds the voice input callback to QueryInputInteractor, encapsulated by the SingleIndexSearchConnector in your class declaration:
1
2
3
4
5
6
7
@objc func didTapVoiceInputButton() {
  voiceOverlayController.start(on: self) { [weak self] (text, isFinal, _) in
    self?.searchConnector.queryInputConnector.interactor.query = text
  } errorHandler: { error in
    print(error?.localizedDescription)
  }
}
Add voice input UI
Change the setupUI function to add the new voice input button to the existing UI.
The updated setupUI function should look as follows:
1
2
3
4
5
6
7
8
9
10
11
12
13
14
15
16
17
18
19
20
21
22
23
24
25
26
27
28
29
30
func setupUI() {
  // Setup search bar
  searchBar.translatesAutoresizingMaskIntoConstraints = false
  searchBar.searchBarStyle = .minimal

  // Setup voice input button
  voiceInputButton.translatesAutoresizingMaskIntoConstraints = false
  voiceInputButton.setImage(UIImage(systemName: "mic"), for: .normal)
  voiceInputButton.contentEdgeInsets = .init(top: 0, left: 0, bottom: 0, right: 10)
  voiceInputButton.addTarget(self, action: #selector(didTapVoiceInputButton), for: .touchUpInside)

  // Setup layout
  let headerStackView = UIStackView()
  headerStackView.translatesAutoresizingMaskIntoConstraints = false
  headerStackView.addArrangedSubview(searchBar)
  headerStackView.addArrangedSubview(voiceInputButton)

  let stackView = UIStackView()
  stackView.translatesAutoresizingMaskIntoConstraints = false
  stackView.axis = .vertical
  view.addSubview(stackView)
  NSLayoutConstraint.activate([
    stackView.topAnchor.constraint(equalTo: view.safeAreaLayoutGuide.topAnchor),
    stackView.leadingAnchor.constraint(equalTo: view.safeAreaLayoutGuide.leadingAnchor),
    stackView.trailingAnchor.constraint(equalTo: view.safeAreaLayoutGuide.trailingAnchor),
    stackView.bottomAnchor.constraint(equalTo: view.bottomAnchor),
  ])
  stackView.addArrangedSubview(headerStackView)
  stackView.addArrangedSubview(hitsTableViewController.view)
}
In the end, the code of your ViewController should look as follows:
1
2
3
4
5
6
7
8
9
10
11
12
13
14
15
16
17
18
19
20
21
22
23
24
25
26
27
28
29
30
31
32
33
34
35
36
37
38
39
40
41
42
43
44
45
46
47
48
49
50
51
52
53
54
55
56
57
58
59
60
61
class ViewController: UIViewController {

  let searchBar: UISearchBar = .init()
  lazy var textFieldController: TextFieldController = .init(searchBar: searchBar)
  lazy var searchConnector: SingleIndexSearchConnector<BestBuyItem> = .init(appID: "latency",
                                                                            apiKey: "1f6fd3a6fb973cb08419fe7d288fa4db",
                                                                            indexName: "bestbuy",
                                                                            queryInputController: textFieldController,
                                                                            hitsController: hitsTableViewController)
  let hitsTableViewController: BestBuyHitsViewController = .init()

  let voiceOverlayController: VoiceOverlayController = .init()
  let voiceInputButton: UIButton = .init()

  override func viewDidLoad() {
    super.viewDidLoad()
    searchConnector.connect()
    searchConnector.hitsConnector.searcher.search()
    setupUI()
  }

  func setupUI() {
    // Setup search bar
    searchBar.translatesAutoresizingMaskIntoConstraints = false
    searchBar.searchBarStyle = .minimal

    // Setup voice input button
    voiceInputButton.translatesAutoresizingMaskIntoConstraints = false
    voiceInputButton.setImage(UIImage(systemName: "mic"), for: .normal)
    voiceInputButton.contentEdgeInsets = .init(top: 0, left: 0, bottom: 0, right: 10)
    voiceInputButton.addTarget(self, action: #selector(didTapVoiceInputButton), for: .touchUpInside)

    // Setup layout
    let headerStackView = UIStackView()
    headerStackView.translatesAutoresizingMaskIntoConstraints = false
    headerStackView.addArrangedSubview(searchBar)
    headerStackView.addArrangedSubview(voiceInputButton)

    let stackView = UIStackView()
    stackView.translatesAutoresizingMaskIntoConstraints = false
    stackView.axis = .vertical
    view.addSubview(stackView)
    NSLayoutConstraint.activate([
      stackView.topAnchor.constraint(equalTo: view.safeAreaLayoutGuide.topAnchor),
      stackView.leadingAnchor.constraint(equalTo: view.safeAreaLayoutGuide.leadingAnchor),
      stackView.trailingAnchor.constraint(equalTo: view.safeAreaLayoutGuide.trailingAnchor),
      stackView.bottomAnchor.constraint(equalTo: view.bottomAnchor),
    ])
    stackView.addArrangedSubview(headerStackView)
    stackView.addArrangedSubview(hitsTableViewController.view)
  }

  @objc func didTapVoiceInputButton() {
    voiceOverlayController.start(on: self) { [weak self] (text, isFinal, _) in
      self?.searchConnector.queryInputConnector.interactor.query = text
    } errorHandler: { error in
      print(error?.localizedDescription)
    }
  }

}
To test your voice search, build and run your application. You should see the voice input button on the right of the search bar.
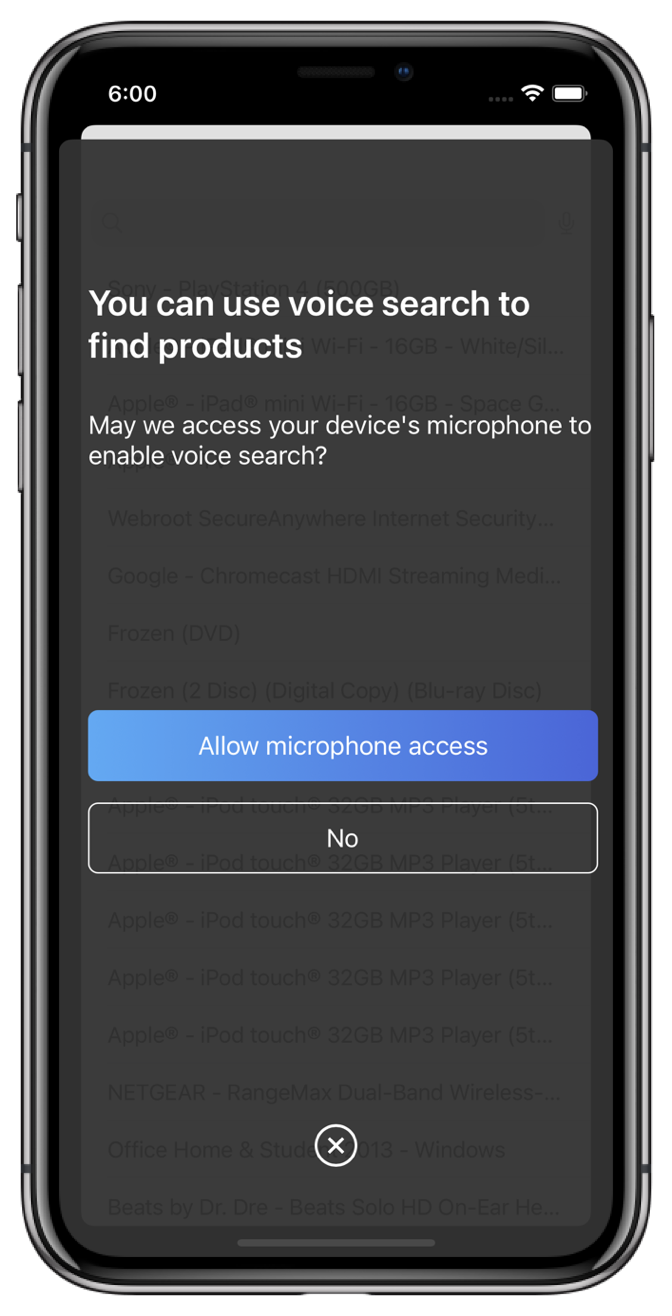
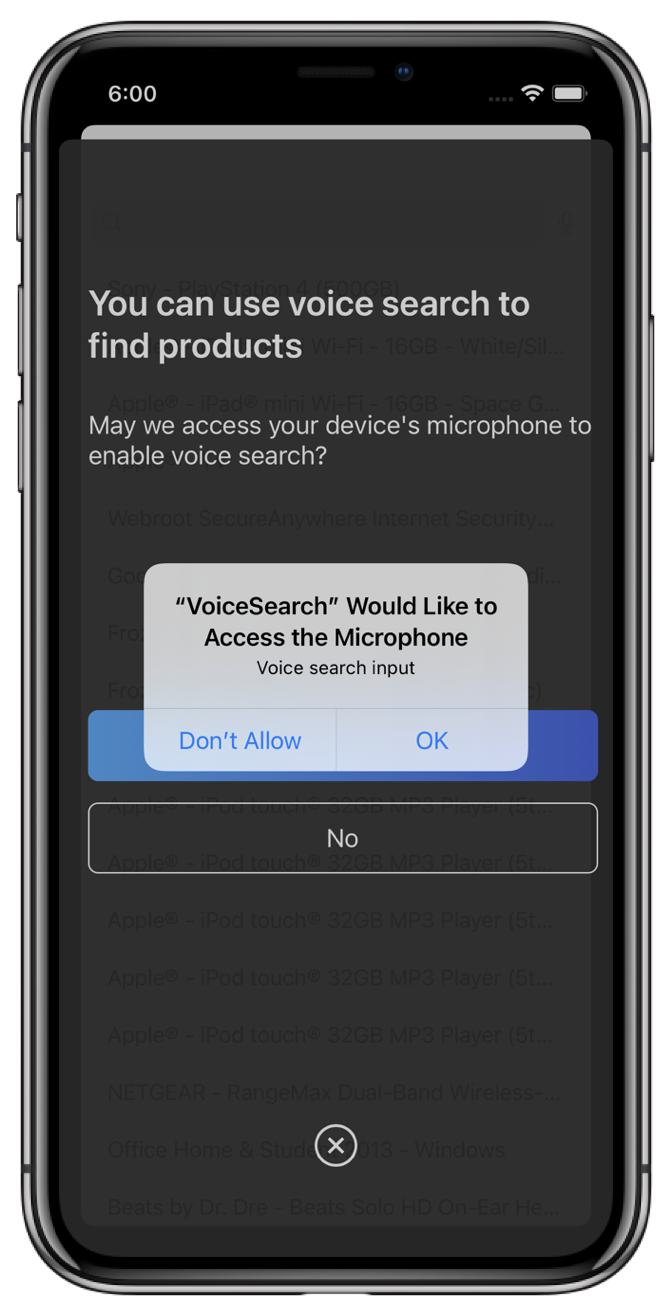
The VoiceOverlay should appear when you tap the voice input button. At the first launch, it asks for the permissions mentioned in the setup permissions request section.
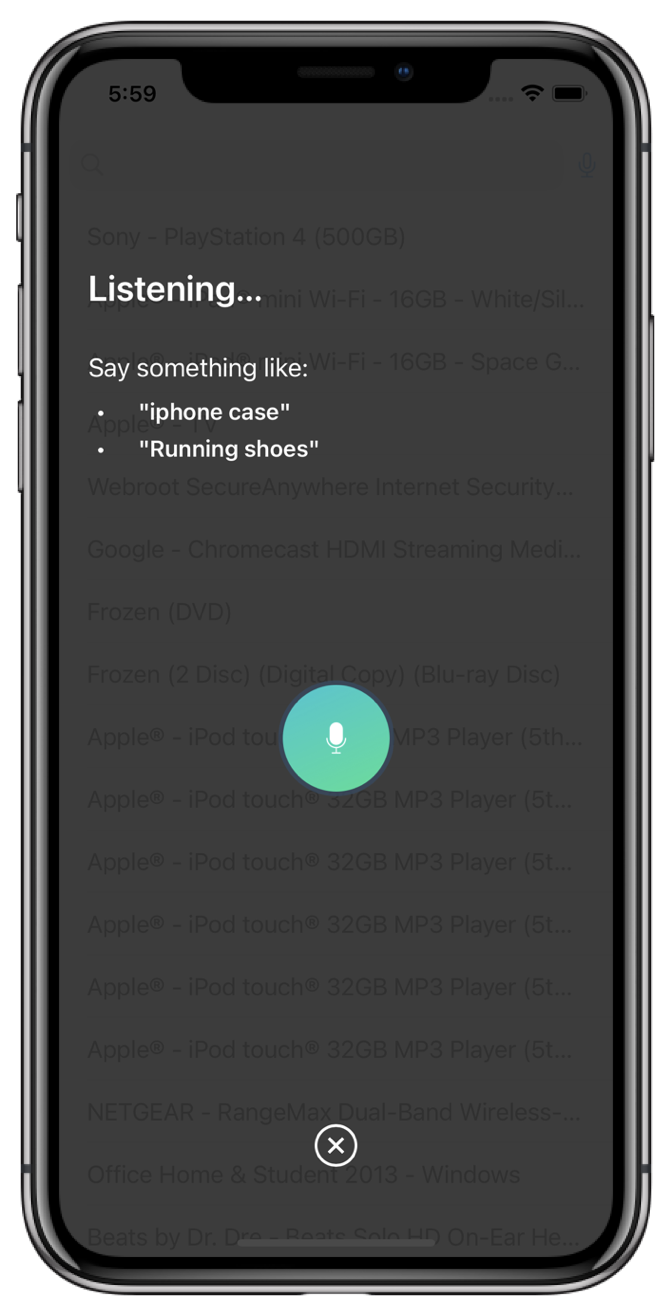
Once you give all the authorizations, the voice input interface appears. Try to say something and get the instant search results.
You can find the complete source code on the InstantSearch examples repository.
Conclusion
With Algolia’s libraries, you can build a voice search experience in less than a hundred lines of code.
You can customize your search experience and make it unique by modifying InstantSearch components, as well as the VoiceOverlay components.
If you use Algolia Answers in your application, the VoiceOverlay is a good start for a conversational search experience in your application.