Adding AI Dynamic Re-Ranking to Category Pages
On this page
You can leverage Algolia’s AI Dynamic Re-Ranking feature to find trends in your users’ behavior. Based on users’ interaction throughout search and browse, Dynamic Re-Ranking makes improvements to the relevance of your category pages by boosting results that are trending or rising in popularity.
Once you set up the category pages and successfully send click/conversion events (requires coding) to Algolia, Algolia starts using this data to detect trends in your user behavior. There is no coding required to enable dynamic re-ranking on category pages.
Learn more about Dynamic Re-Ranking’s effect on relevance.
Implementation steps
There are four steps to implement this solution:
- Build the category pages using Algolia
- Send click and conversion events to Algolia
- Enable AI Dynamic Re-Ranking on category pages
- A/B test Dynamic Re-Ranking on category pages
1. Build the category pages using Algolia
In order to apply Dynamic Re-Ranking on category pages with Algolia, you must first create category pages powered by Algolia. Please refer to this guide for the detailed steps to implement category page with Algolia.
2. Send click and conversion events to Algolia
You must complete this step before enabling AI Re-Ranking.
Dynamic Re-Ranking refreshes each query’s ranking every 24 hours. Re-Ranking always takes the last 30 days into account, meaning it’s based on a sliding window of the most recent analytics data.
3. Enable AI Dynamic Re-Ranking on category pages
You can configure the following options from the AI Re-Ranking page in the dashboard.
- Opt in an index for Dynamic Re-Ranking.
- Select the correct events source index (optional).
- Pick your category page identifier by choosing a Browsing facet.
- Adjust weight to recent events (optional)
- Simulate Dynamic Re-Ranking.
- Activate Dynamic Re-Ranking.
You can see re-ranked results only after Algolia has received enough search traffic and click and conversion events. For a record to be promoted for a given query, Re-Ranking requires it to gather at least 20 clicks or two conversions during the 30 days time window.
A. Opt in an index for Dynamic Re-Ranking
Navigate to the AI Re-Ranking page in the dashboard and select an index you want to use for Dynamic Re-Ranking.
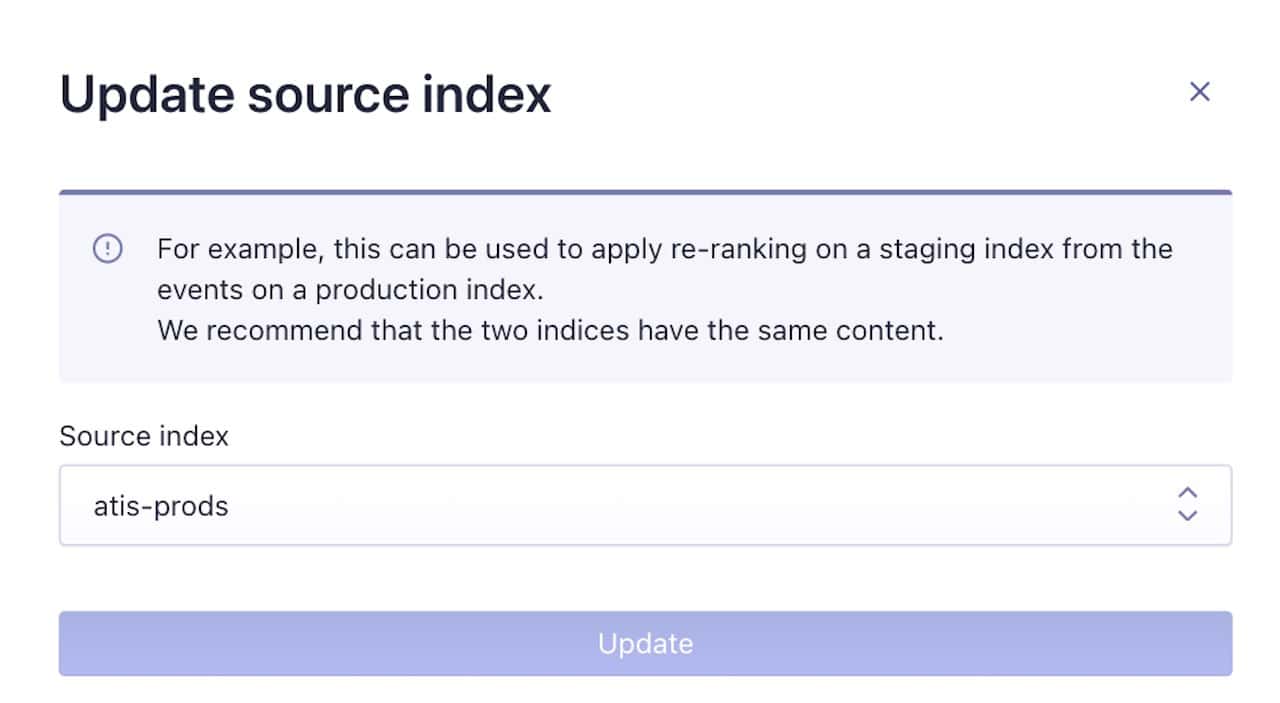
B. Select the correct events source index (optional)
Under AI Re-ranking, click on Events source index and update the source index where you send your click and conversion events in production. If you need to use a different source for your events, you have the option to select the correct events source index.
A main use case for selecting an alternative source index is when you have a staging index that replaces the production index every day for atomic reindexing. In this case, you should enable re-ranking on both the staging and target production indices as source events, given that the production index already receives events.
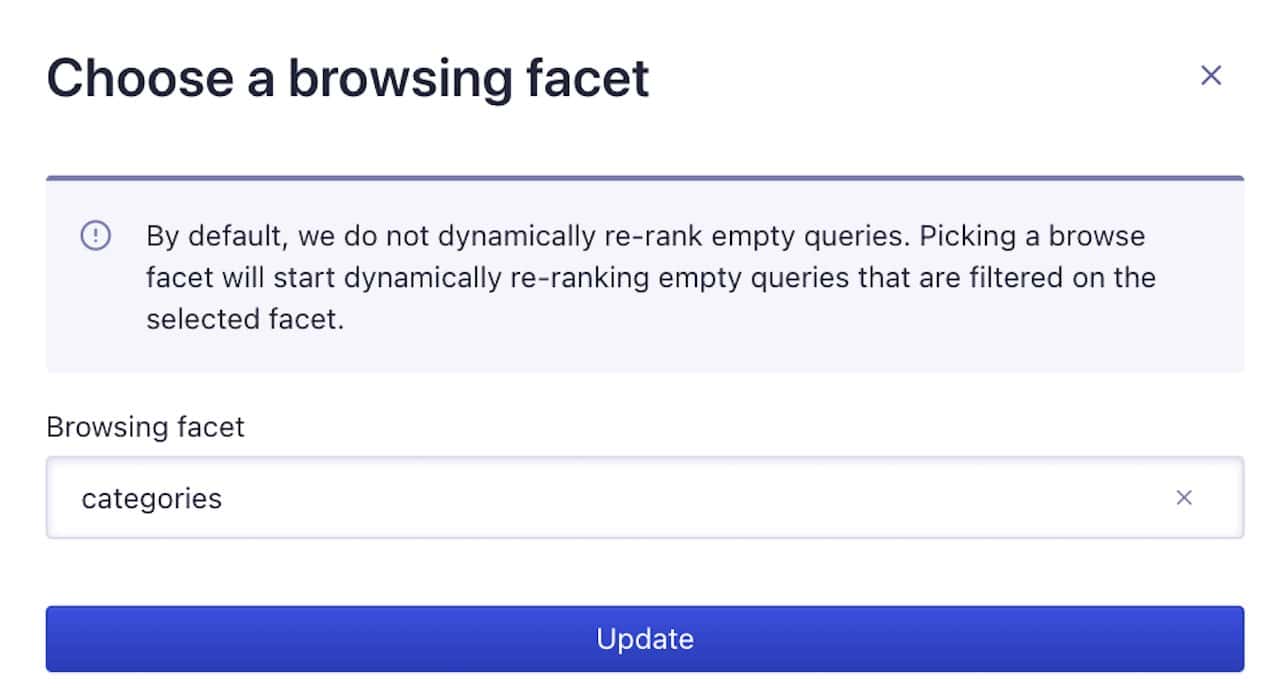
C. Pick your category page identifier by choosing a “browsing facet”
Under AI Re-Ranking, click on Browsing facet and update the browsing filter to the category page identifier you indexed in the dataset. A category page identifier is a unique identifier that references a particular category page. Possible identifiers include collections, categories, categoryId, and categoryPageId. Please check with your team to make sure the browsing filter is referencing the correct filter used in the query to generate the category page in the front-end UI.
D. Adjust weight to recent events (optional)
By default, the event freshness setting is enabled to handle seasonality and shorter trends. You have the option to turn off this setting, but it’s recommended to leave it on.
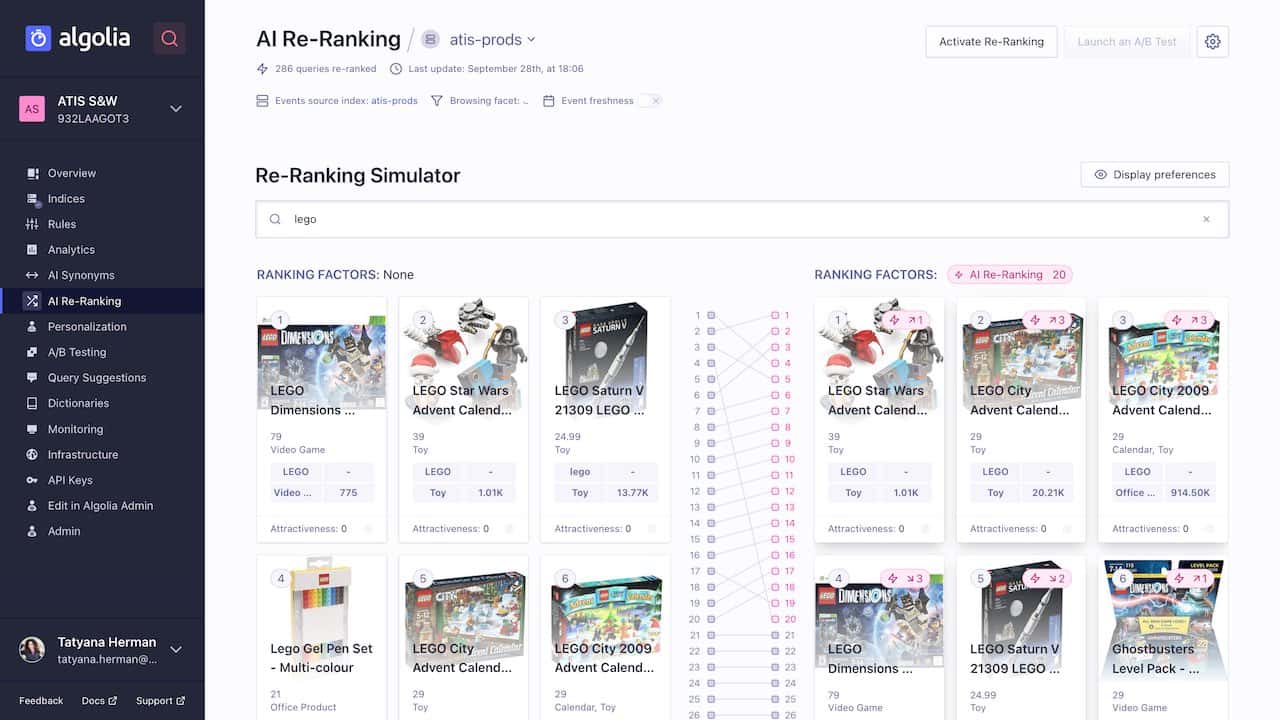
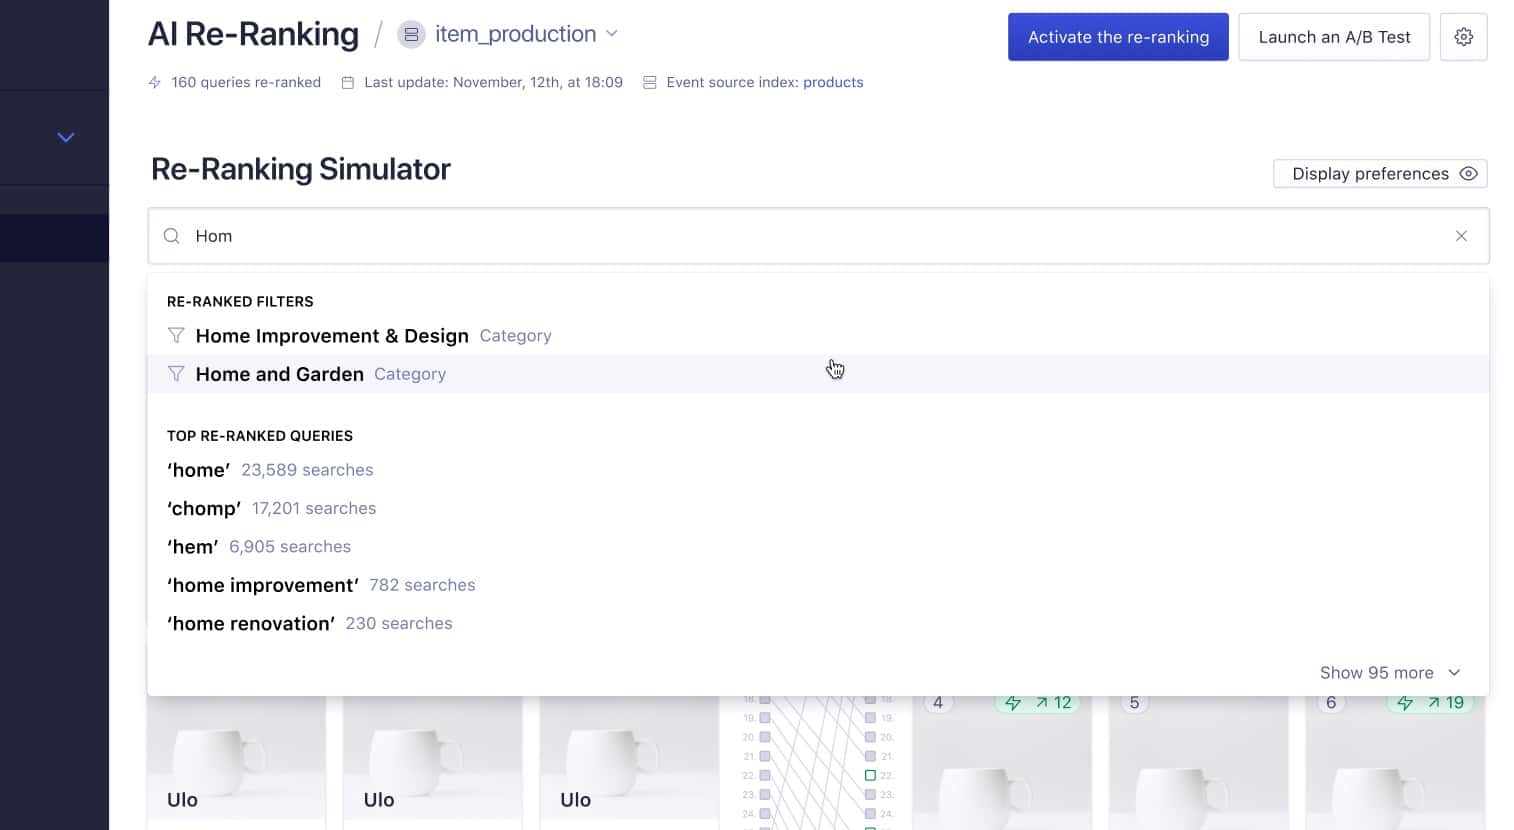
E. Simulate Dynamic Re-Ranking
Once Algolia receives enough search traffic and click and conversion events, you can assess the effect of re-ranking on your search results/browse page in the simulator.
It’s recommended to use the simulator before activating the feature in production.
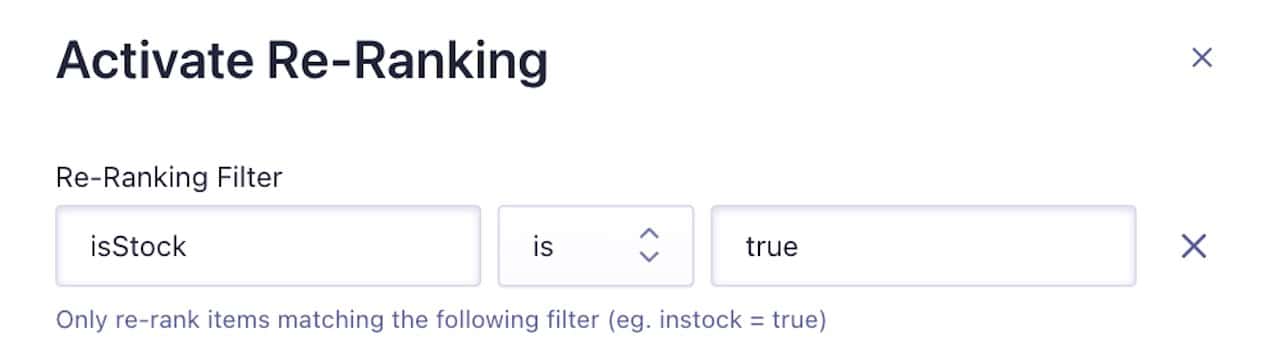
F. Activate Dynamic Re-Ranking
Before activating Dynamic Re-Ranking, you have the option to turn off re-ranking for specific records. To prevent promoting popular items that are out of stock or no longer listed, select a filter value, for example instock=true.
Click Activate:

Turn off Re-ranking for specific records:
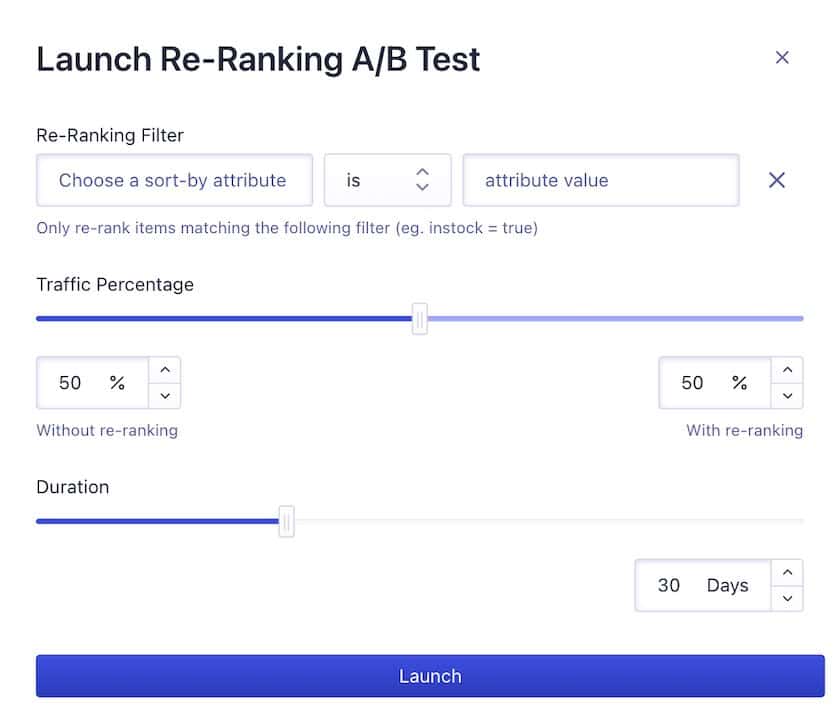
4. A/B test Dynamic Re-Ranking on category pages
To measure performance of the Re-Ranking approach, it’s important to launch the A/B test directly from the Re-Ranking section of the UI and not from the A/B test tab in the dashboard. This ensures all the settings are configured correctly and that you are measuring the performance only on the pages with enough traffic and where Re-Ranking rules apply.