Google Tag Manager
If you have already integrated Google Tag Manager (GTM) on your website, you can leverage this solution to send click, conversion and view events to the Algolia Insights API.
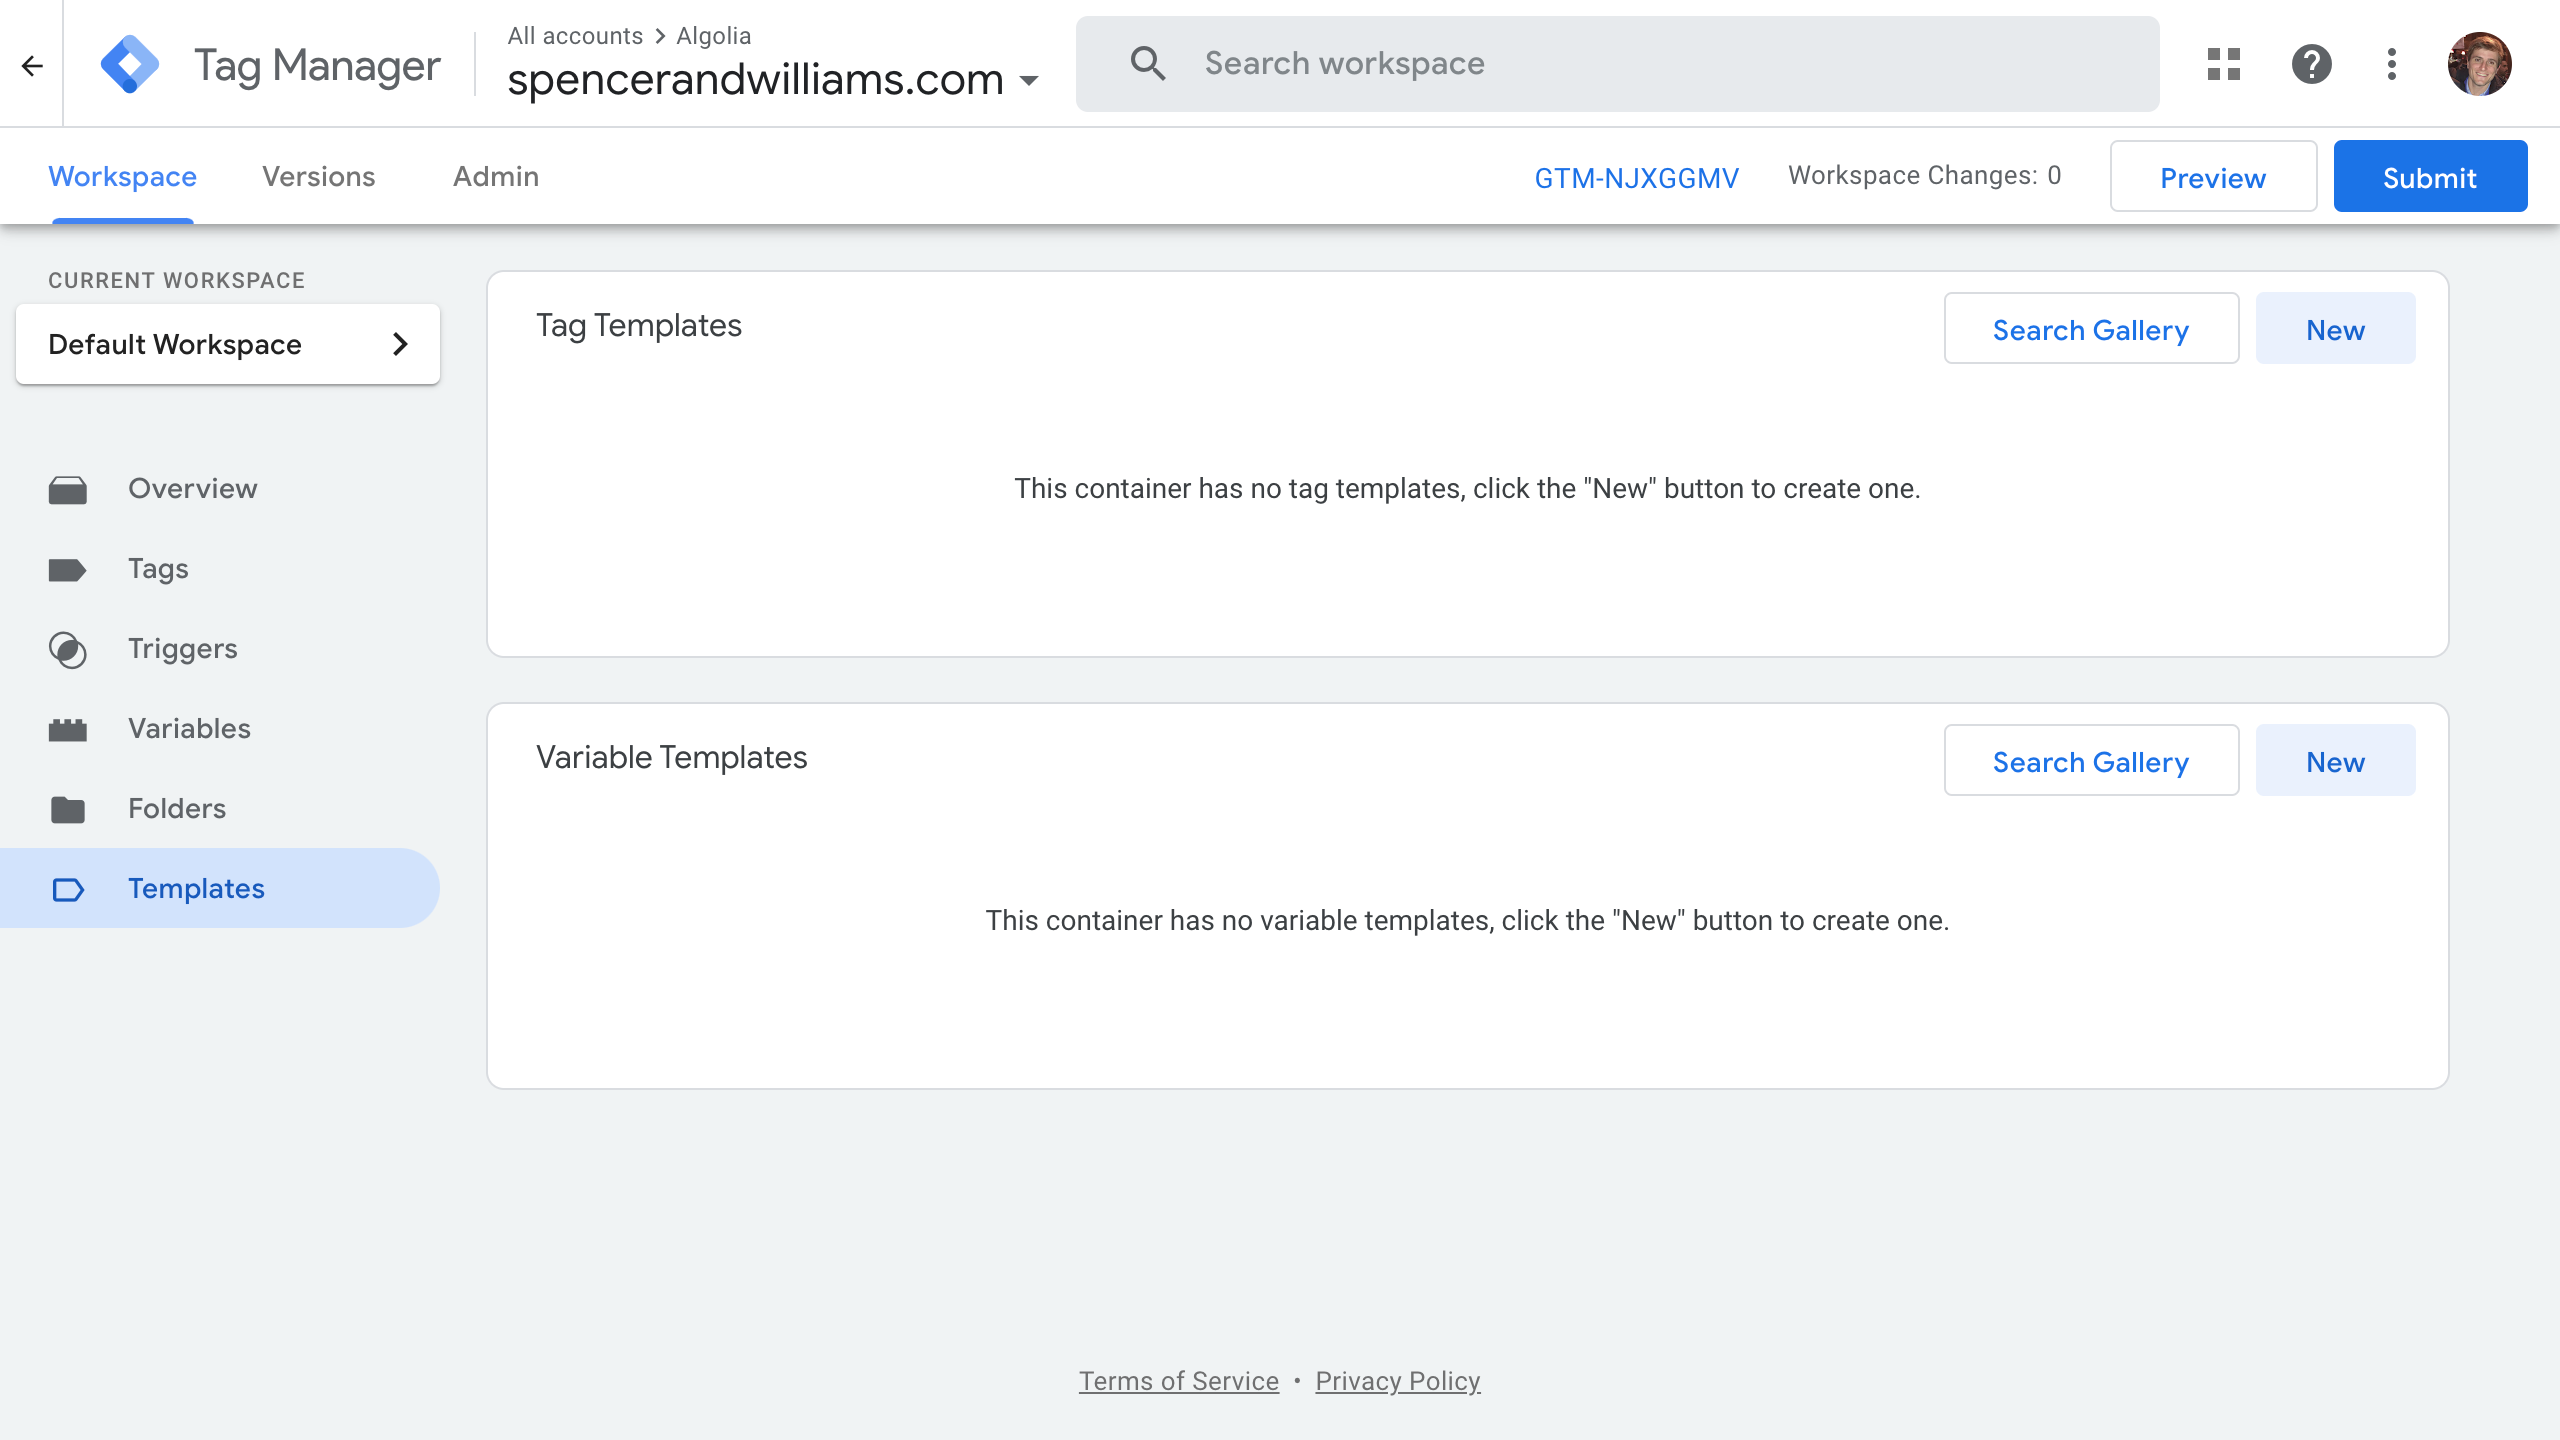
Setup
Before sending events to the Insights API via Google Tag Manager (GTM), you need to import the official Algolia Search Insights template.
In GTM, click on the New button in the Templates section of your Workspace, search for the official Algolia Search Insights tag template in Templates and add it to your workspace.

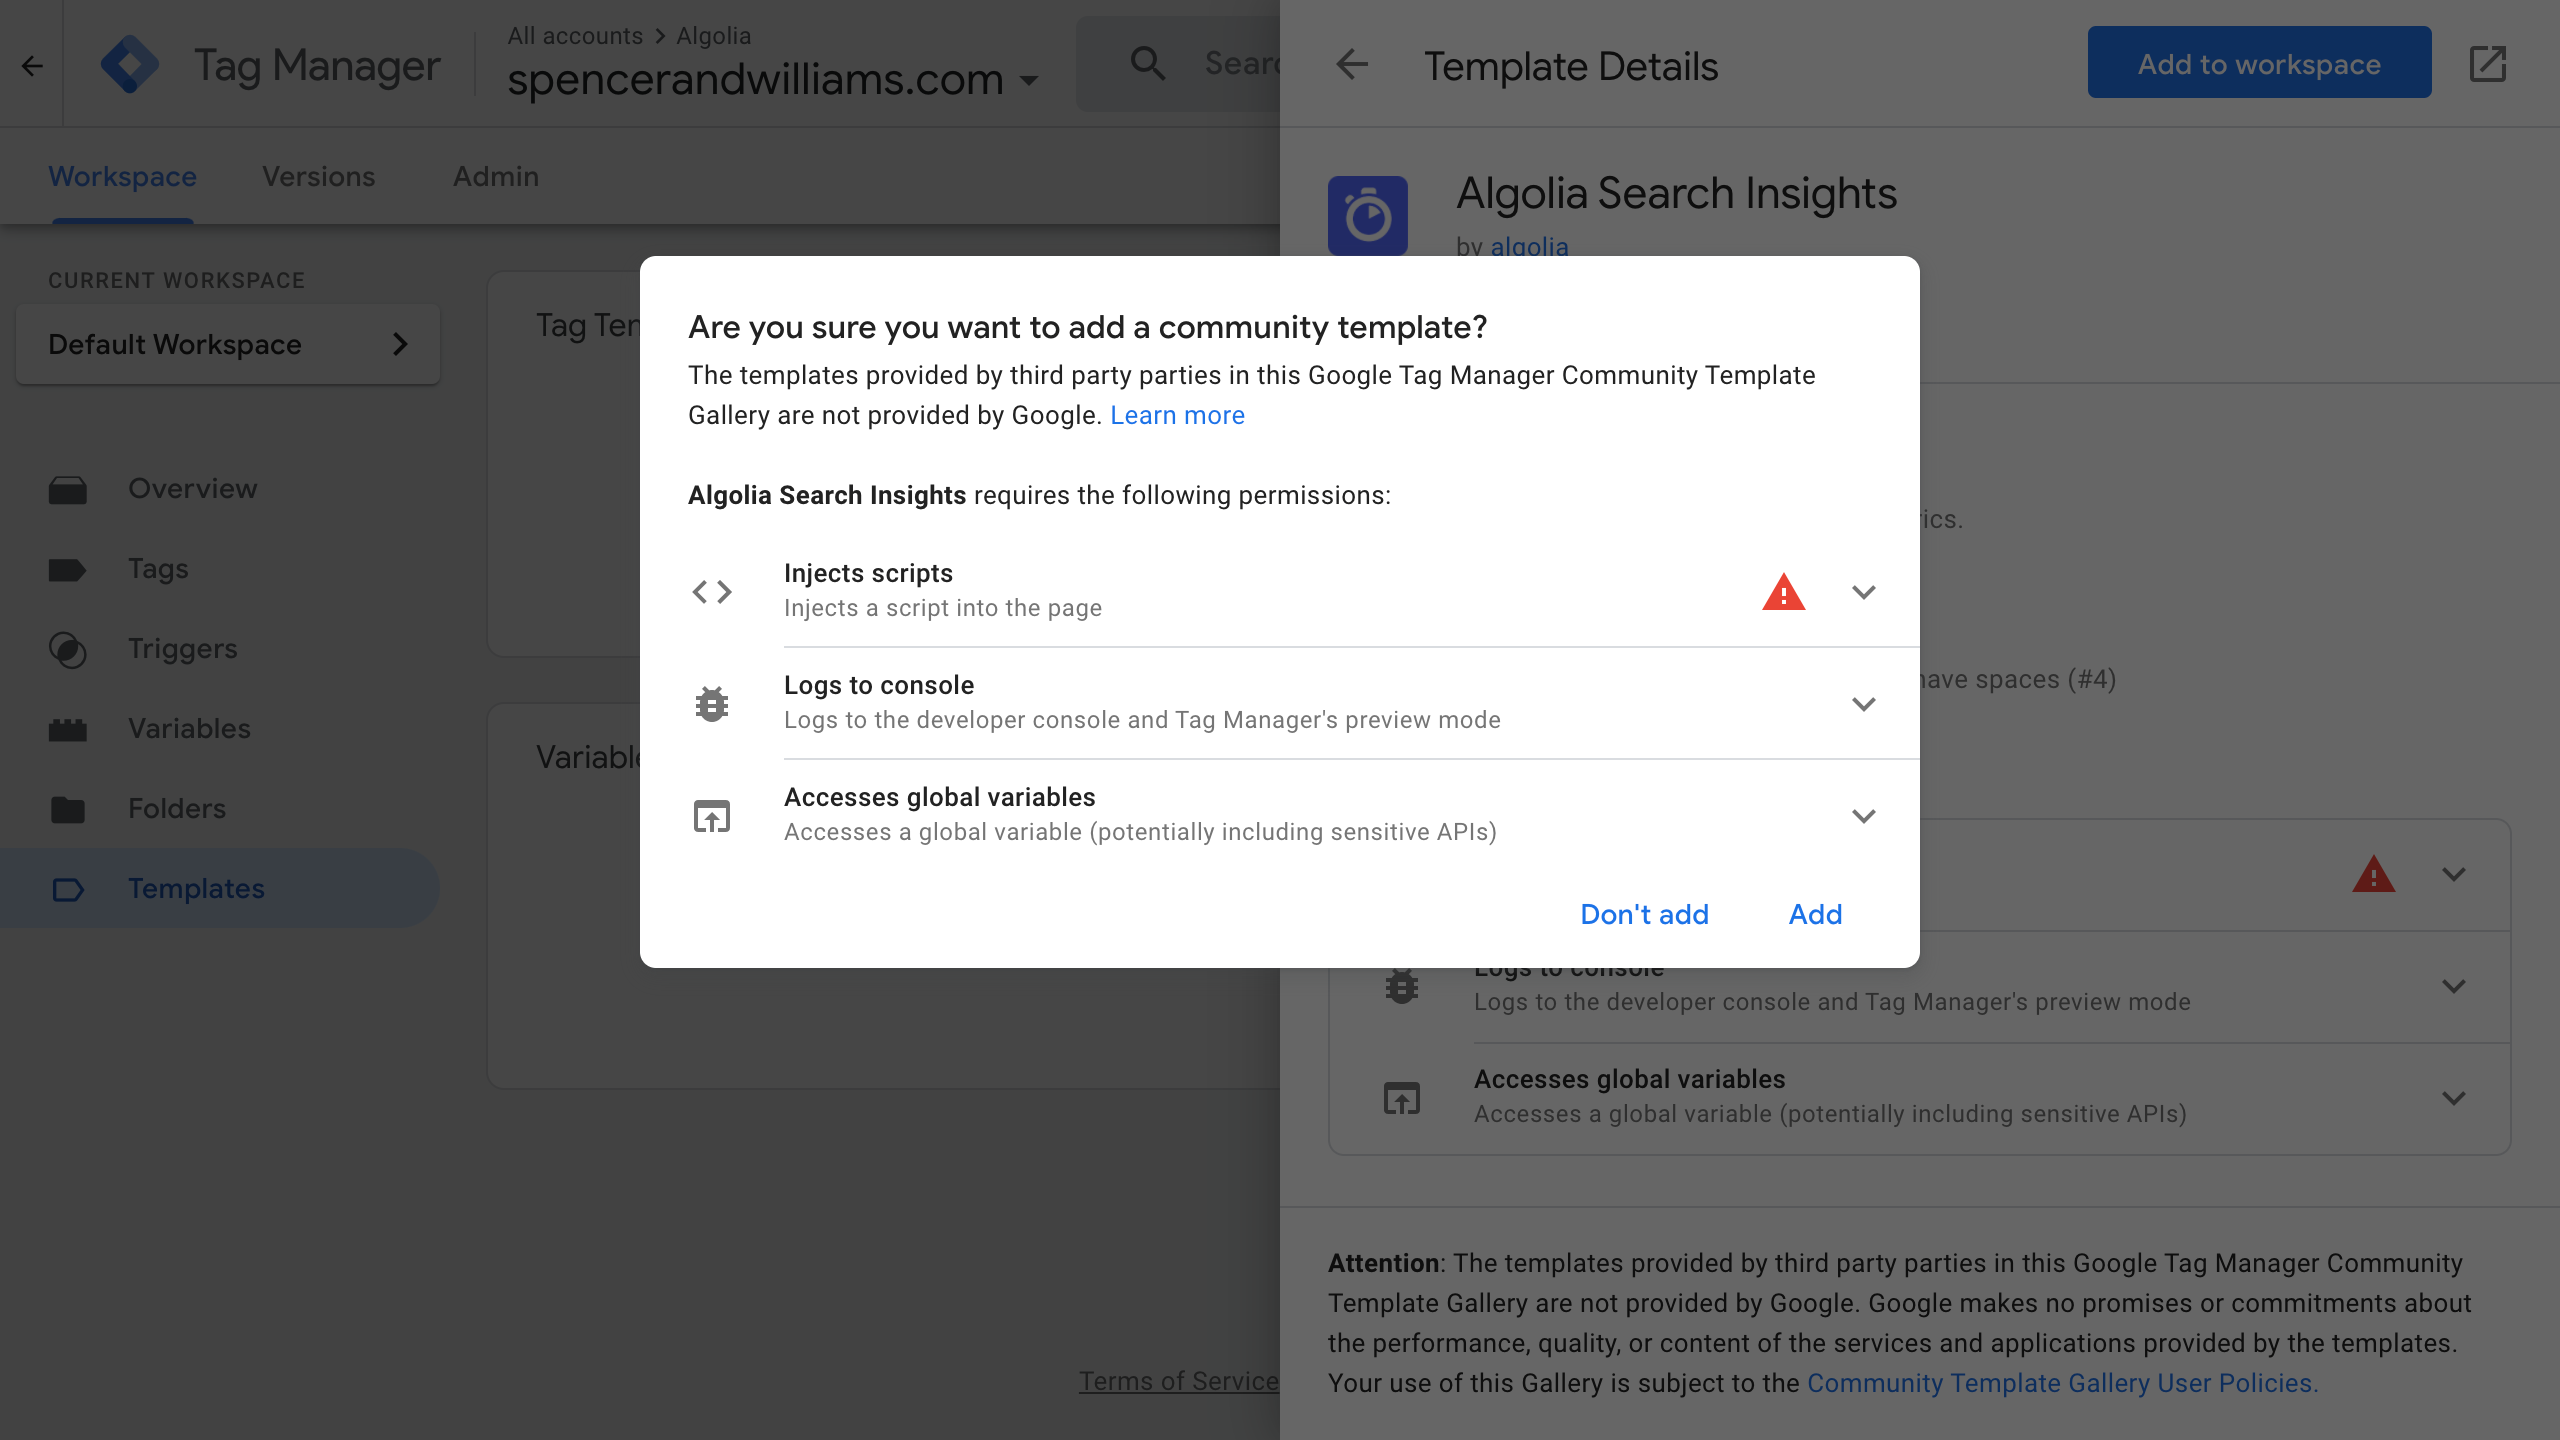
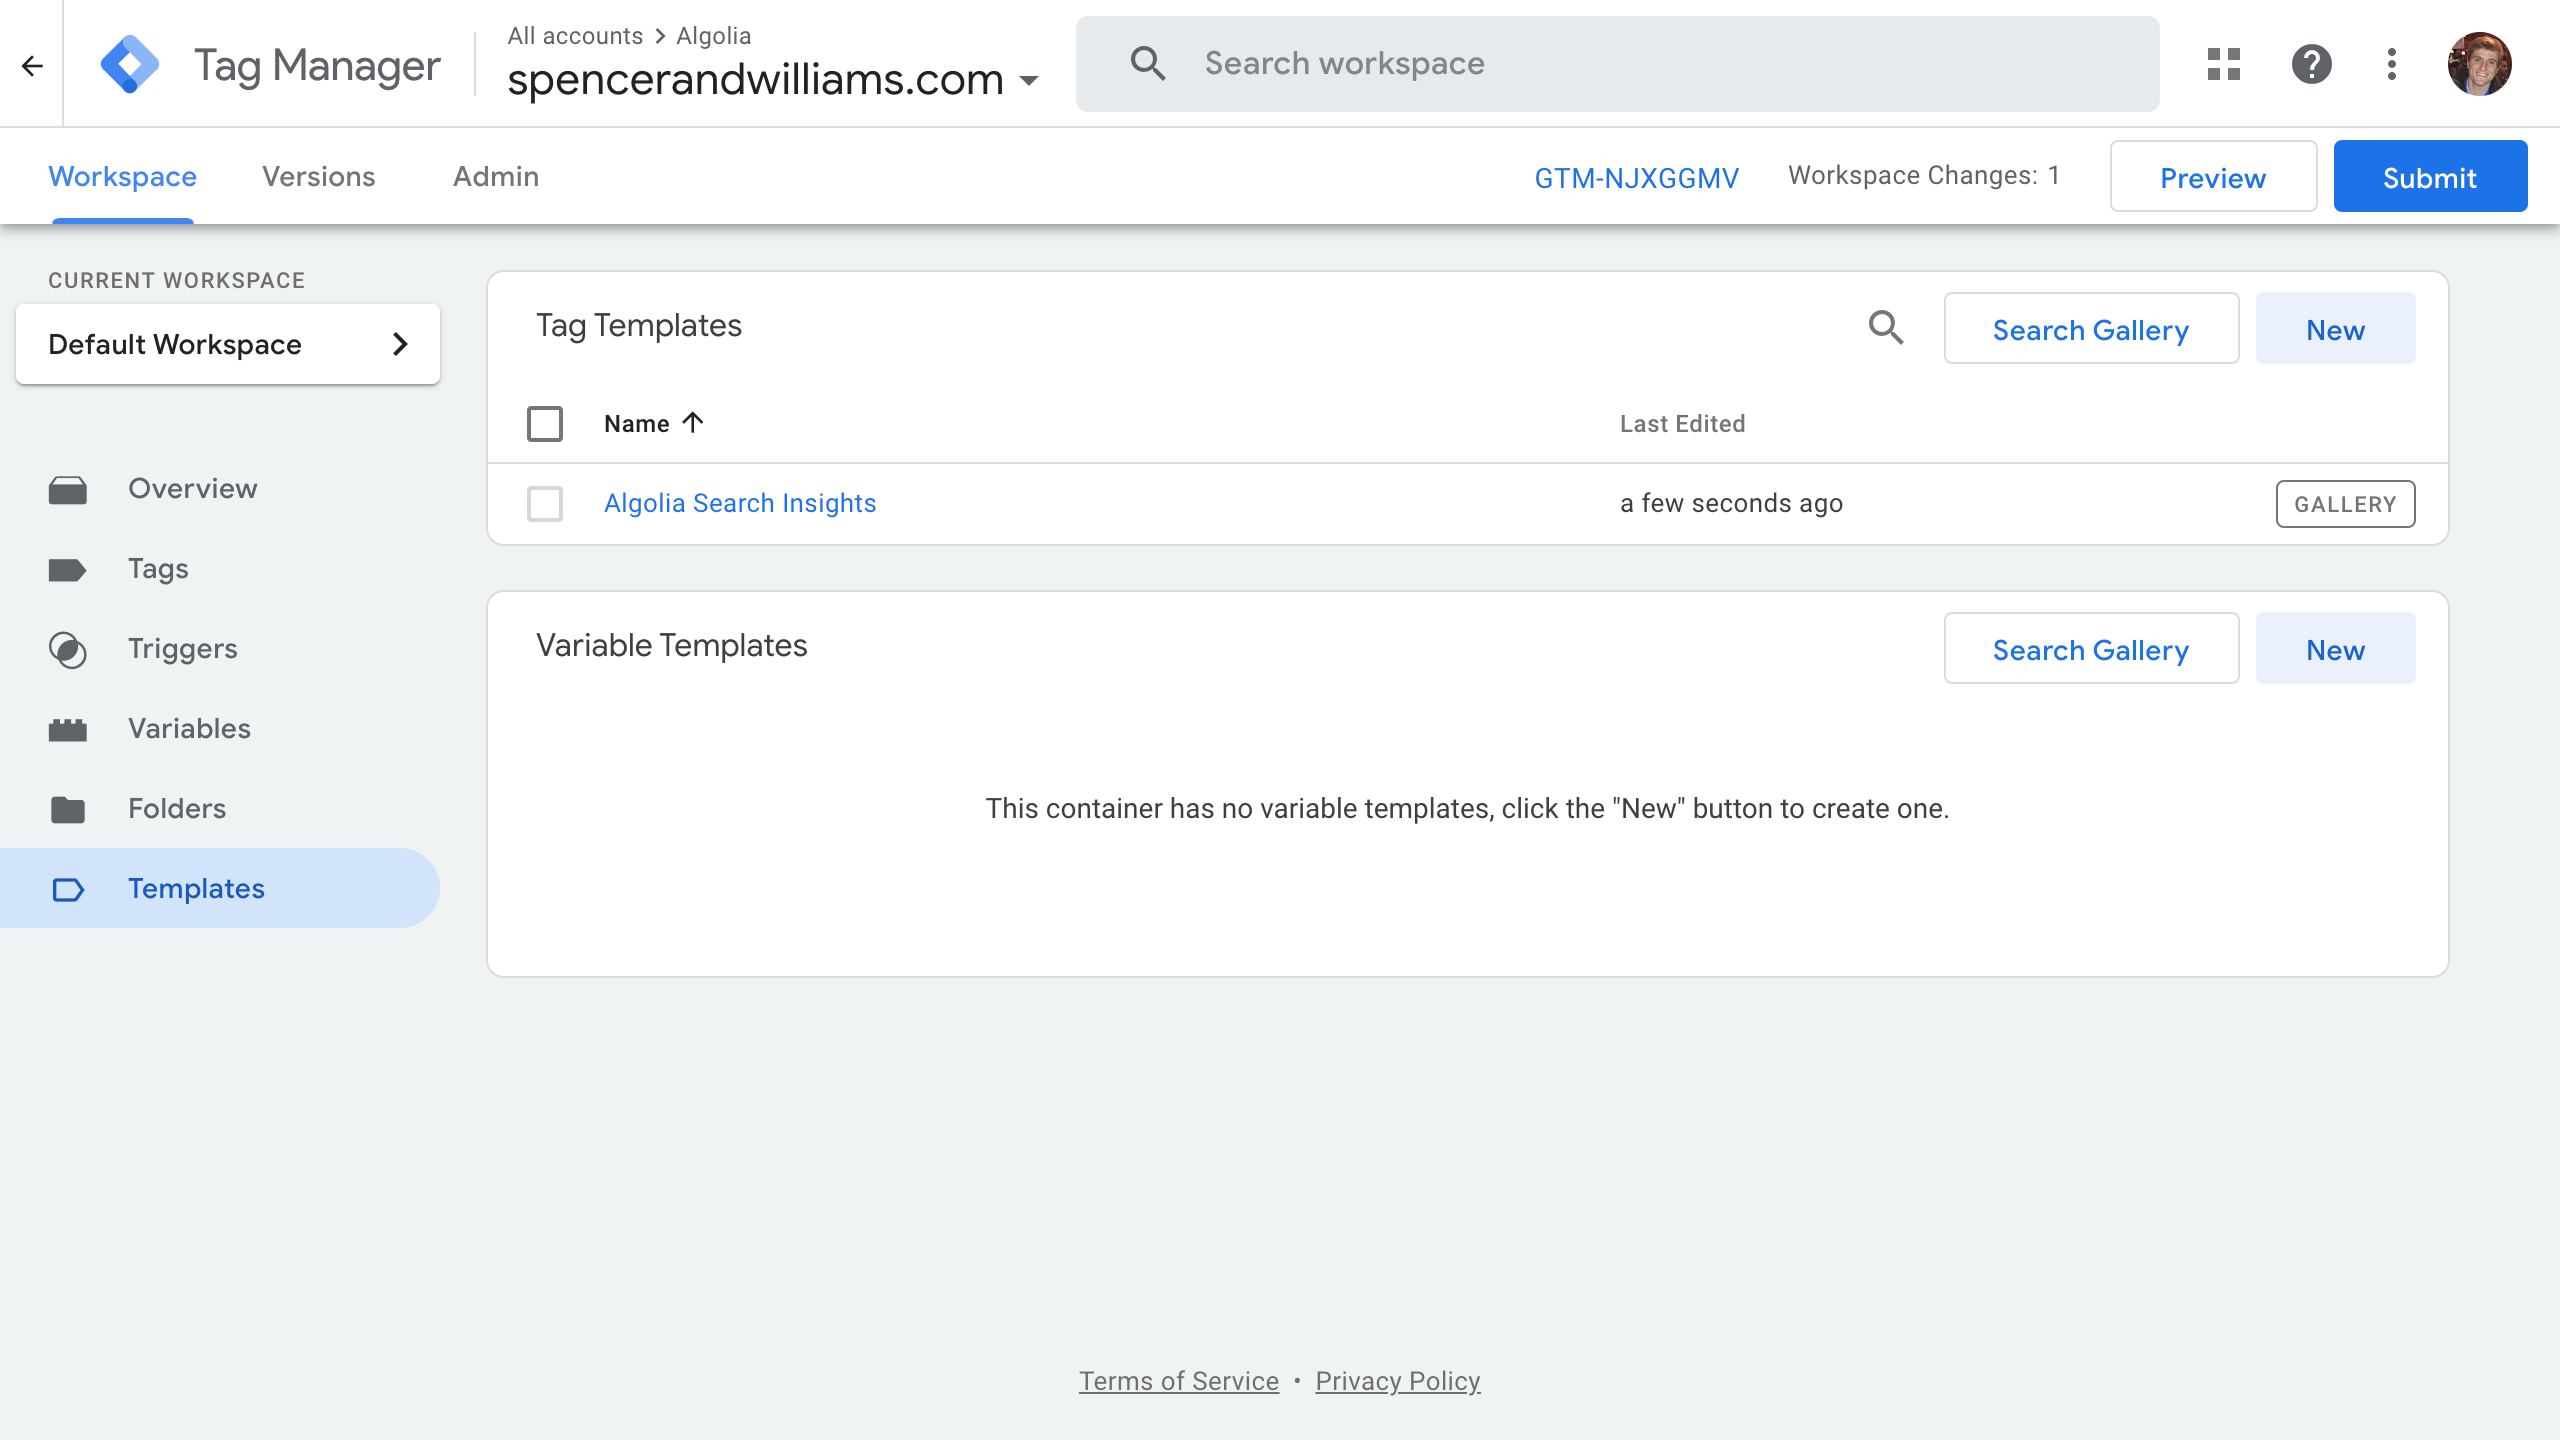
Once added, you should see the below screen:
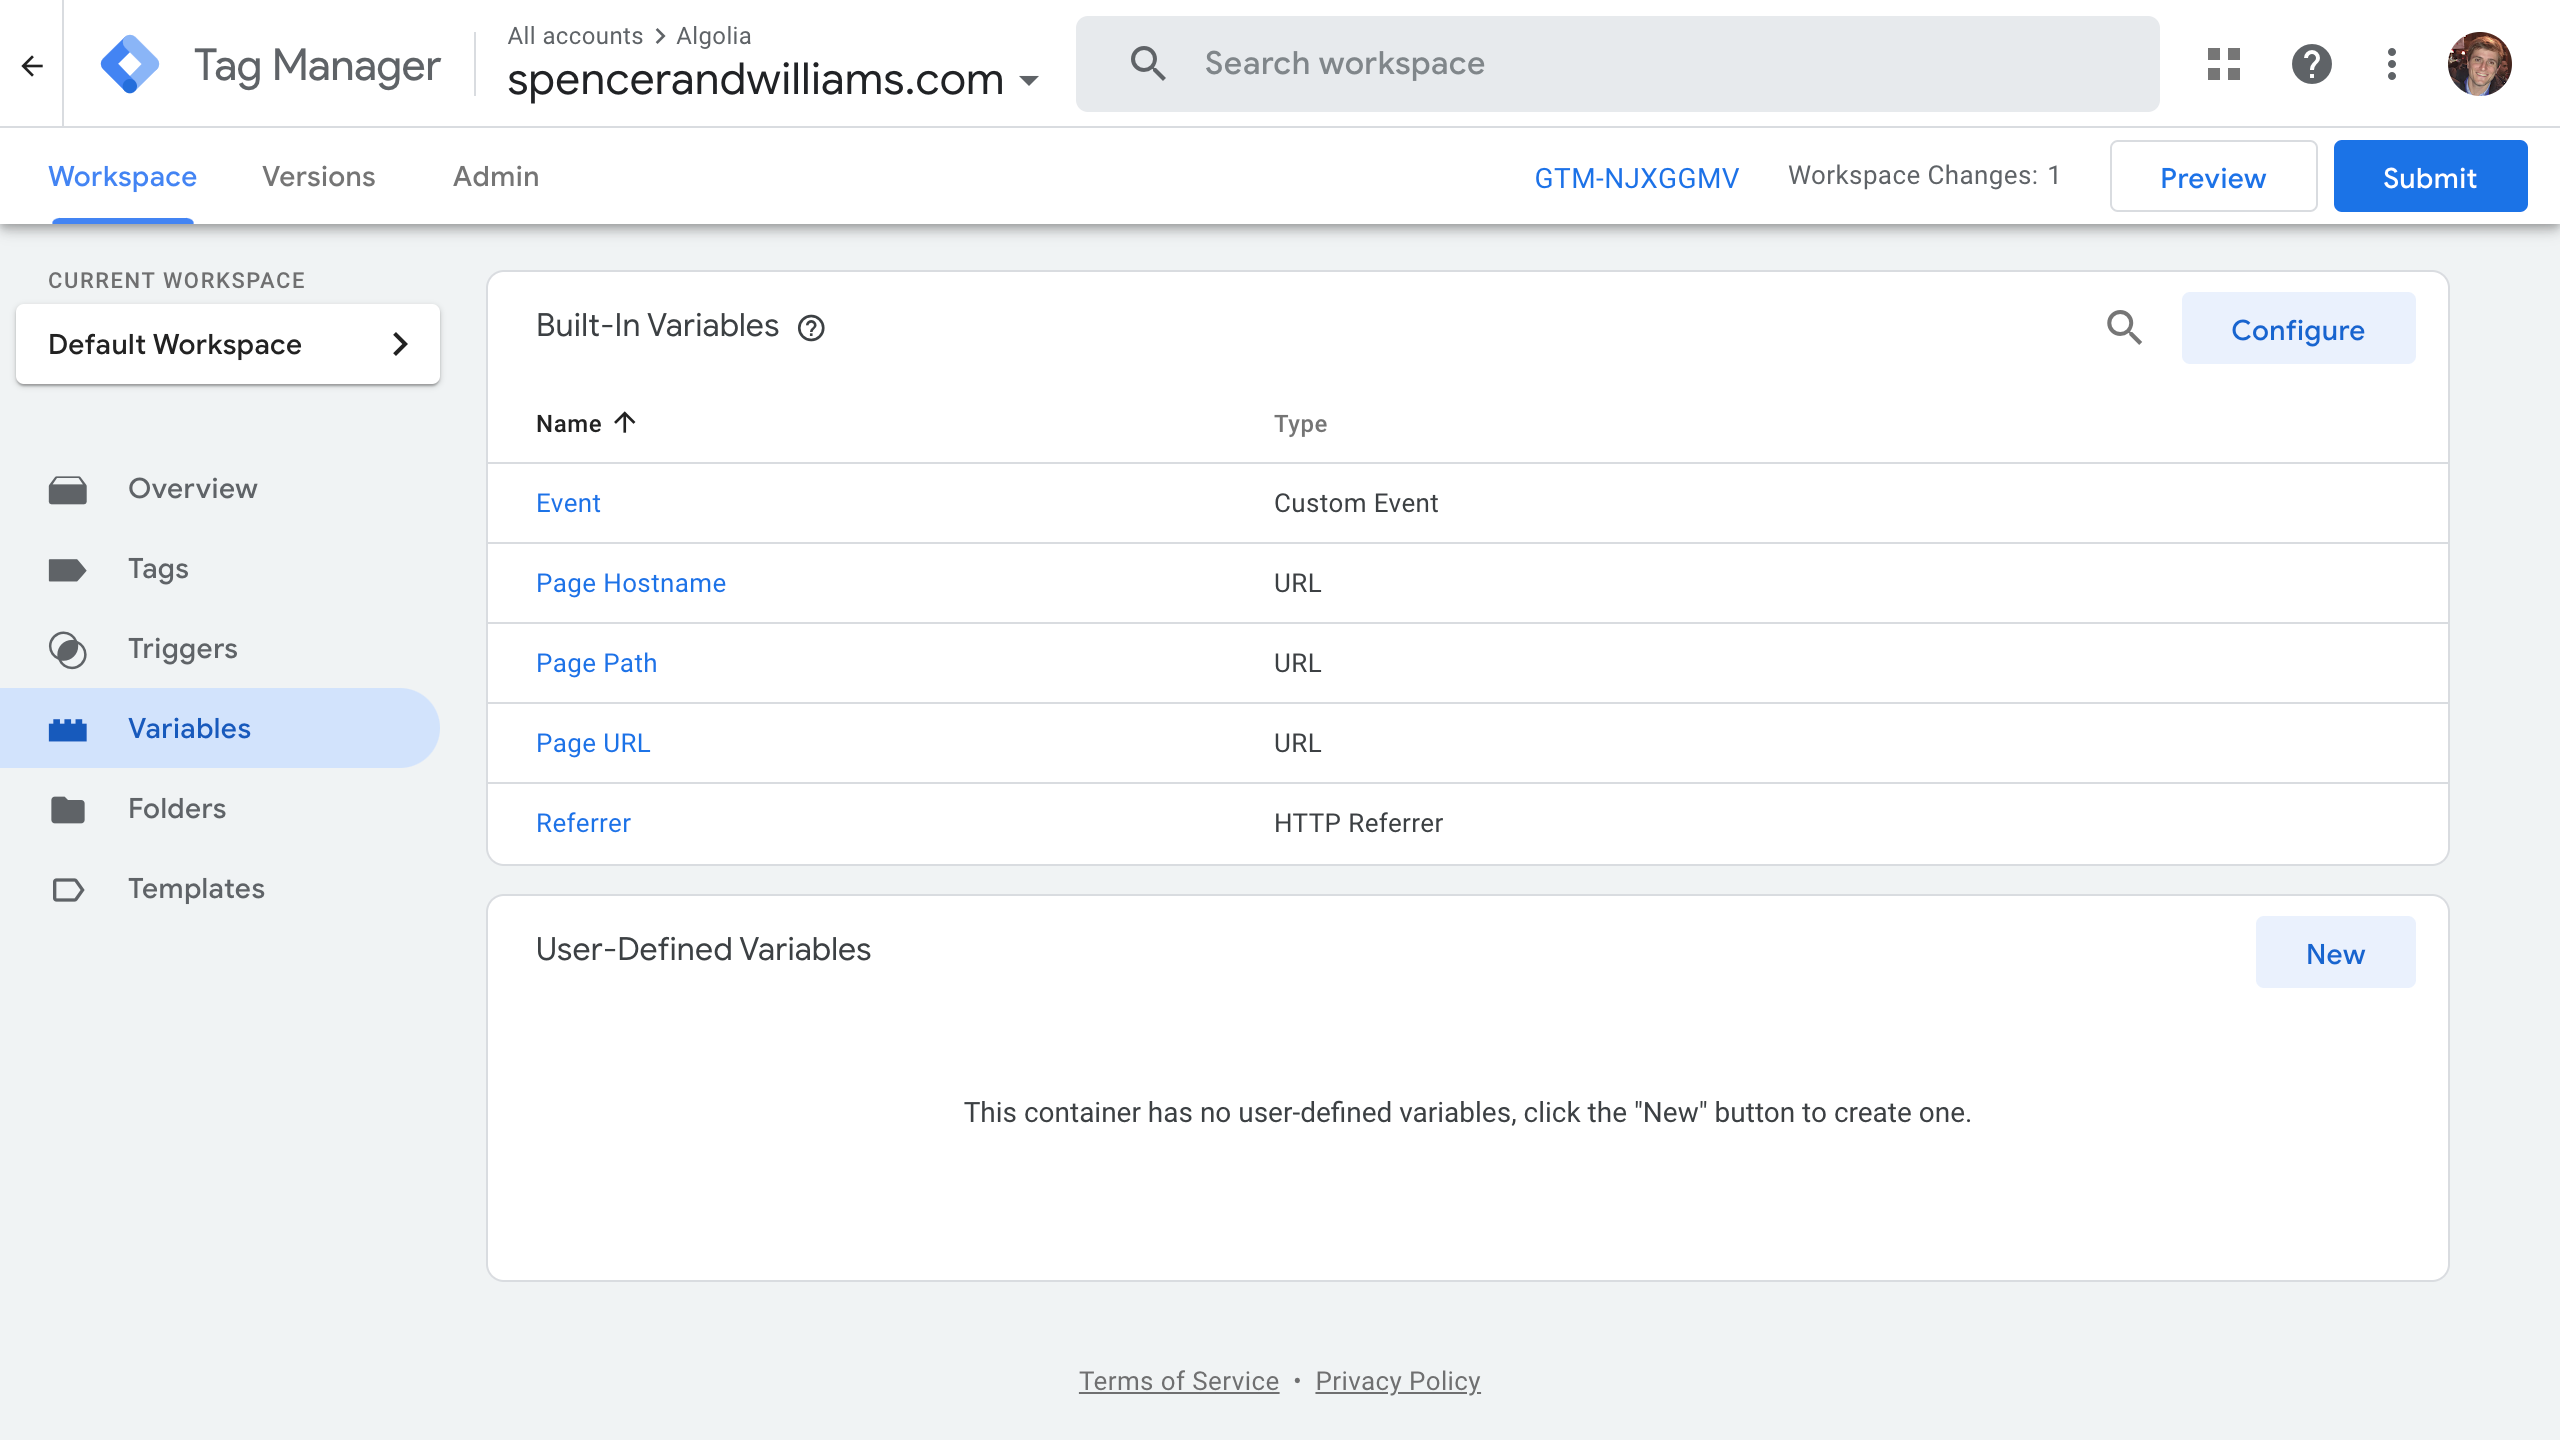
Variables
Required HTML attributes for hits
This guide expects your Algolia Hits to be rendered with the following data attributes within your HTML:
data-insights-object-idwith the actualobjectIDvaluedata-insights-positionwith the position of the hit within the results list (not index-based, so starts with 1). For InstantSearch implementations, this position is available through thehit.__positionattributedata-insights-query-idwith the queryID related to the search. For InstantSearch implementations, this queryID is available through thehit.__queryIDattribute
1
2
3
4
5
6
7
<div class=”my-hit”
 data-insights-object-id="{{hit.objectID}}"
 data-insights-position="{{hit.__position}}"
 data-insights-query-id="{{hit.__queryID}}"
>
  <!-- ... -->
</div>
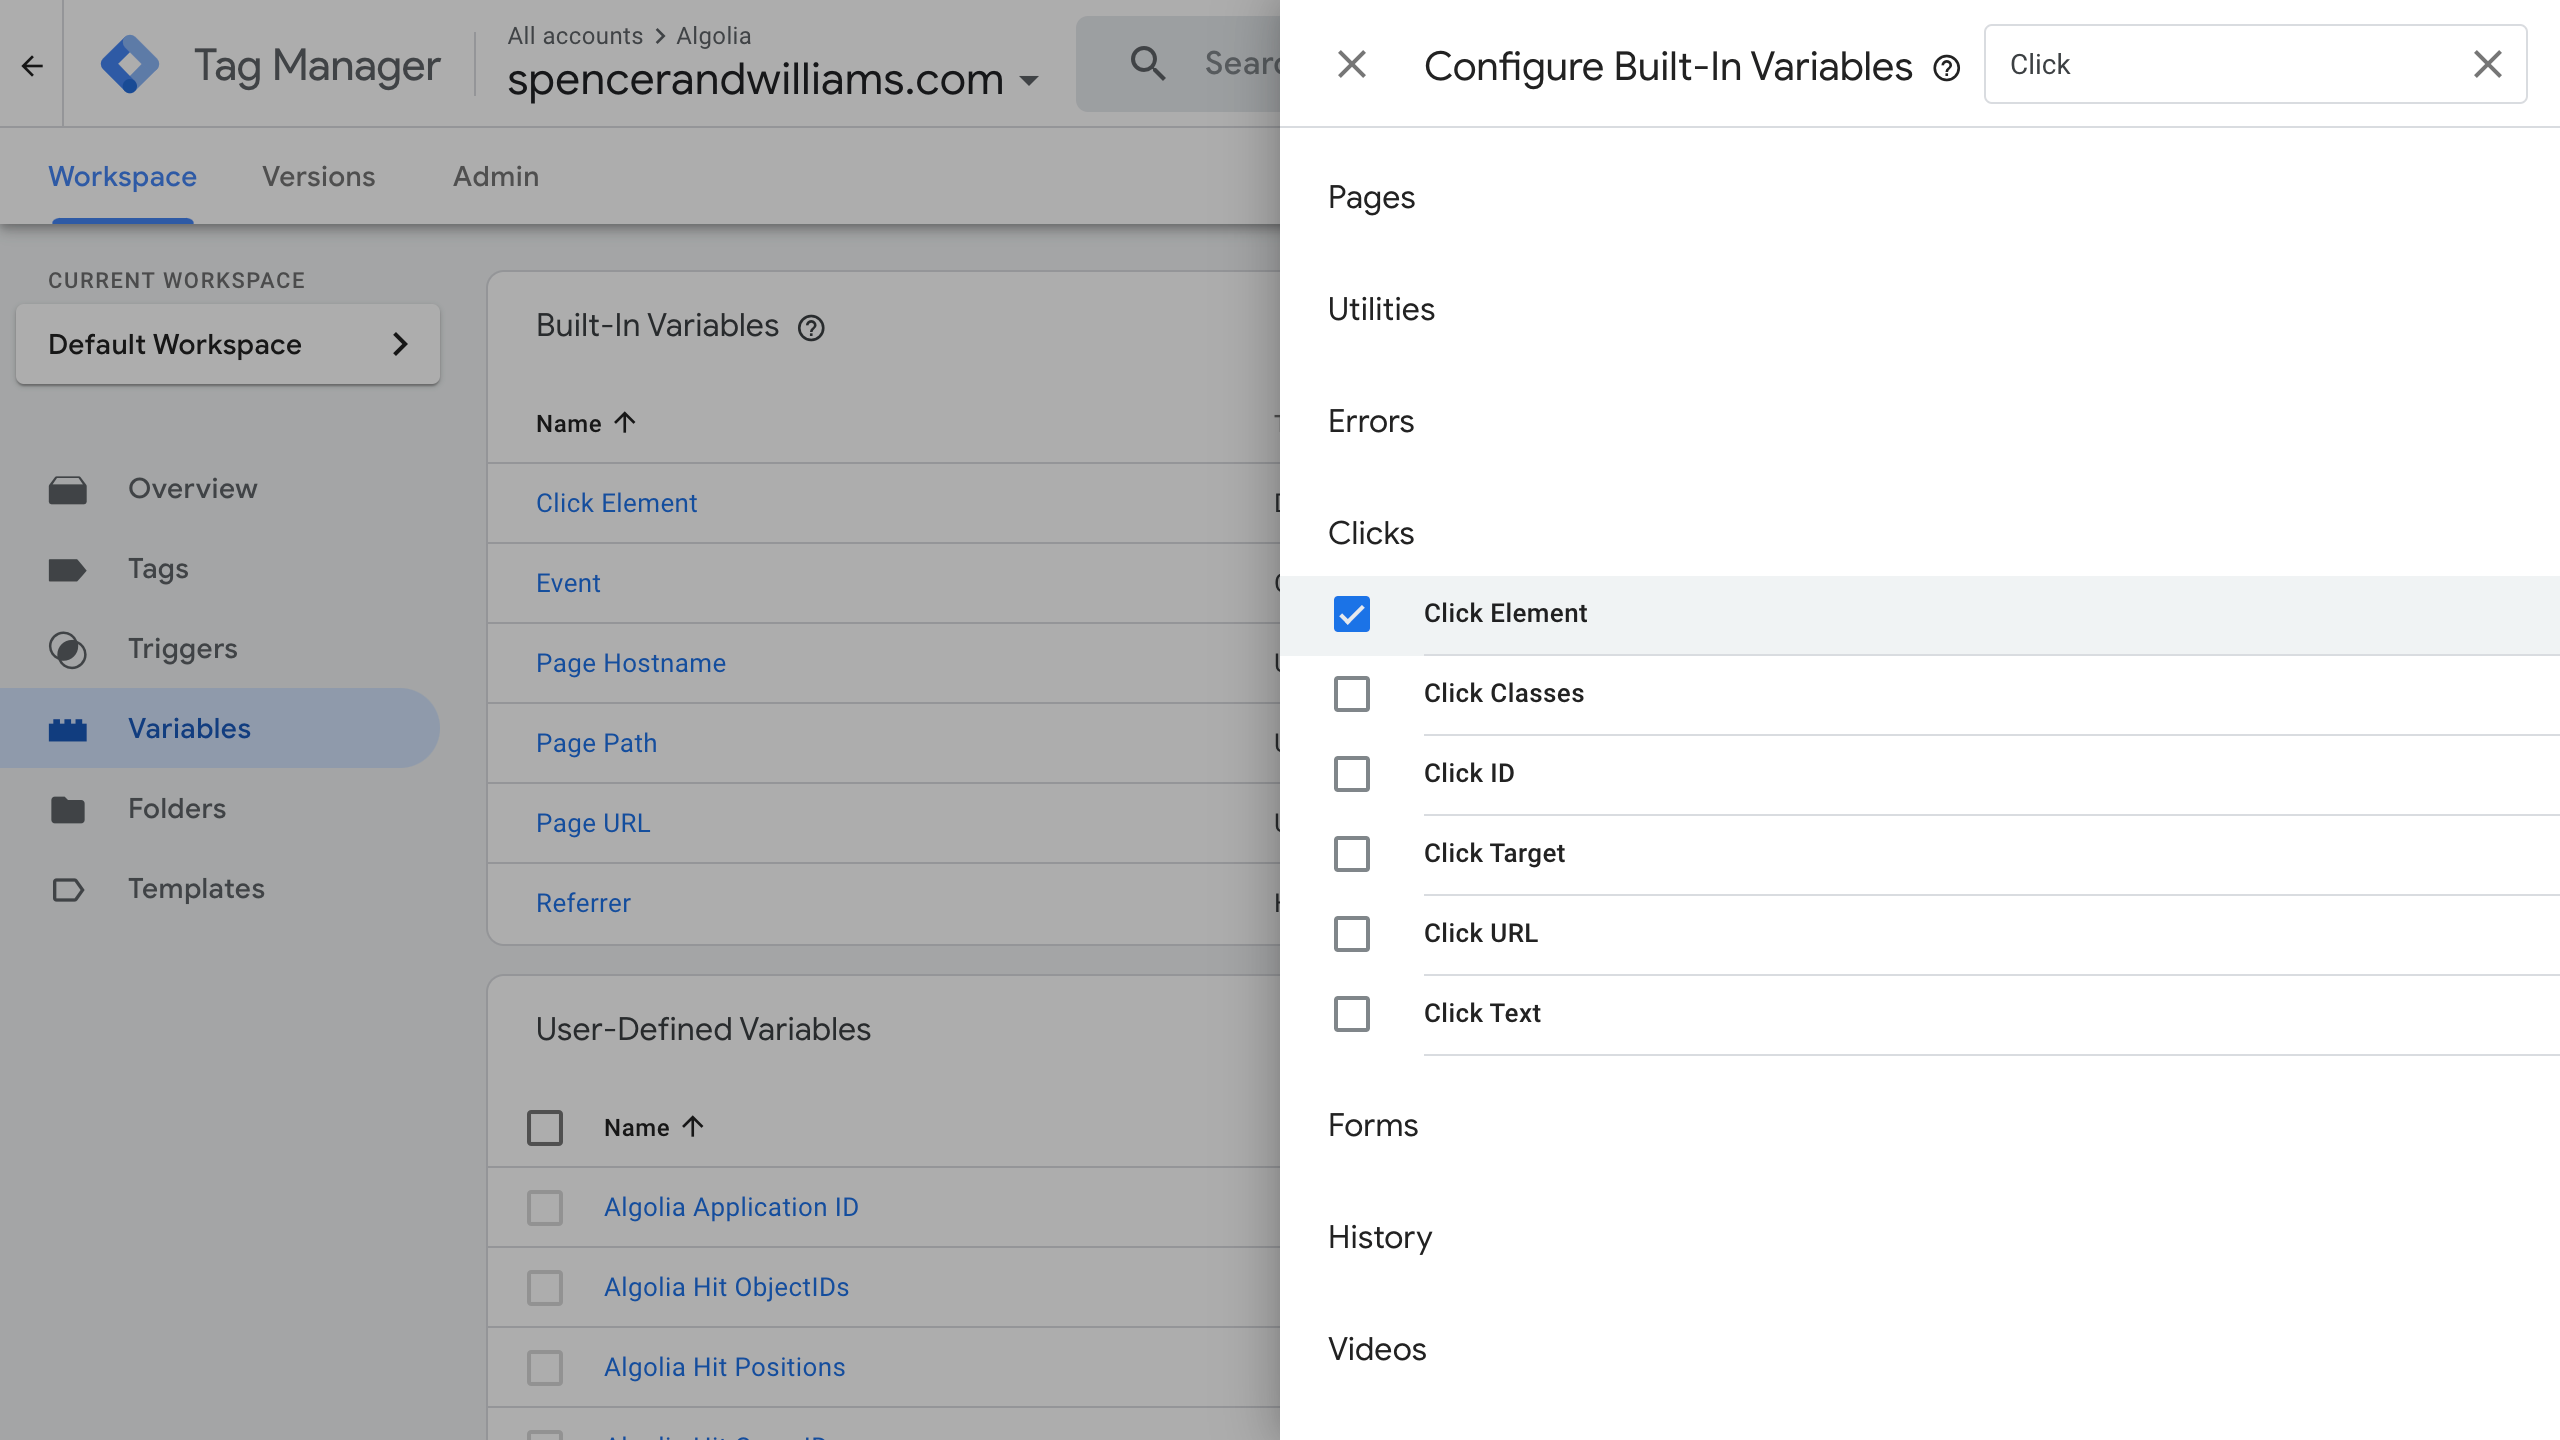
Add built-in variable
First, add the built-in variable Click Element. This variable is used to retrieve the data associated with the various clicks.
Create user-defined variables
For events to be sent with the correct information from your Algolia implementation, you need to add variables in the User-Defined Variables section:
- A “Your Algolia Application ID” constant
- A “Your Algolia Search API Key” constant
- A “Find closest” custom JavaScript helper
- An “Algolia Hit ObjectIDs” custom JavaScript helper
- An “Algolia Hit Positions” custom JavaScript helper
- An “Algolia Hit QueryID” custom JavaScript helper
- An “Algolia Displayed Object IDs” Data-Layer variable
- An “Algolia UserToken” Data-Layer variable
- An “Algolia Index Name” Data-Layer variable
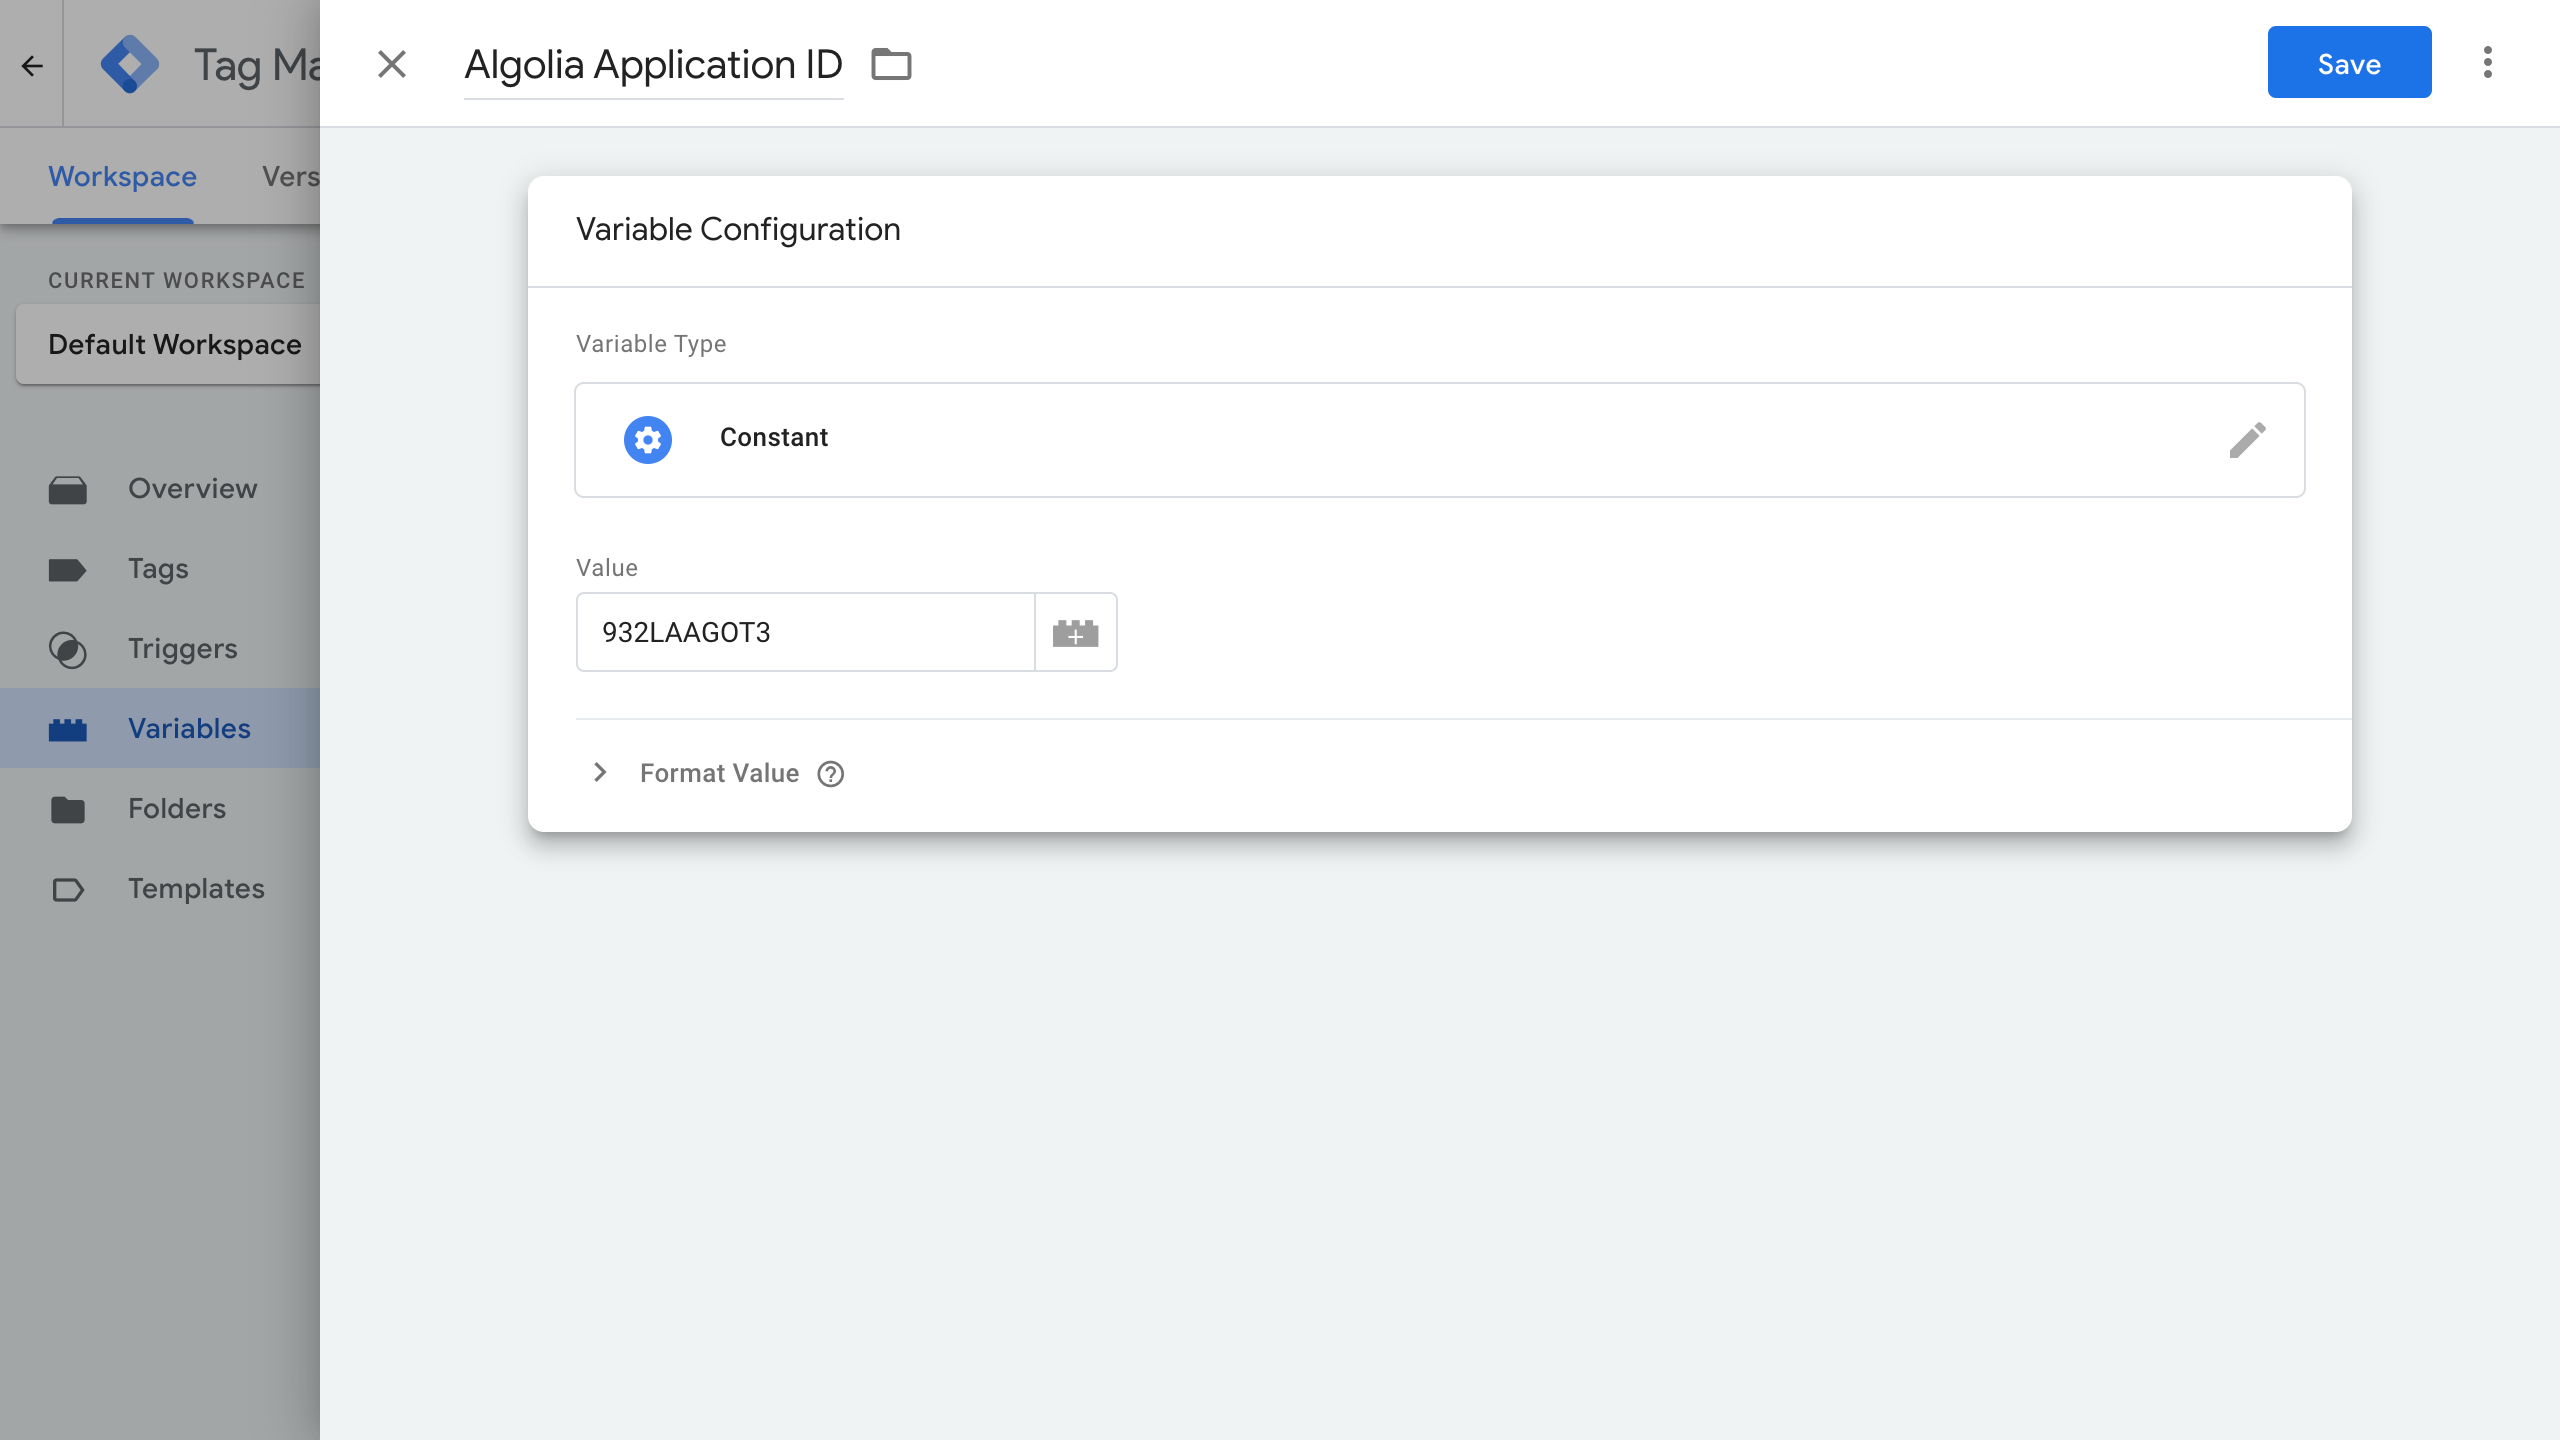
Algolia application ID and search API key
In order to create user-defined variables, you need to go to the Variables section of your workspace and click on the New button in the User-Defined Variables sub-section.
To create your Algolia Application ID and your Algolia Search API Key as user-defined variables, you need to click on the New button.
From there, you need to name the Untitled Variable as “Algolia Application ID” and choose the variable type as Constant under the Utilities sub-section. Copy and paste your Algolia Application ID and save.

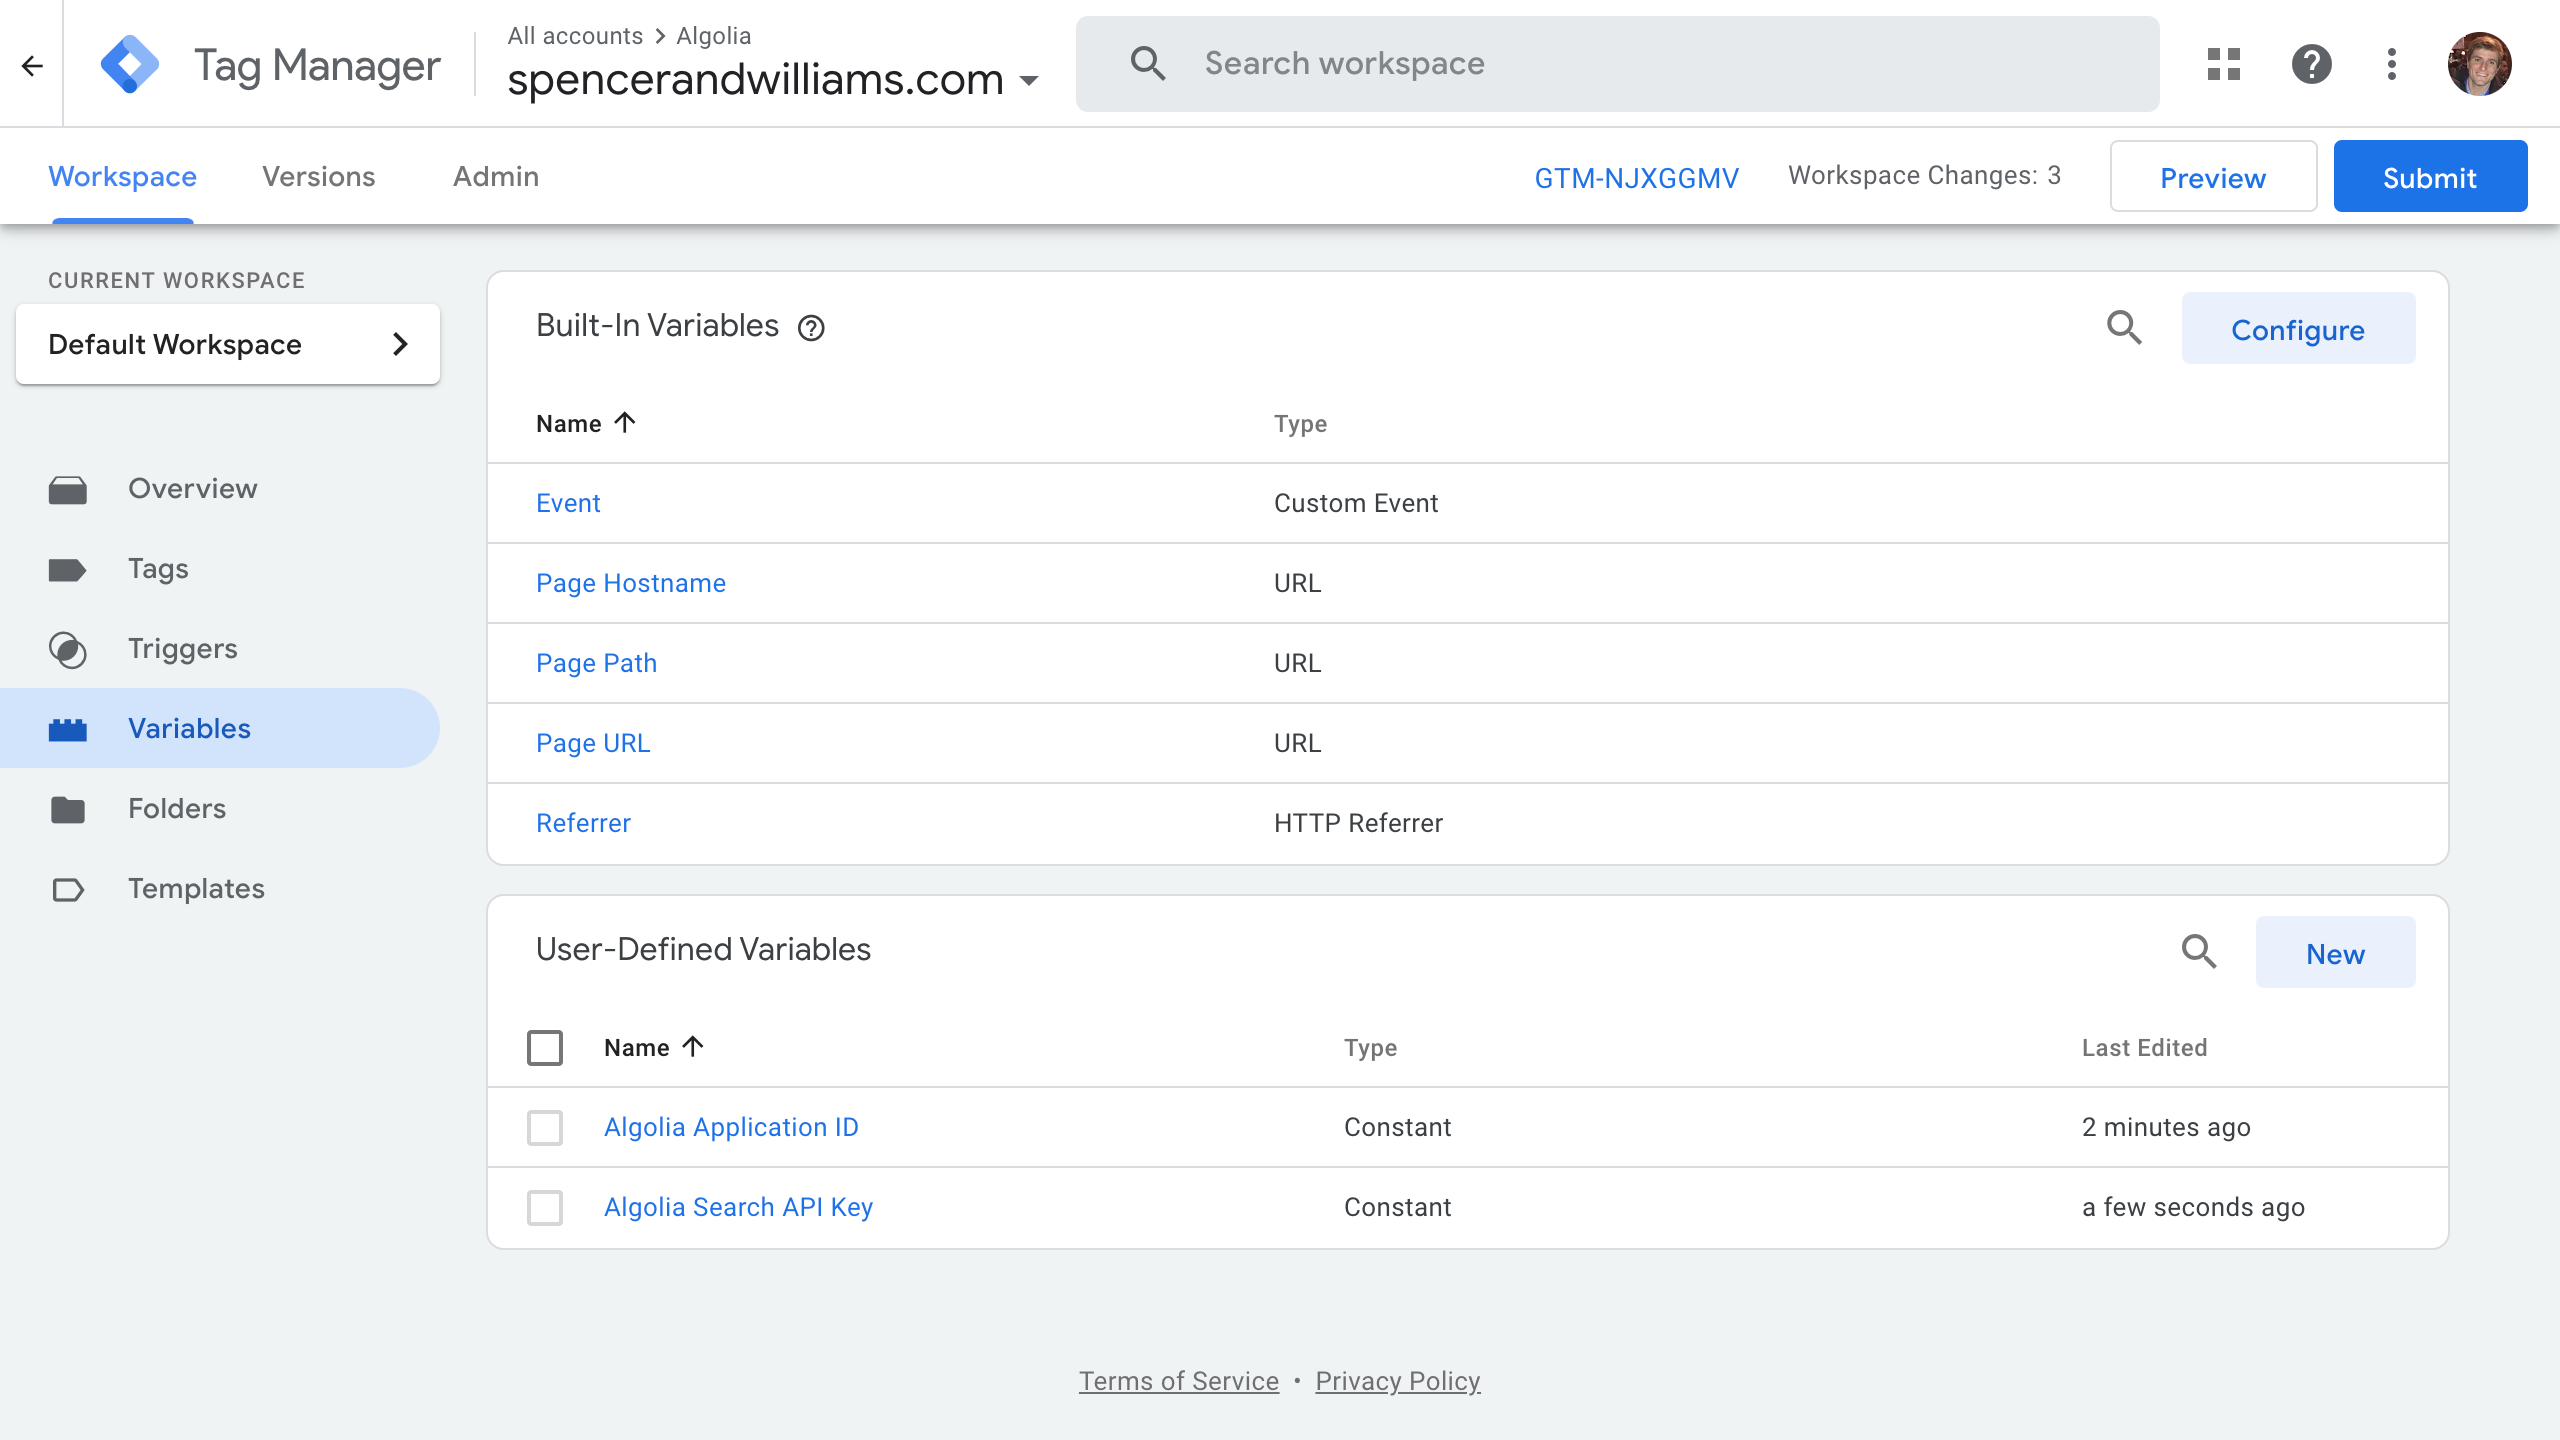
Repeat the exact same steps but this time name the Untitled Variable as “Algolia Search API Key” and copy and paste your Algolia Search API Key from the dashboard.
All the relevant variables should now be created and ready for use.
Next, you need to create the following user-defined variables with the Custom JavaScript type to capture objectIDs, queryID, userToken and send proper events.
Find closest
To target elements based on their selection, you need to create a user-defined variables section with the Custom JavaScript type and name it “Find closest” with the following code to paste in the custom JavaScript section:
1
2
3
4
5
6
7
8
9
function() {
  return function(target, selector) {
    while (!target.matches(selector) && !target.matches('body')) {
      target = target.parentElement;
    }

    return target.matches(selector) ? target : undefined;
  }
}
Click Save to save your changes.
In the GTM interface, a new variable called {{Find closest}} is available and has the nearest element matching the selector.
Algolia Hit ObjectIDs
To ensure you capture the objectID, you need to create a custom JavaScript variable and name it Algolia Hit ObjectIDs with the following code to paste in the custom JavaScript section:
1
2
3
4
5
6
7
function() {
  var element = {{Find closest}}({{Click Element}}, '[data-insights-query-id]');

  return typeof element !== 'undefined'
    ? element.getAttribute('data-insights-query-id')
    : undefined;
}
Click Save to save your changes.
In the GTM interface, a new variable called {{Algolia Hit ObjectIDs}} is available, which gives you the objectIDs of the hits you want to capture for a click or a conversion.
Algolia Hit Positions
To ensure you capture the position of the objectID, you need to create a custom JavaScript variable and name it Algolia Hit Positions with the following code to paste in the custom JavaScript section:
Click Save to save your changes.
In the GTM interface, a new variable called {{Algolia Hit Positions}} is available, which gives you the position of the objectID you want to capture for a click or a conversion.
Algolia Hit QueryID
To capture the queryID you need to create a custom JavaScript variable and name it Algolia Hit QueryID with the following code to paste in the custom JavaScript section:
1
2
3
4
5
6
7
function() {
  var element = {{Find closest}}({{Click Element}}, '[data-insights-query-id]');

  return typeof element !== 'undefined'
    ? element.getAttribute('data-insights-query-id')
    : undefined;
}
Click Save to save your changes.
In the GTM interface, a new variable called {{Algolia Hit QueryID}} is available, which gives you the queryID related to the hit. This is the identifier of the search query that returned the hit.
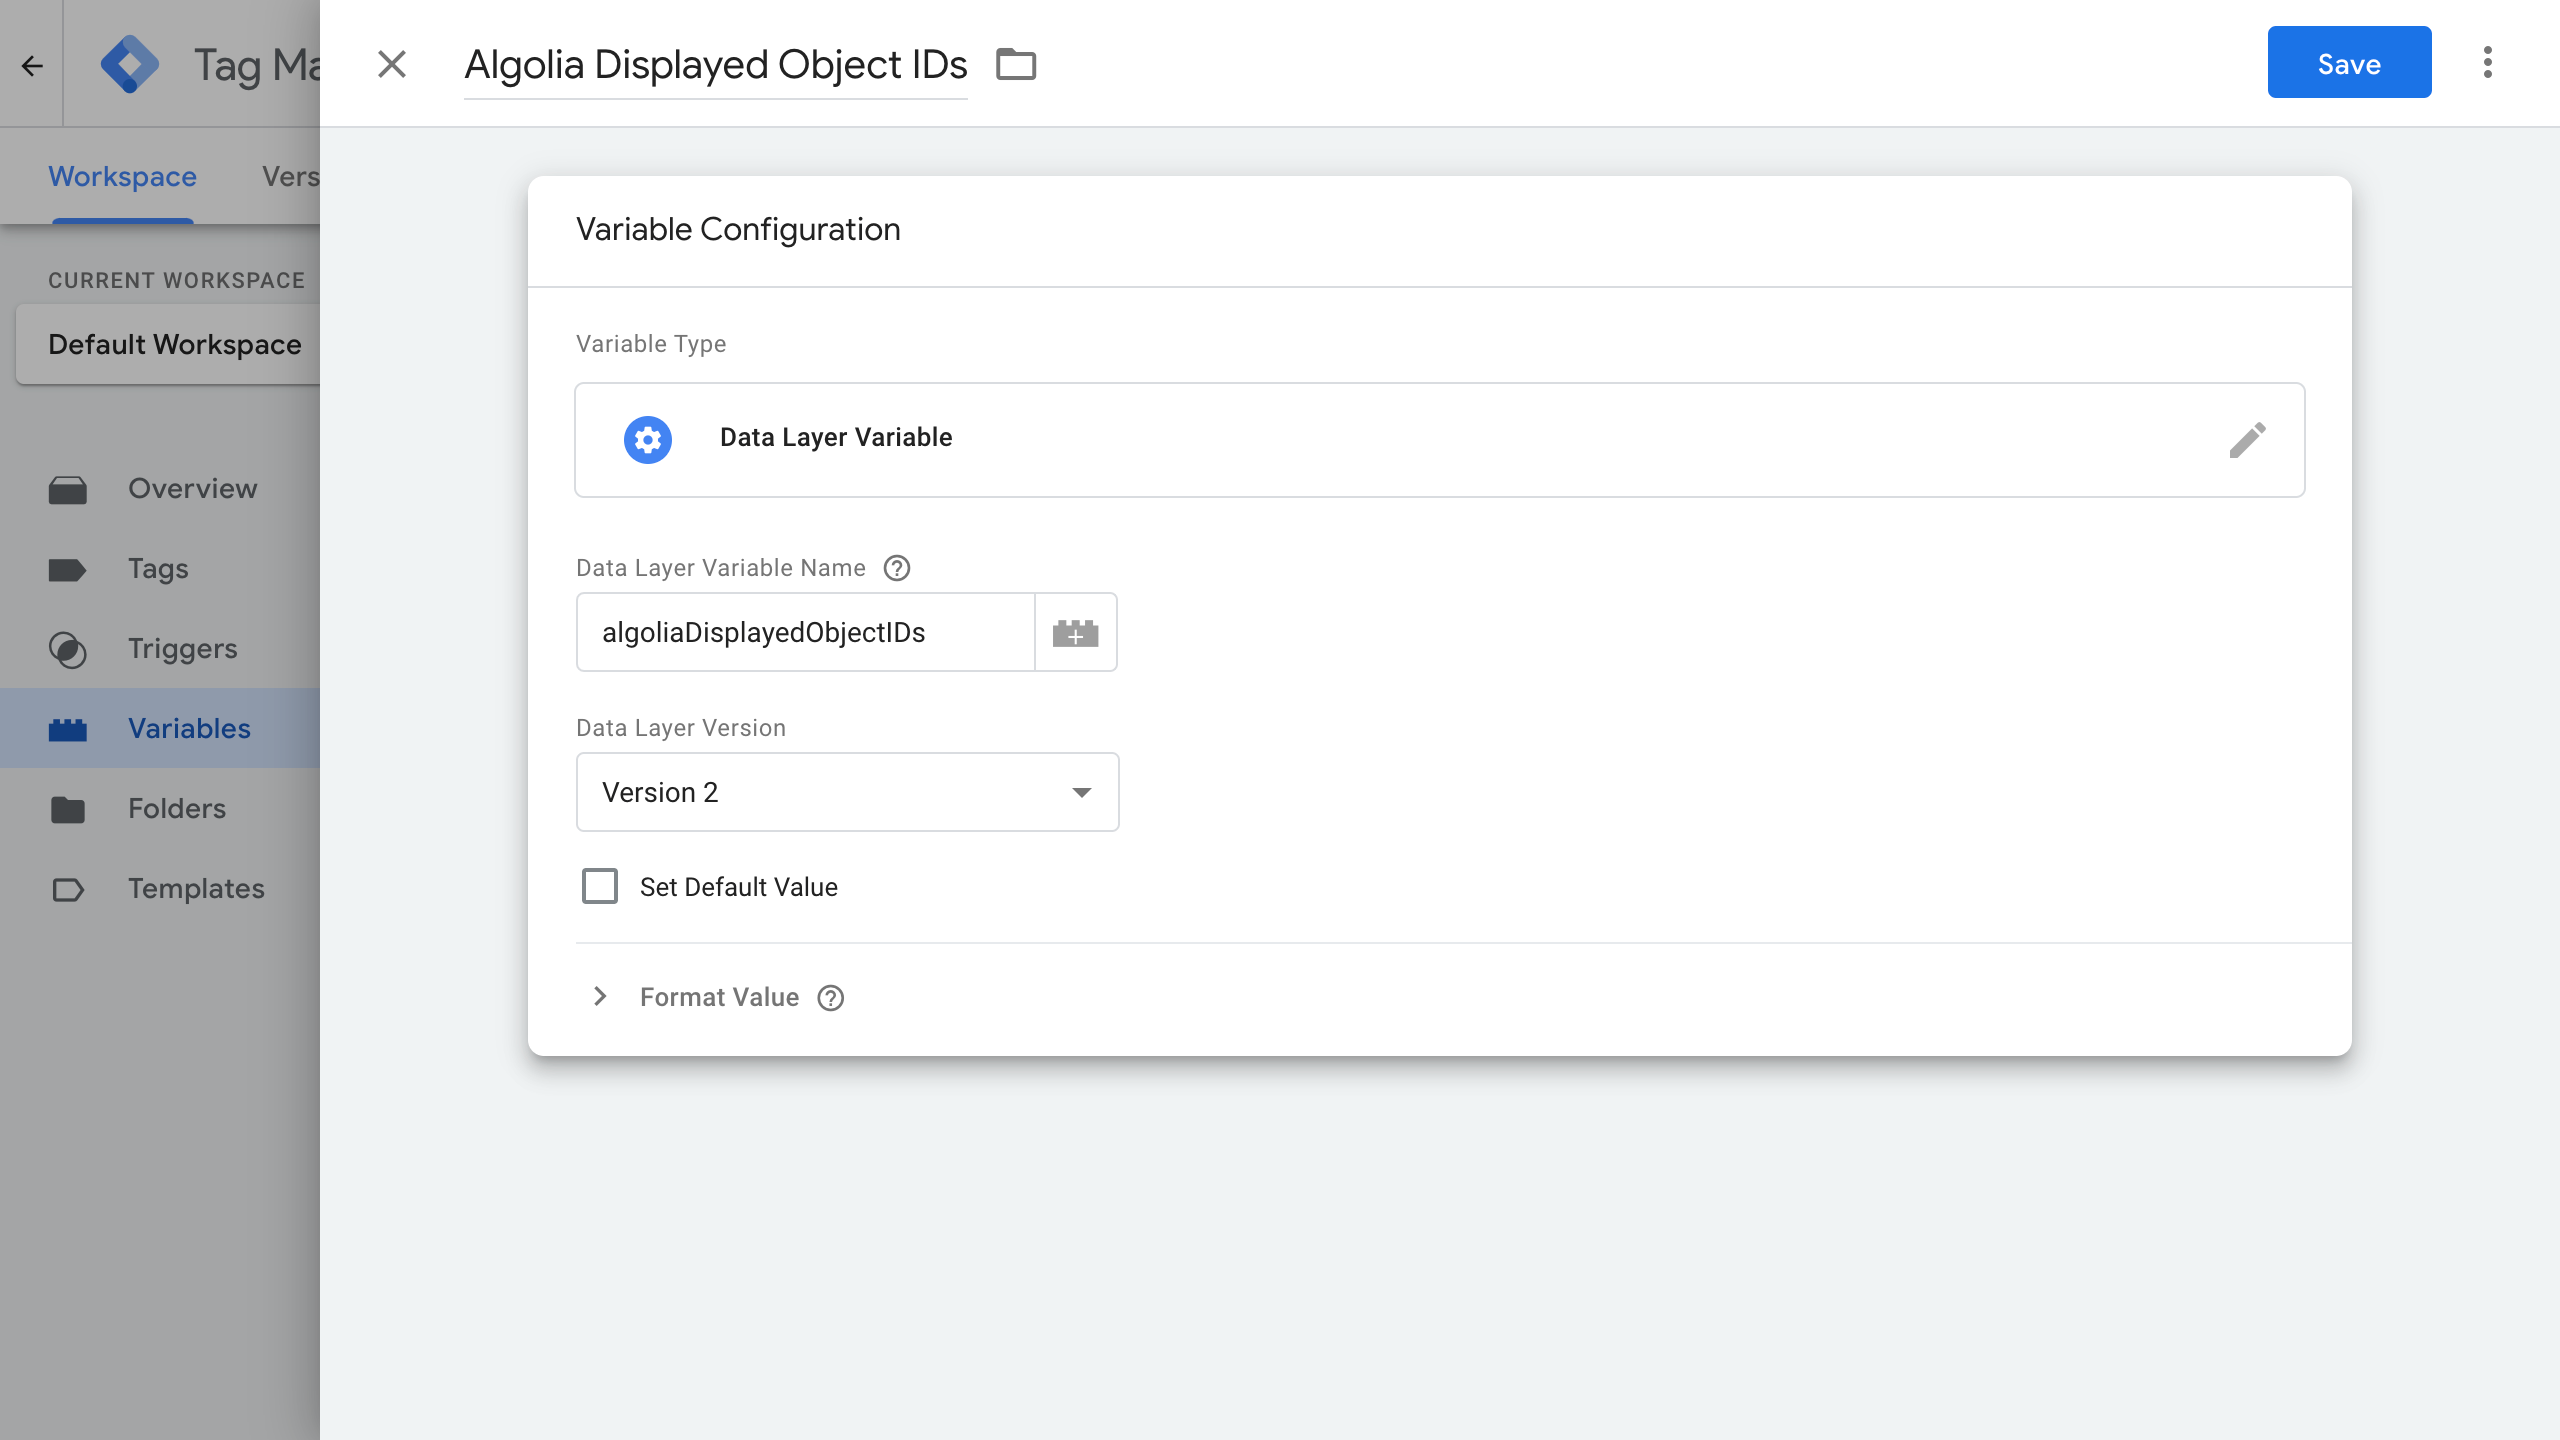
Algolia Displayed Object IDs
To capture the ObjectID displayed on the product detail pages, the best is to rely on the Data-Layer. You need to add a new “Data Layer Variable” named “Algolia Displayed Object IDs” and set the “Data Layer Variable Name” to “algoliaDisplayedObjectIDs”.
In the HTML code of your product detail page, ensure the algoliaDisplayedObjectIDs is set with the following snippet of code:
1
2
3
4
window.dataLayer = window.dataLayer || []
window.dataLayer.push({
  algoliaDisplayedObjectIDs: '<comma separated list of objectIDs displayed>' // 1 objectID in most cases
})
Algolia UserToken
To capture the current visitor’s user token, the best is to rely on the Data-Layer. You need to add a new “Data Layer Variable” named “Algolia UserToken” and set the “Data Layer Variable Name” to “algoliaUserToken”.

In your HTML code, ensure the “algoliaUserToken” is set with the following snippet of code:
1
2
3
4
window.dataLayer = window.dataLayer || []
window.dataLayer.push({
  algoliaUserToken: '<The UserToken of the current user>' // uniquely identifies the current visitor
})
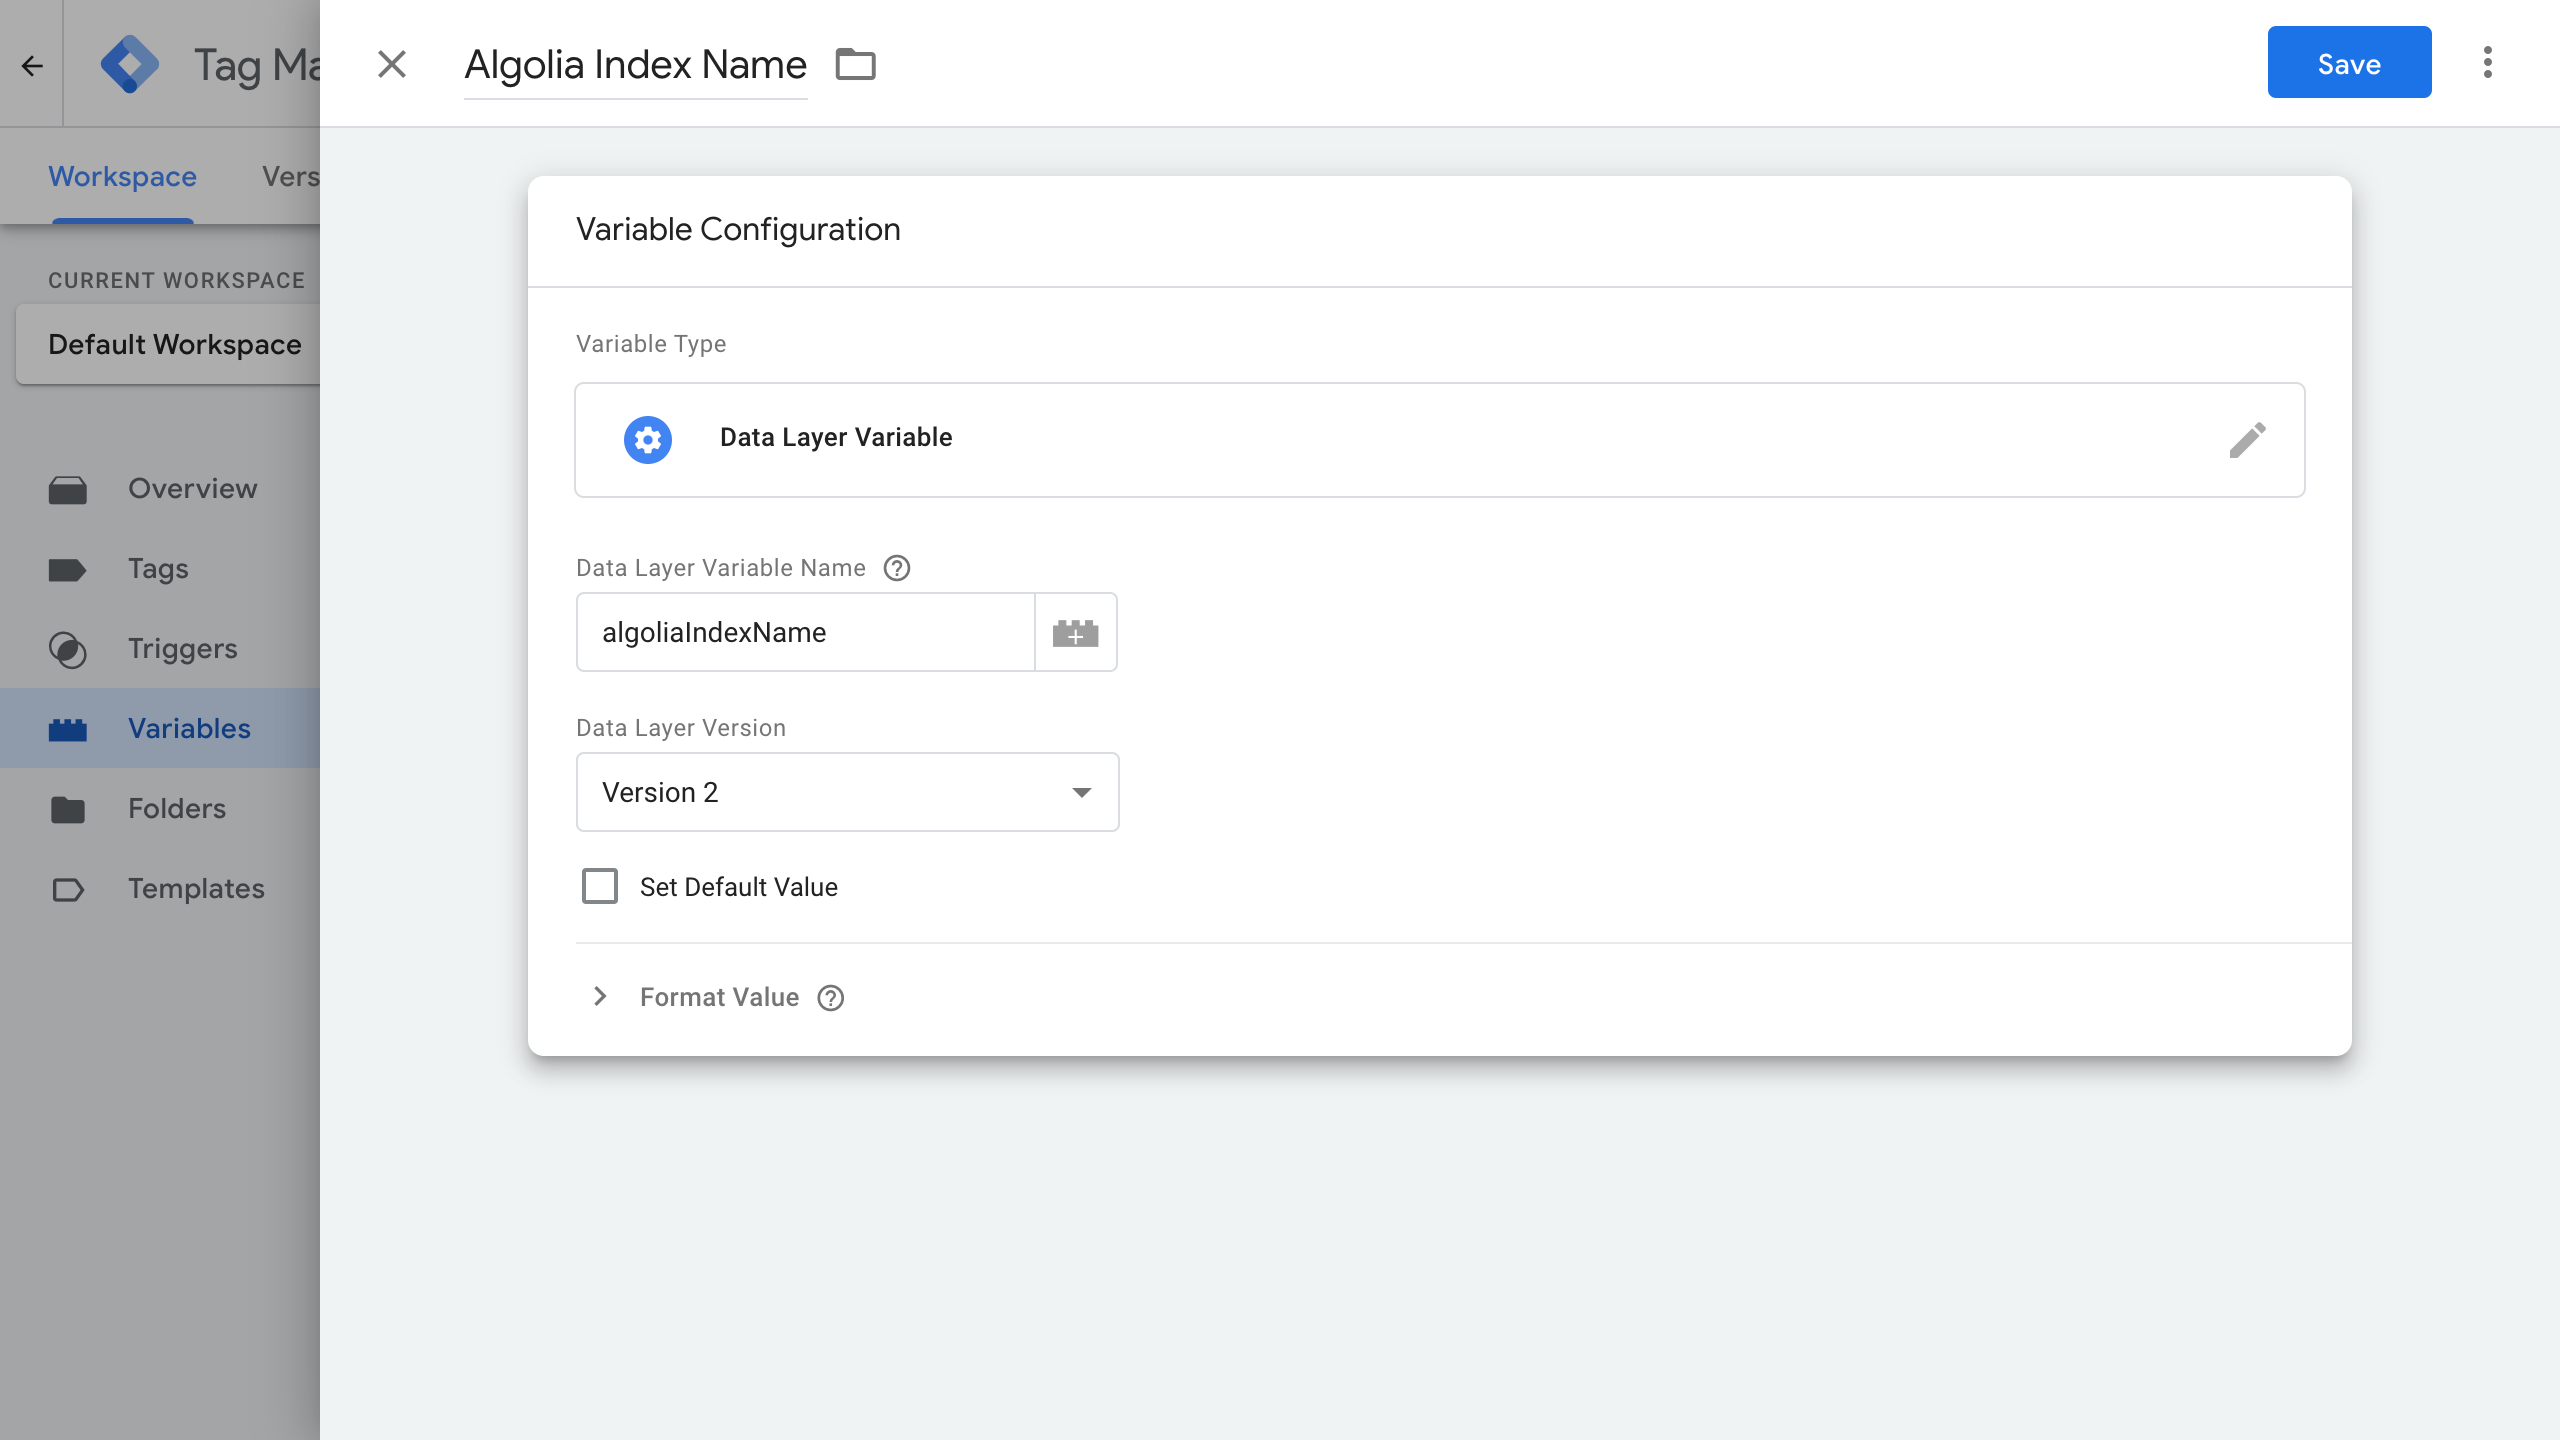
Algolia Index Name
To capture the Algolia index used, the best is to rely on the Data-Layer. You need to add a new “Data Layer Variable” named “Algolia Index Name” and set the “Data Layer Variable Name” to “algoliaIndexName”.
In your HTML code, ensure the “algoliaIndexName” is set with the following snippet of code:
1
2
3
4
window.dataLayer = window.dataLayer || []
window.dataLayer.push({
  algoliaIndexName: '<The index used for the search>'
})
Triggers
In regards to Triggers, this documentation expects you to have your triggers in your Google Tag Manger Workspace up and running.
You should have triggers when your visitors view a product detail page and when they click on an Algolia hit. You can learn more about triggers if you’re not too familiar with them.
In short, triggers listen to events happening on the app to trigger tags.
Tags
Tags should specify which Insights method to call when triggered. Each Insights method is represented by a tag in GTM.
Setup your initialization tag (mandatory)
This step is mandatory for initializing the connection with the Insights API. You need to create a new tag in the Tags section of your workspace and select Algolia Search Insights with the right Init Options.
In the dropdown, select the {{Algolia Application ID}} and {{ Algolia Search API Key}}, set up as user-defined variables. You want to trigger this tag on all pages, hence in the Triggering section below, you need to select
“All Pages” as the triggering option.
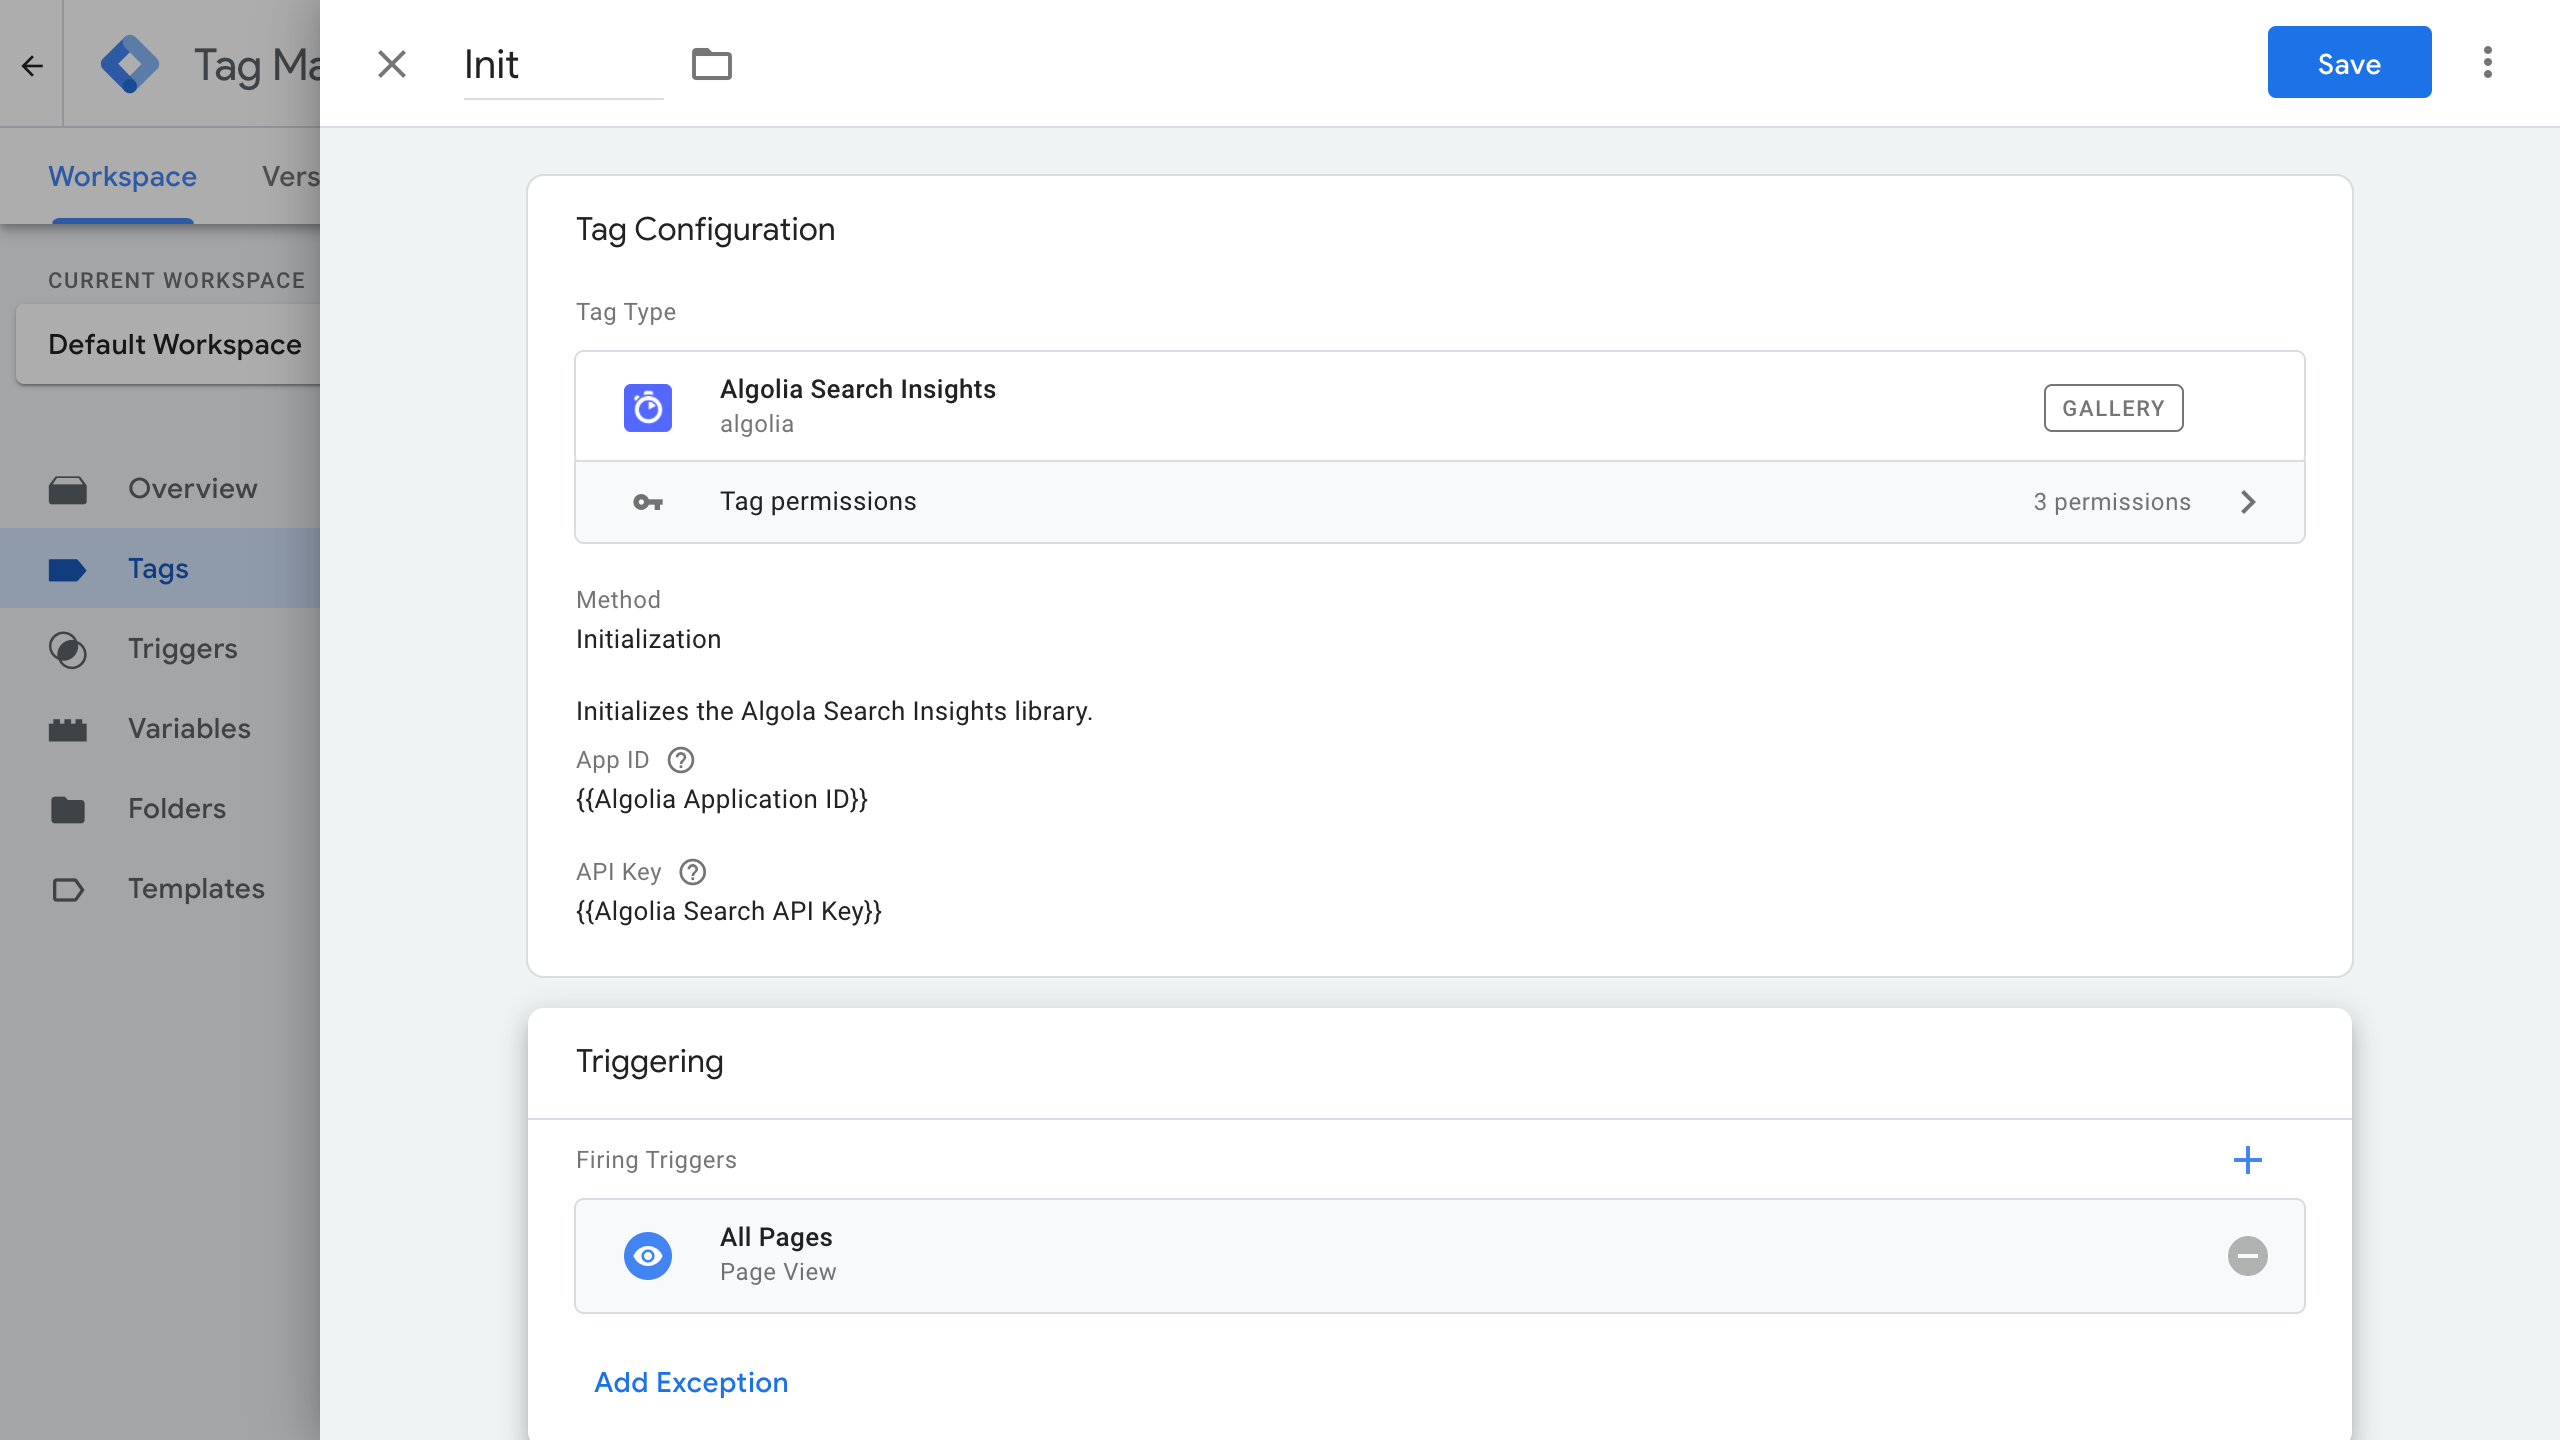
In the GTM interface, a new tag called “Init” is available.
Setup your click tags
Clicked Object IDs After Search
This method refers to Clicked Object IDs After Search from the Insights API which sends a click event to capture a query and its clicked items and positions. To setup this click tag, you need to create a new tag in the Tags section of your workspace, select Algolia Search Insights with the appropriate Event Options below and choose the following Triggering option:
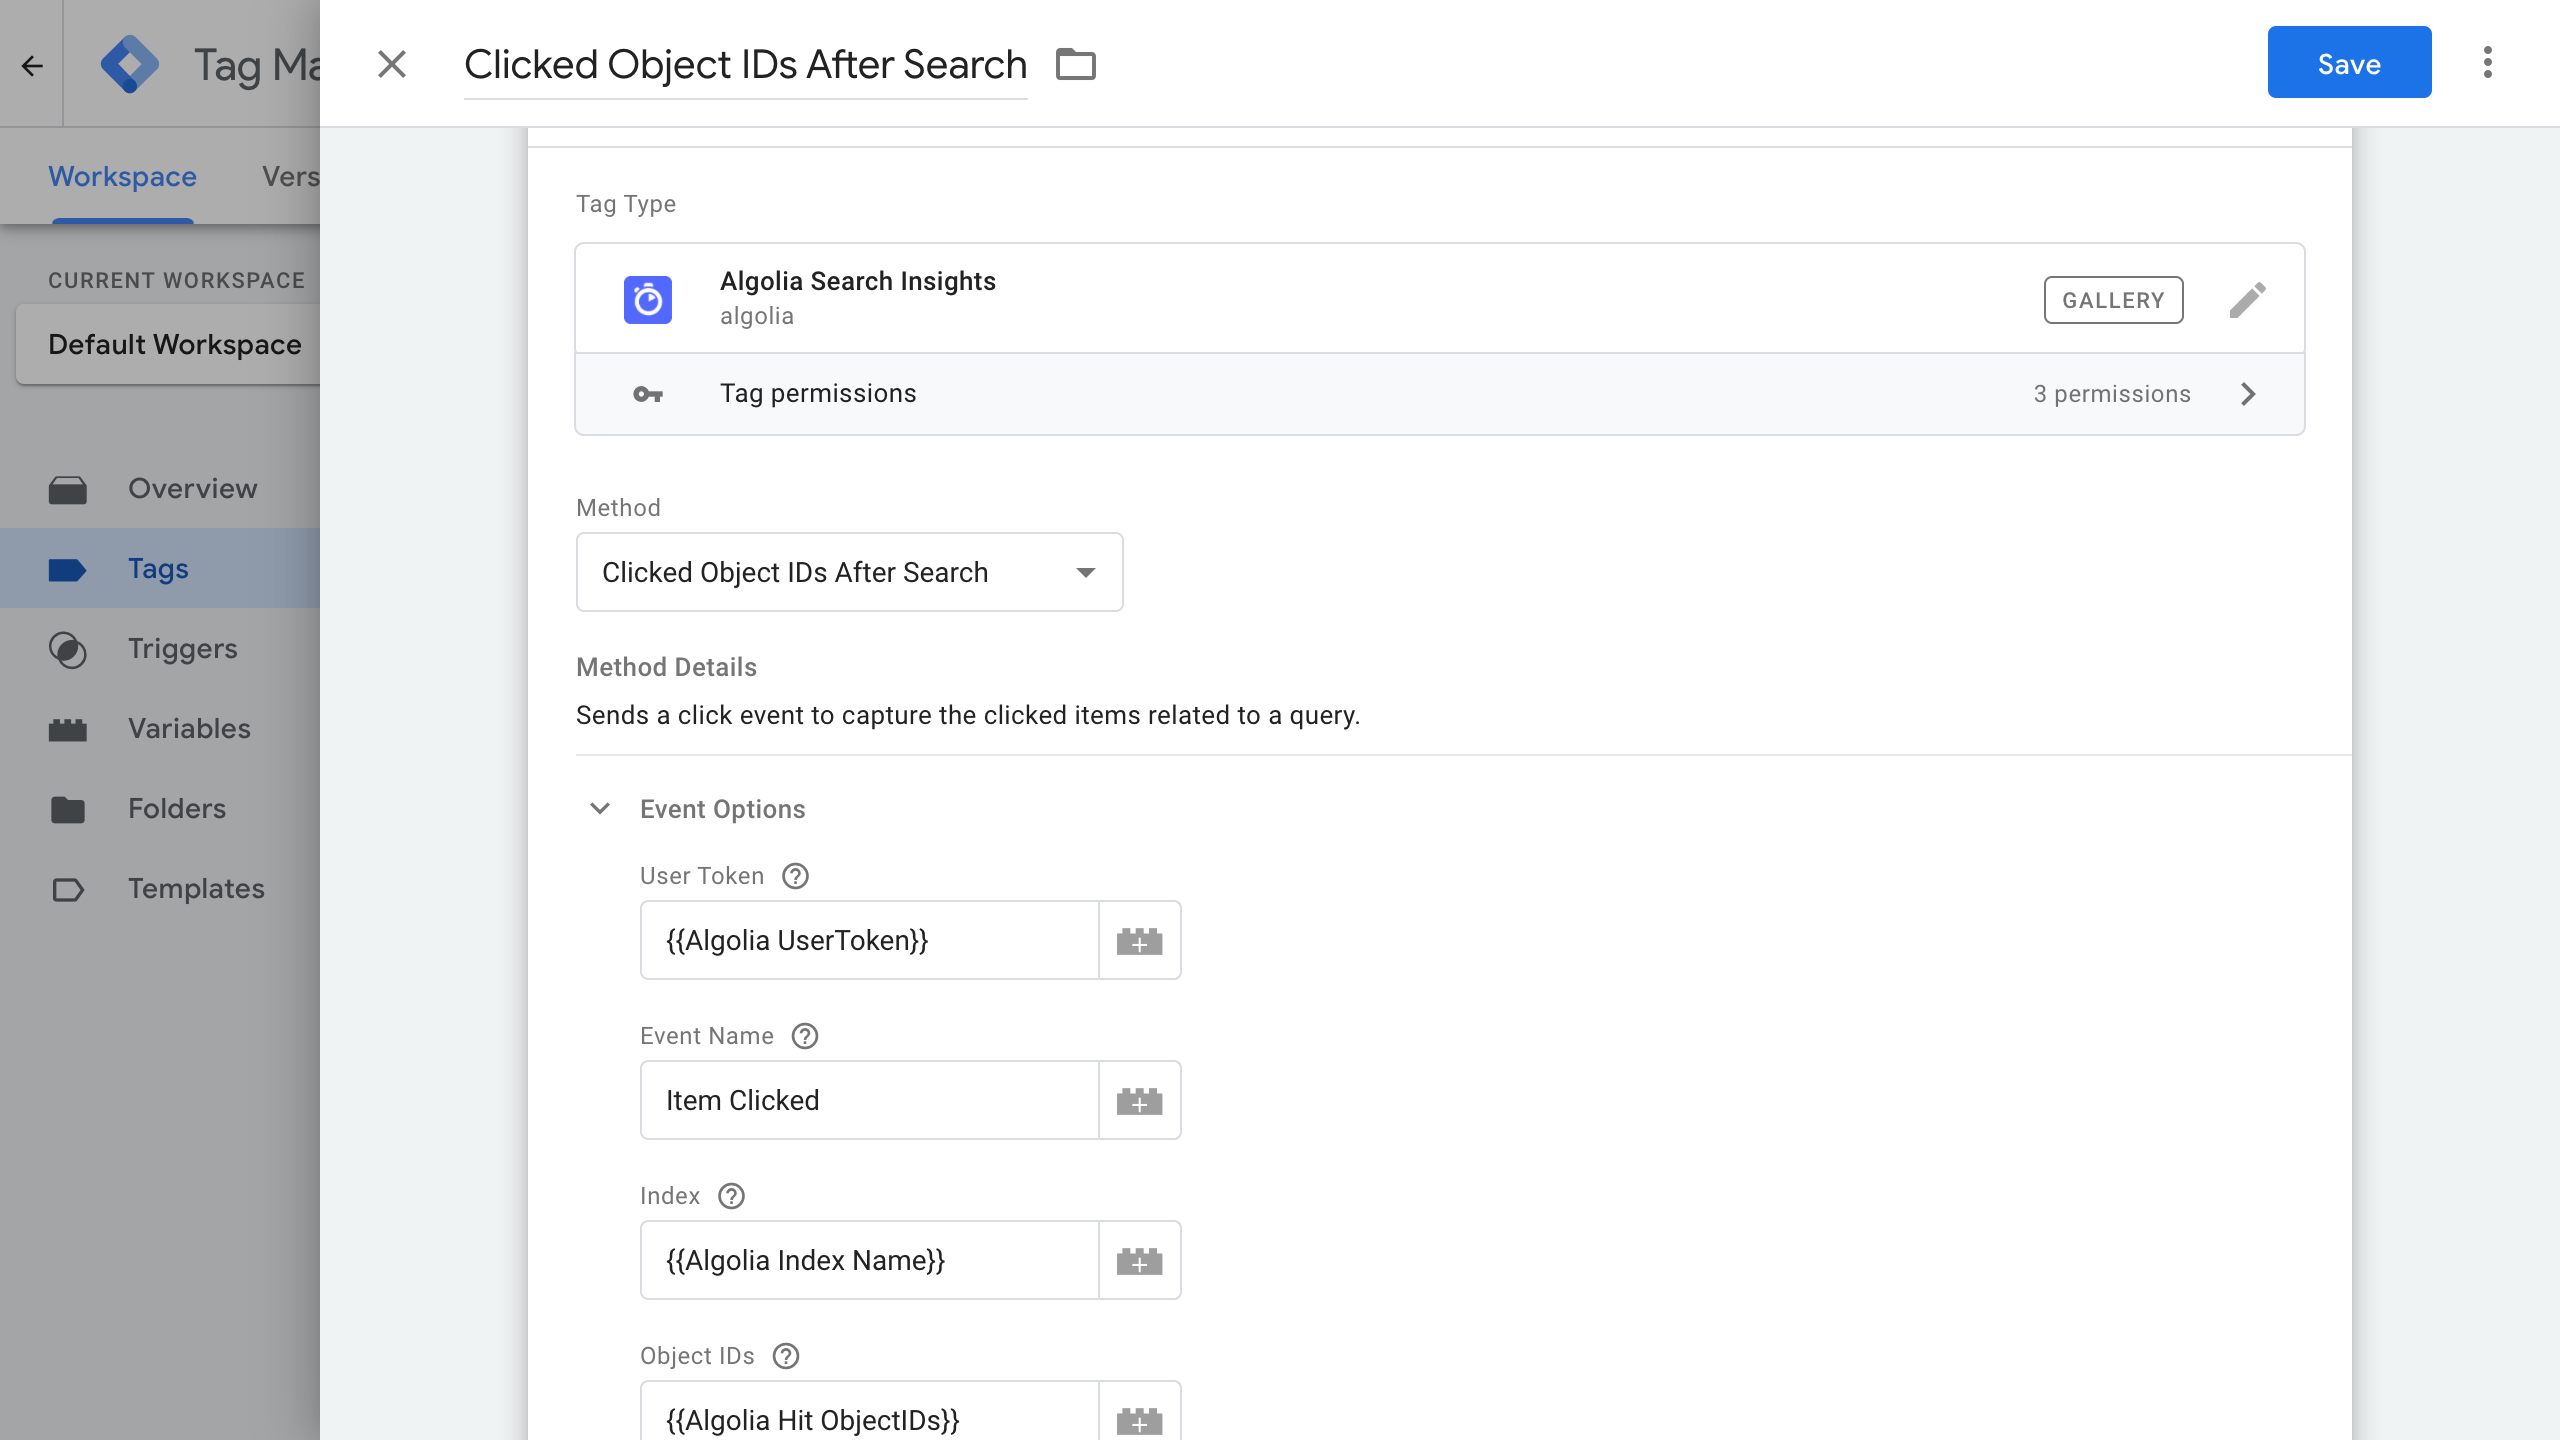
In the GTM interface, a new tag called Clicked ObjectIDs After Search is available.
Clicked Object IDs
This method refers to Clicked Object IDs from the Insights API which sends a click event to capture a query and its clicked items and positions regardless of the query associated with it. To setup this click tag, you need to create a new tag in the Tags section of your workspace and select Algolia Search Insights with the appropriate Event and Triggering Options below:
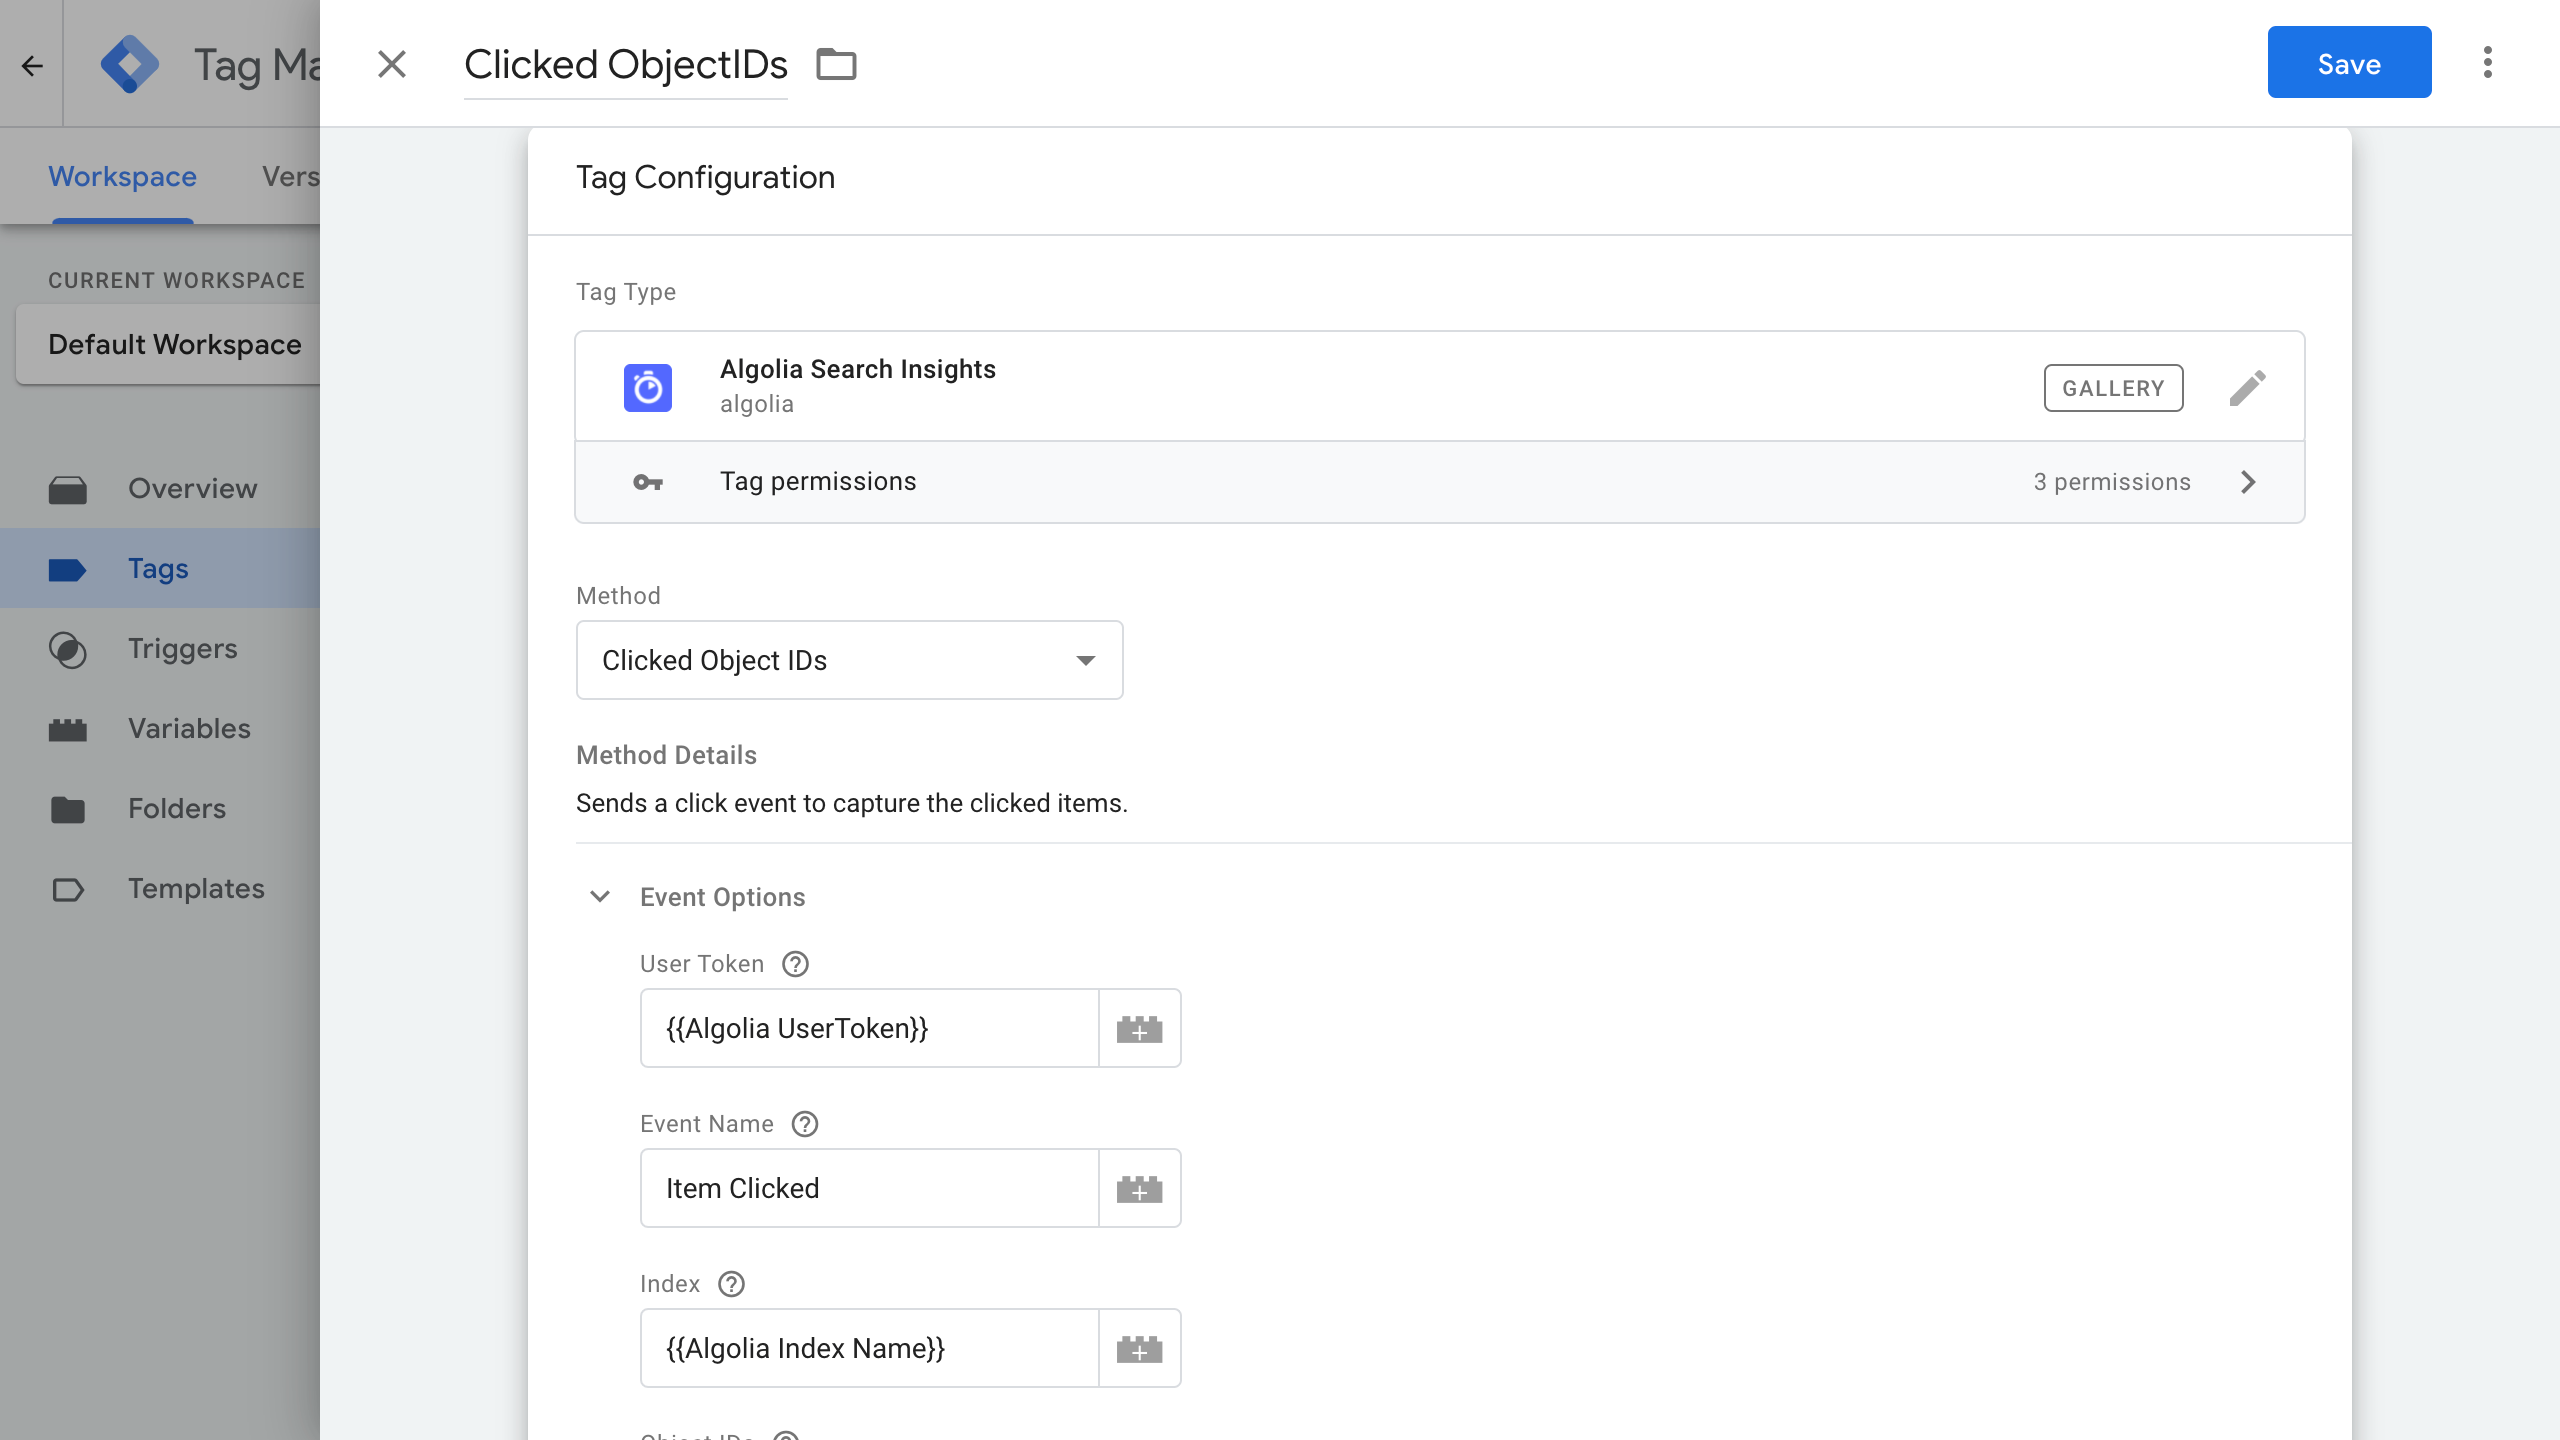
In the GTM interface, a new tag called Clicked ObjectIDs is available.
Setup your view tags
Viewed Object IDs
This method refers to Viewed Object IDs from the Insights API which sends a view event to capture clicked items. To setup this click tag, you need to create a new tag in the Tags section of your workspace and select Algolia Search Insights with the appropriate Event and Triggering Options below:
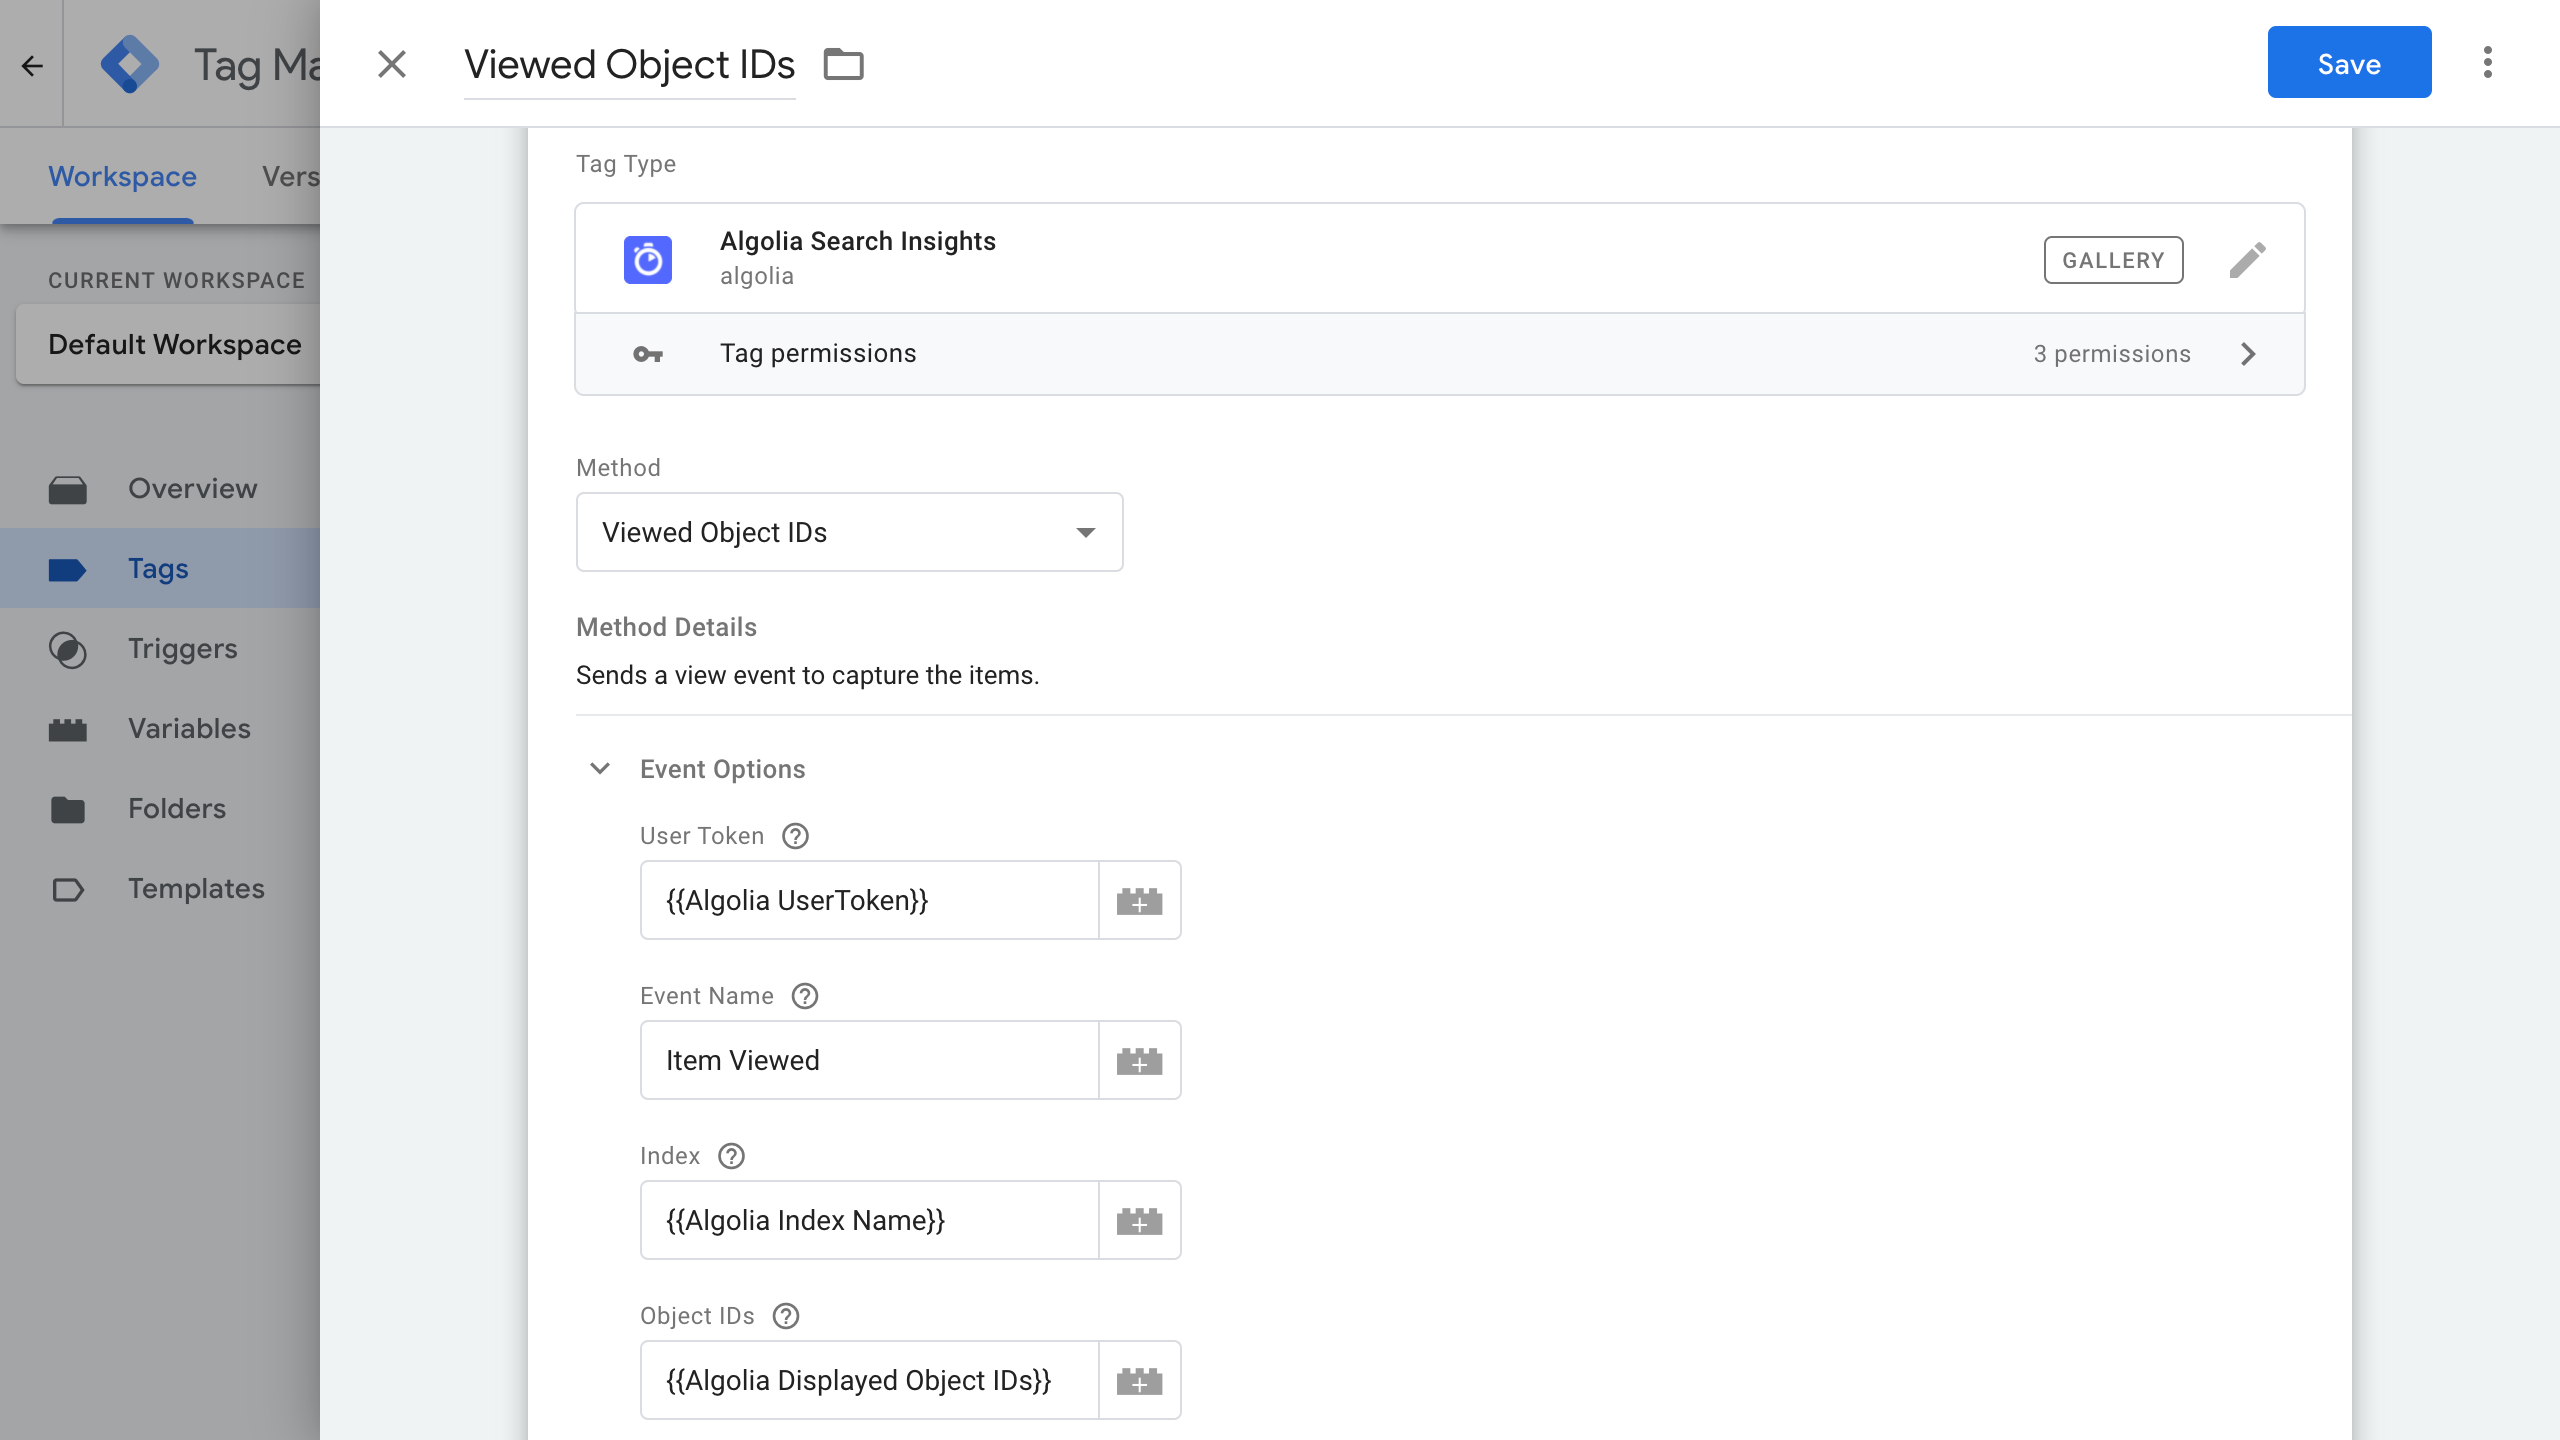
In the GTM interface, a new tag called Viewed ObjectIDs is available.
Setup your conversion tags
Converted Object IDs After Search
This method refers to Converted Object IDs After Search from the Insights API which sends a conversion event to capture a query and its clicked items. To setup this tag, you need to create a new tag in the Tags section of your workspace and select Algolia Search Insights with the appropriate Event and Triggering Options below:
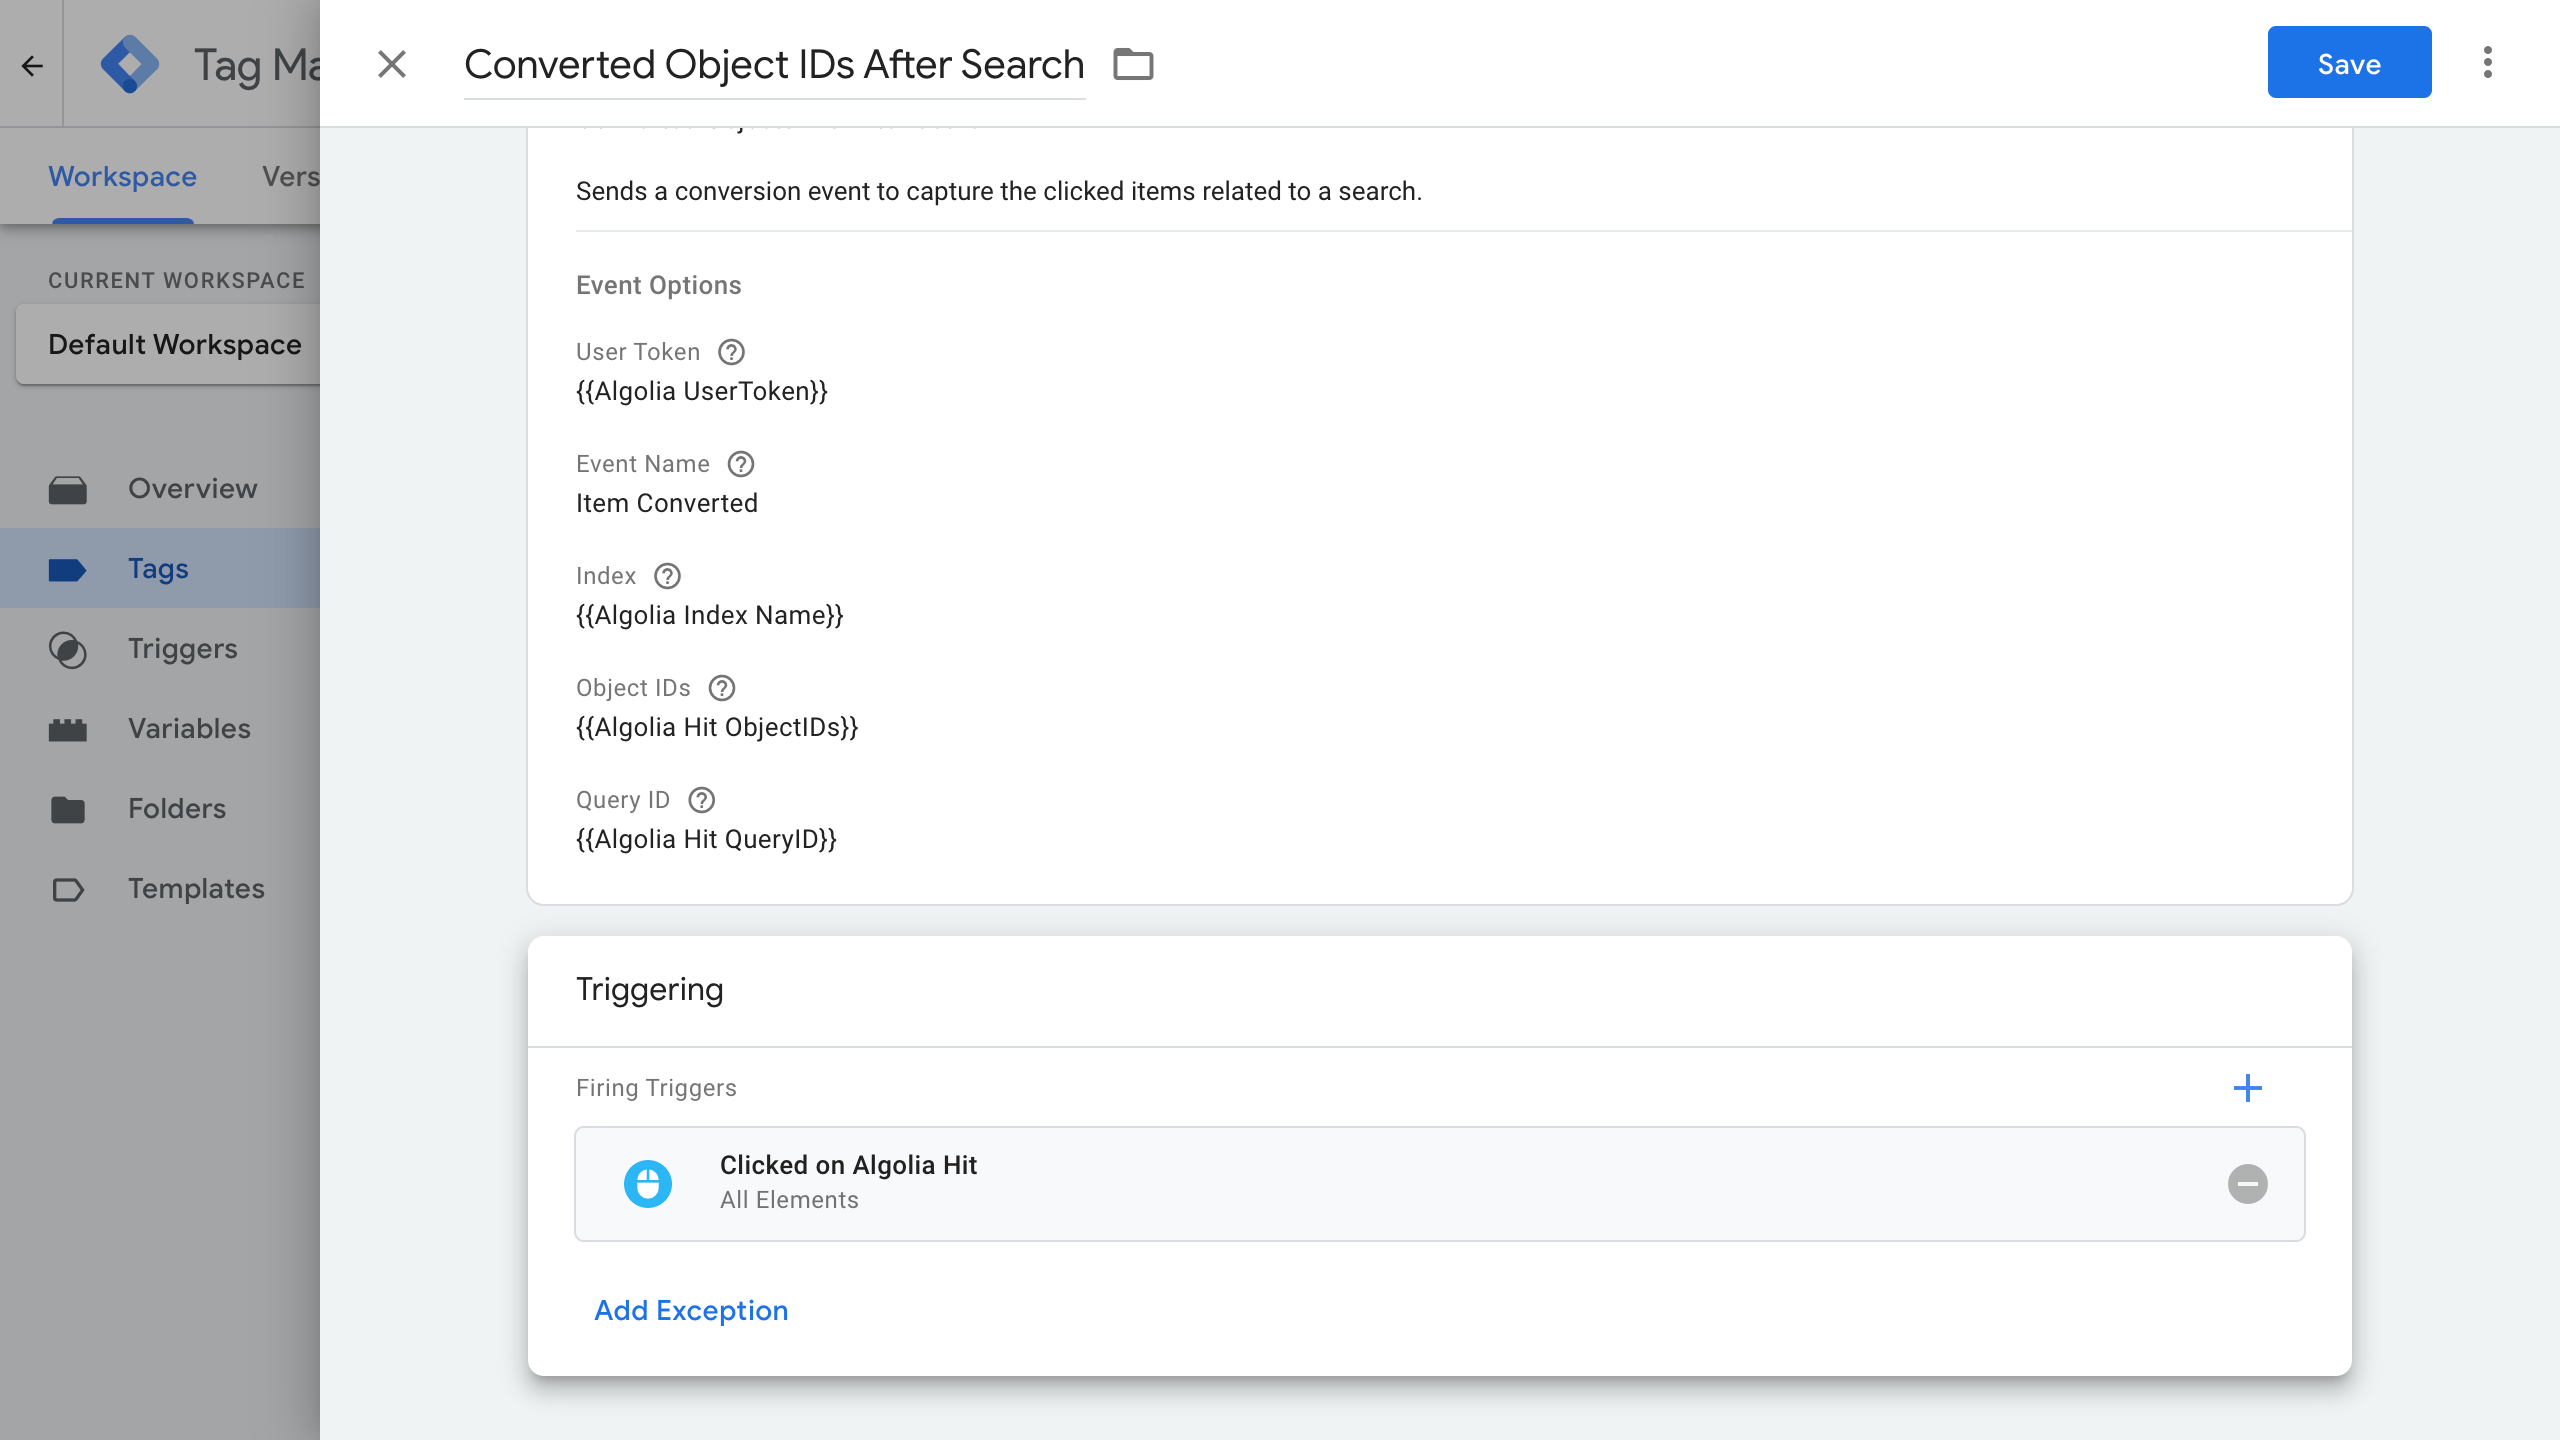
In the GTM interface, a new tag called Converted ObjectIDs After Search is available.
Converted Object IDs
This method refers to Converted Object IDs from the Insights API which sends a conversion event to capture a query and its clicked items. To setup this click tag, you need to create a new tag in the Tags section of your workspace and select Algolia Search Insights with the appropriate Event and Triggering Options below:
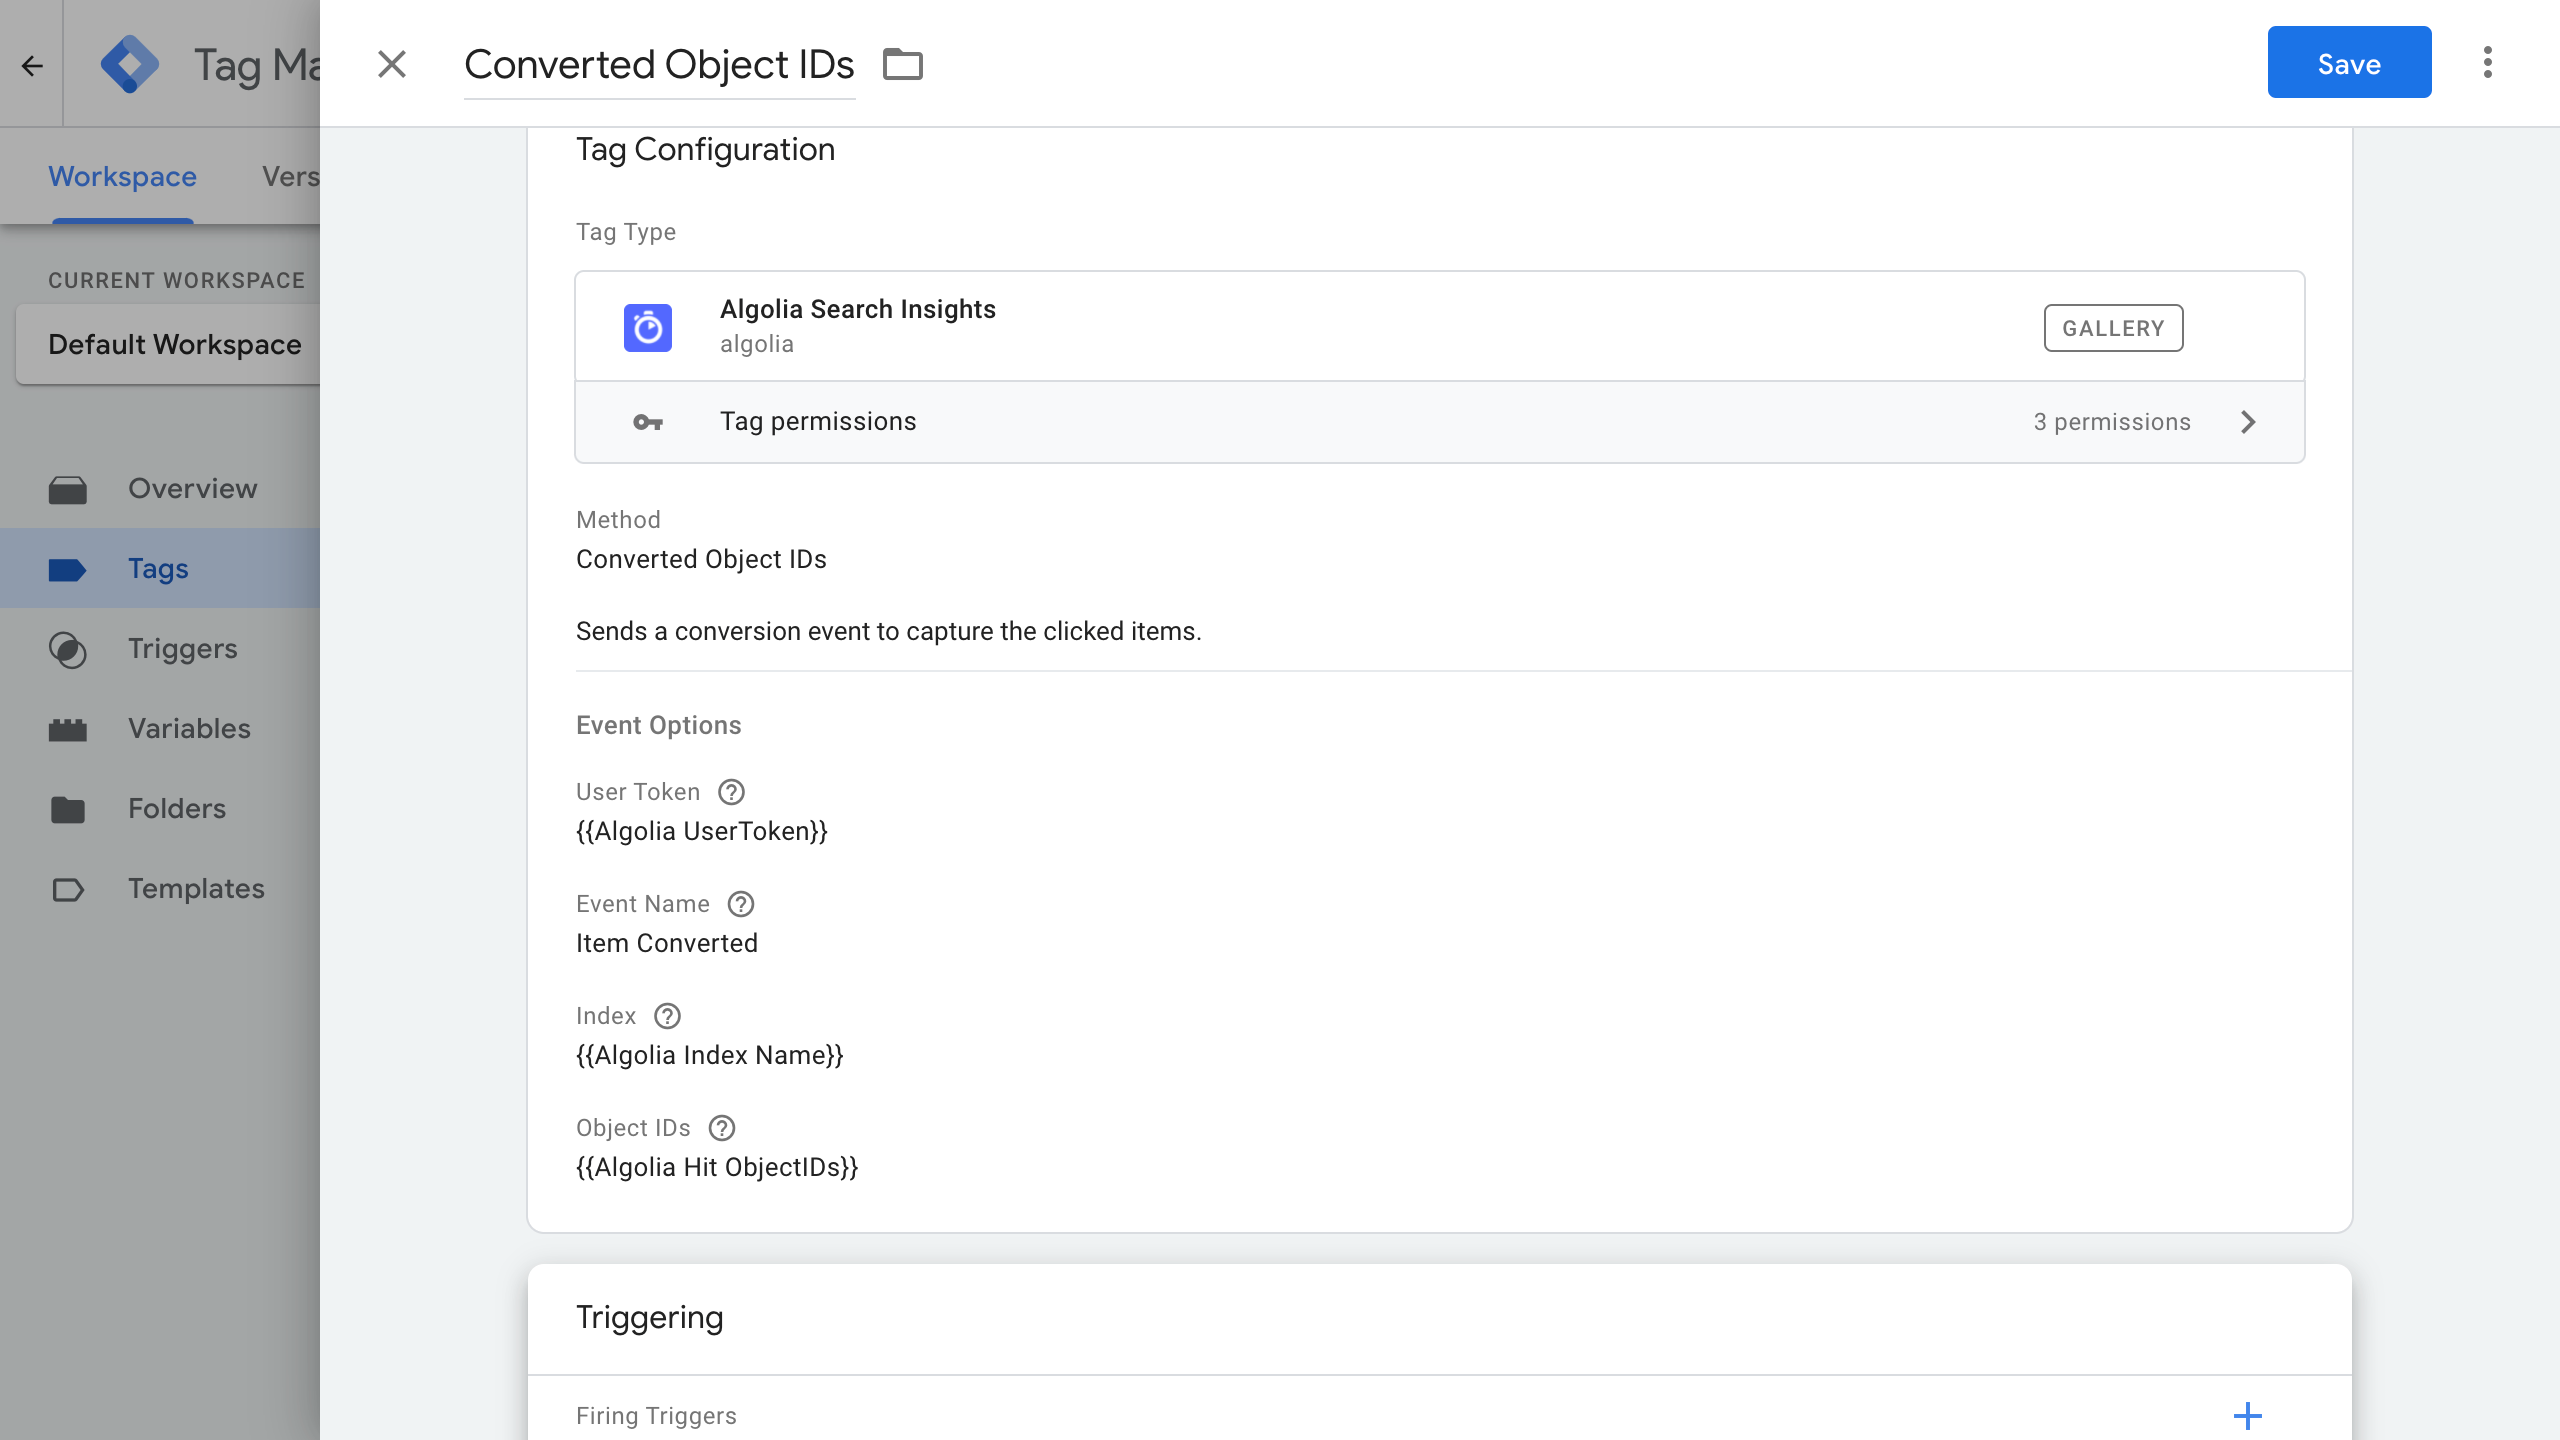
In the GTM interface, a new tag called Converted ObjectIDs After Search is available.
Submit your changes and debug your events
Once you have set up the different variables, tags, and triggers, you can submit your changes. To ensure you are sending events to the Insights API, you can use the Tag Assistant from Google (which is in beta), or rely on Algolia tools to make sure your events are correctly sent to the Insights API, such as the Insights Validator for Google Chrome or within the Algolia dashboard via the Insights API Logs in the Monitoring section.